1
2
submitted 3 months ago* (last edited 3 months ago) by promitheas@programming.dev to c/arduino@lemmy.ml

Hello guys! While I am a relatively experienced programmer, I have practically zero experience on the hardware/electronics side of things. I really want and need (I'd like to work in embedded systems) to get this stuff in my "tool belt" of skills, but I am really worried that I will do something wrong or order the wrong parts because it is quite an old project I will be trying to build.

I would like to make this project (EDTracker github) so that i can play all my sim games that benefit from head tracking again. I had one which was pre-built but the connector broke. I would prefer a version with the magnetometer (9150 or 9250). The problem is that due to my inexperience I have no idea where to search for cheap(ish) components, or even if the components listed in the docs are still available or if there are better ones that do the same thing.

I realise this is not much (almost nothing) to go on, but I would really appreciate any help at all that can push me in the right direction. Also, please be understanding of my possibly ignorant questions. When you have no knowledge in a field it is often hard to know what the right questions are :)

Many thanks in advance!

Edit: Spelling

2
5
submitted 5 months ago by Smorty@lemmy.blahaj.zone to c/arduino@lemmy.ml

I have recently started working on my school project which involves writing some c++ for the ESP32. At school everything works fine, but at home only the first time I compile and upload the project (using the Arduino IDE), does it actually work correctly. So the communication is there, it just seems that the first compilation step does something to the program, as every time after that first compilation it refuses to compile. Here are the console outputs of the two compilations:

First compilation (successful)[___](WARNUNG: Kategorie '' in der Bibliothek ESP Insights ist ungültig und wird auf 'Uncategorized' festgelegt WARNUNG: Kategorie '' in der Bibliothek ESP RainMaker ist ungültig und wird auf 'Uncategorized' festgelegt WARNUNG: Kategorie '' in der Bibliothek WiFiProv ist ungültig und wird auf 'Uncategorized' festgelegt Der Sketch verwendet 295301 Bytes (22%) des Programmspeicherplatzes. Das Maximum sind 1310720 Bytes. Globale Variablen verwenden 26792 Bytes (8%) des dynamischen Speichers, 300888 Bytes für lokale Variablen verbleiben. Das Maximum sind 327680 Bytes. esptool.py v4.5.1 Serial port /dev/ttyUSB0 Connecting...... Chip is ESP32-D0WDQ6 (revision v1.0) Features: WiFi, BT, Dual Core, 240MHz, VRef calibration in efuse, Coding Scheme None Crystal is 40MHz MAC: 24:0a:c4:58:2a:9c Uploading stub... Running stub... Stub running... Changing baud rate to 921600 Changed. Configuring flash size... Flash will be erased from 0x00001000 to 0x00005fff... Flash will be erased from 0x00008000 to 0x00008fff... Flash will be erased from 0x0000e000 to 0x0000ffff... Flash will be erased from 0x00010000 to 0x00058fff... Compressed 18992 bytes to 13112... Writing at 0x00001000... (100 %) Wrote 18992 bytes (13112 compressed) at 0x00001000 in 0.5 seconds (effective 291.1 kbit/s)... Hash of data verified. Compressed 3072 bytes to 146... Writing at 0x00008000... (100 %) Wrote 3072 bytes (146 compressed) at 0x00008000 in 0.1 seconds (effective 336.8 kbit/s)... Hash of data verified. Compressed 8192 bytes to 47... Writing at 0x0000e000... (100 %) Wrote 8192 bytes (47 compressed) at 0x0000e000 in 0.1 seconds (effective 629.9 kbit/s)... Hash of data verified. Compressed 295664 bytes to 165899... Writing at 0x00010000... (9 %) Writing at 0x0001af40... (18 %) Writing at 0x000242c6... (27 %) Writing at 0x00029aae... (36 %) Writing at 0x0002ef0a... (45 %) Writing at 0x000342da... (54 %) Writing at 0x0003a4b6... (63 %) Writing at 0x000447e9... (72 %) Writing at 0x0004c7f4... (81 %) Writing at 0x00051d5d... (90 %) Writing at 0x000576bd... (100 %) Wrote 295664 bytes (165899 compressed) at 0x00010000 in 2.8 seconds (effective 856.4 kbit/s)... Hash of data verified.

Leaving... Hard resetting via RTS pin...)

Second time (fail)WARNUNG: Kategorie '' in der Bibliothek ESP Insights ist ungültig und wird auf 'Uncategorized' festgelegt WARNUNG: Kategorie '' in der Bibliothek ESP RainMaker ist ungültig und wird auf 'Uncategorized' festgelegt WARNUNG: Kategorie '' in der Bibliothek WiFiProv ist ungültig und wird auf 'Uncategorized' festgelegt panic: runtime error: index out of range [7] with length 7

goroutine 1 [running]: arduino.cc/builder.(*includeCache).Next(...) arduino.cc/builder/container_find_includes.go:209 arduino.cc/builder.findIncludesUntilDone(0xc000046c00, 0xc0000b0000, {{0x538340, 0xc0006994a0}, {0xc00019604e, 0x7}}) arduino.cc/builder/container_find_includes.go:321 +0x1190 arduino.cc/builder.(*ContainerFindIncludes).Run(0xc00002e1c0?, 0xc000046c00) arduino.cc/builder/container_find_includes.go:149 +0xbe5 arduino.cc/builder.runCommands(0x38?, {0xc000053c58?, 0x22, 0x415b0b?}, 0x55?) arduino.cc/builder/builder.go:191 +0xda arduino.cc/builder.(*Builder).Run(0x7ffca1319b57?, 0x19?) arduino.cc/builder/builder.go:124 +0x890 arduino.cc/builder.RunBuilder(...) arduino.cc/builder/builder.go:222 main.main() arduino.cc/arduino-builder/main.go:338 +0xa1f arduino-builder gab 2 zurück Fehler beim Kompilieren für das Board ESP32 Dev Module.

As you can tell, these error messages are not English, they are actually German. In the second compile step, they essentially say the following:

arduino-builder returned 2
Error during compilation of the Board ESP32 Dev Module

I am using Debian 12 (GNU/Linux) on my machine, but I don't think that this would be the issue, as I am clearly able to upload the project the first time around.

Has someone here experienced something like this before? I have looked online, and most sources say that the error code was one and not two, so this seems like a different issue.

3
5
submitted 5 months ago by slyuser@lemmy.ml to c/arduino@lemmy.ml

Hey Made a script to aimbot in aimlab just to challenge myself with learning opencv and color detection. Feel free to use code for your own similar projects!

4
6
submitted 5 months ago by tomjuggler@lemmy.world to c/arduino@lemmy.ml
5
0

cross-posted from: https://lemmy.world/post/10852531

Working on a joystick. Seems like any protocol I use to read from peripherals is going to be bottlenecked by having just one input. My microcontroller might have multiple ADCs, but there's just one processor stepping through them. Same for spi, or i2c, or uart. There's really only ever one sensor reporting back its data at a time.

I know this might not matter for measurement resolution. Especially if you're polling at like 115k serial or something, but...

That's 8 bits per axis, and three axis. Now that's at least 34 bits. To sample each axis we're down to only 4.5k samples per second. Plus whatever other cycles the controller has to handle... even if I spent half that time doing microcontrolle cycles at like 2k we're probably still well with the best star craft apms or whatever. I'd still like to find some way to really over engineer this thing.

I read a little about tdm, but that's out of my league and I don't know if you could even have 3 simultaneously signals that way

I'm thinking a microcontroller for each axis, and a usb port for each of them. So it appears like 3 different controllers to the computer. The user would just have to map the axis from the 3 controllers into 1 in their game software. I assume the steam remapping could do this.

Is it just going to get smashed back into one thread in the computer's usb hub anyway?

Any other suggestions?

6
1
submitted 7 months ago by pcgaldo@lemmy.ml to c/arduino@lemmy.ml

Crossposted from: https://lemmy.ml/post/9698836

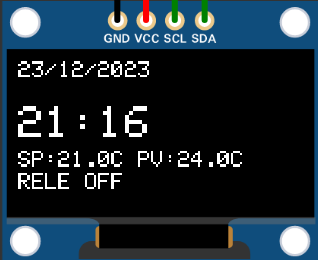
This setup allows Arduino to read temperature, control relay based on setpoints, display info on OLED screen, and manage date/time settings with user input through buttons. Adjust based on specific hardware/project requirements.

Designed to replace the faulty electronic control of a blue heat radiator.

Code and simulation at Wokwi

Licensed under GNU GPLv3.

7
3
submitted 11 months ago by deczzz@lemmy.dbzer0.com to c/arduino@lemmy.ml

I have previously used Arduino Leonardo as it supports the keyboard.h library that enables HID keyboard presses. The latest update of the library is from May 5, 2022. Anyone knows if the Uno rev 4 supports the keyboard library?

8
4
submitted 11 months ago by SpaghettiYeti@lemmy.world to c/arduino@lemmy.ml

Hey all,

I've been sitting on a starter kit for a Mega 2560 R3 board and sensors for over a year. I want to get into it, so bad, but I frankly don't have the time to learn to code this with my job the way it is.

Is there a WYSIWYG program anyone favors, especially for someone new to Linux (I'm using a Raspberry Pi 3 Model B running Raspbian and I have a Raspberry Pi 4 Model B too) and Arduino (board model Mega 2560 R3)?

I found these options. Anyone have experience with them?

Visuino

Embrio

9
4
submitted 11 months ago by dudenas@lemmy.ml to c/arduino@lemmy.ml

Hi all, intuitively it seems to make sense to split different parts of code to different files, so it is easier to navigate and read.

For example to have separate files for servos, controllers and web which are included in the main code, and only variables are passed through.

And if this is a good practice, how do you deal with separation of setup and loop parts? I have not found reaources on this, so thinking to ask the community.

10
0
submitted 1 year ago* (last edited 1 year ago) by roho@lemmy.ml to c/arduino@lemmy.ml

(me again) i’m trying to use both WIFI-AP, DO and SPI. But my wifi is not properly working when i let everything run at maximum (required) speed.

TLDR; Seems that pins D1 and D2 interfere with WIFI, but why?

i have a NodeMCU ESP8266 V3 ‘wemos’ variant. (it doesn’t have the ESP-12E board integrated) https://makerselectronics.com/product/wemos-nodemcu-v3-esp8266-340g-wifi-module-with-extra-memory-32m-flash

in setup() i have

  WiFi.softAP(ssid, password);

  IPAddress myIP = WiFi.softAPIP();
  Serial.print("AP IP address: ");
  Serial.println(myIP);

  server.on("/", handleRoot);
  server.on("/set_config", handleForm);
  server.onNotFound(handleNotFound);
  server.begin();
  ..
  t=D1;pinMode(t, OUTPUT); digitalWrite(t, LOW);
  t=D2;pinMode(t, OUTPUT); digitalWrite(t, LOW);
  t=D3;pinMode(t, OUTPUT); digitalWrite(t, LOW);

What i'm seeing;

if i have a main loop() with only

  • while (Serial.available()){ .. }
  • server.handleClient();

Then i can see the AccessPoint and i can connect to it with my Android phone.

When i add code running once every 100 msec

  • Debug setting set to MAX debug info to Serial
  • using pins D1,D2,D3 for output (to LED screen)
  • using D5,D7 for SPI, (to LED screen)
  • having SPISettings(15000000, MSBFIRST, SPI_MODE0)
  • taking total 60 up to 74 microseconds

Then i do see the WIFI AP, and i CAN connect with the WIFI AccessPoint. (But my LED display is flickering)

When i change the code to running once every 10 msec

  • // same as before

Then i CAN connect with the WIFI AccessPoint (But my LED display is flickering)

When i change the code to running once every 10 msec

  • Debug setting off
  • using pins D1,D2,D3 for output
  • using D5,D7 for SPI
  • taking total 60 up to 74 microseconds

Then i CAN connect with the WIFI AccessPoint (But my LED display is flickering)

When i change the code to running once every 1 msec

  • Debug setting None + Debug to serial
  • using pins D1,D2,D3 for output
  • using D5,D7 for SPI
  • taking total 60 up to 74 microseconds

Then i do see the WIFI AP, but i CAN'T connect with the WIFI AccessPoint (But my LED display is showing a steady picture)

When i change the code to running once every 1 msec

  • Debug setting None + Debug disabled
  • using pins D1,D2,D3 for output
  • NOT using D5,D7 for SPI
  • taking total 30 up to 40 microseconds

Then i do NOT see the WIFI AP?!

When i change the code to running once every 1 msec

  • Debug setting None + Debug disabled
  • NOT using pins D1,D2,D3 for output
  • using D5,D7 for SPI
  • taking total 50 up to 70 microseconds

Then i CAN connect with the WIFI AccessPoint?!

Seems one of the pins D1,D2,D3 is interfering with WIFI..

instead of using D1,D2,D3, i changed all I/O to only use D1. Then the WIFI AP does not show up in the WIFI networks.

instead of using D1,D2,D3, i changed all I/O to only use D2. Then the WIFI AP does not show up in the WIFI networks.

instead of using D1,D2,D3, i changed all I/O to only use D3. Then the WIFI AP does show up in the WIFI networks. And i can connect to it.

So my question is; Seems that pins D1 and D2 interfere with WIFI, but why?

11
21
submitted 1 year ago by LazaroFilm@lemmy.world to c/arduino@lemmy.ml

cross-posted from: https://lemmy.world/post/2463460

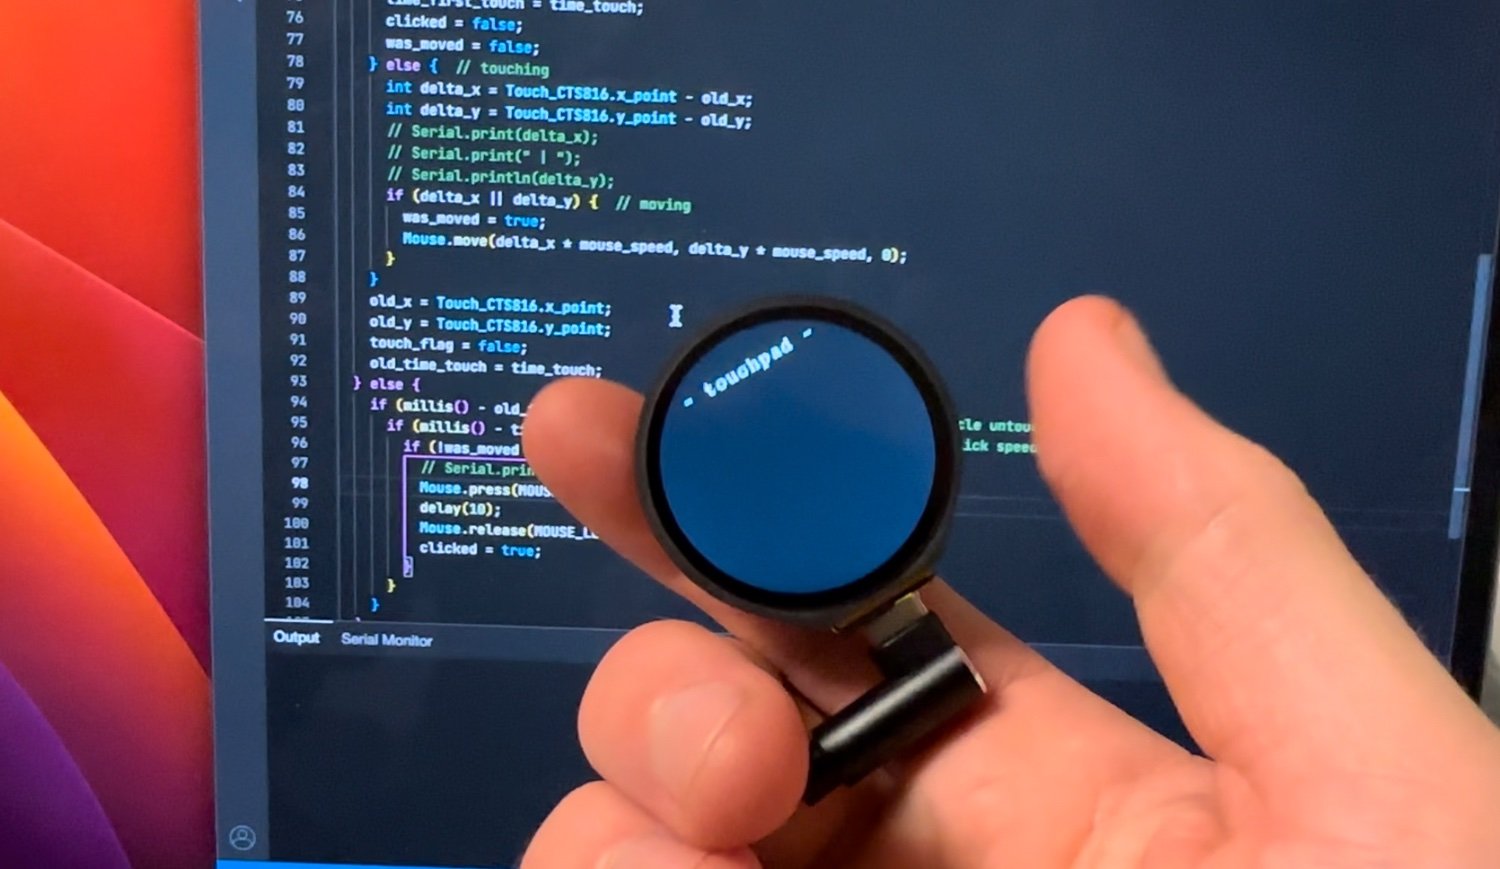
I took a WaveShare RP2040-Touch-LCD-1.28and made a program to use it as a touchscreen. This is still very much in the beta phase but the proof of concept works. Here’s my GitHub repo for it.

I’m planning on integrating it into my next split near the thumb cluster.

12
36
submitted 1 year ago by irkli@lemmy.world to c/arduino@lemmy.ml

This is a big deal. Arduino has accepted 32 million in VC money and the new "Pro" boards are not open source,so they won't be as easily cloned, and code and libraries in the ide could be unavailable to see or modify!

And I won't be using any of these boards.

13
3
Need help with IMU QMI8658 (stackoverflow.com)
submitted 1 year ago by LazaroFilm@lemmy.world to c/arduino@lemmy.ml

I know this is MicroPython, but I was having the same issue through Arduino. The IMU on the WaveShare 1.28 module has a fusion engine but I can’t seem to access it via I2C. More detail in the SO post linked.

14
3
submitted 1 year ago by RandomUser@lemmy.world to c/arduino@lemmy.ml

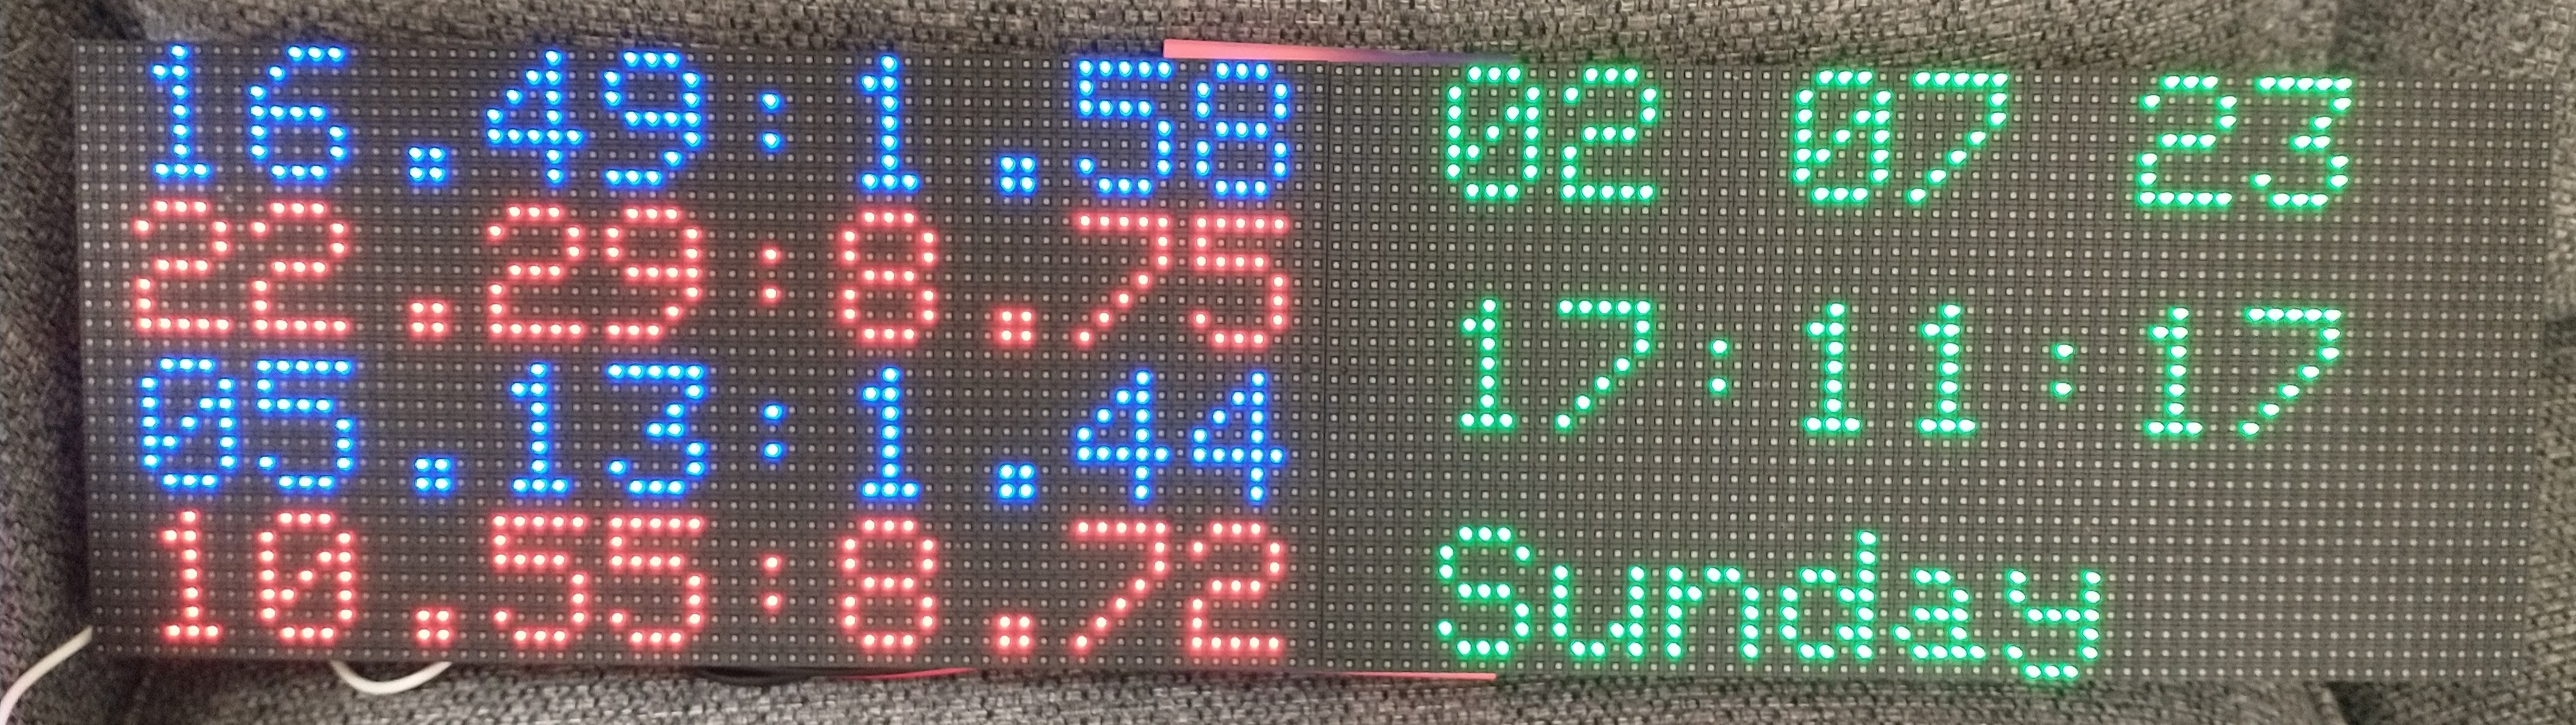
Project was to display tide information (time and height) on an LED panel. Fingers crossed the image loads!

OK, it's not an Arduino as such, it's an ESP32, but I programmed it on the arduino IDE. I get the time from an NTP time server and tide data from an API. A bit of messing around with daylight savings times and I display the next four tides on the Hub75 LED matrix. Date and clock is shown on the other side. Every 24 hours I pull new data down and sync the clock.

The good: It works as planned.

The bad: API keys and wifi creds are all hard coded so will need a firmware update if either change. Don't think I have sufficient pins left to allow me to read from an SD card.

The ugly: The wiring behind it is not beautiful. The code could do with a review and tidy. - Maybe even a bit of error handling wouldn't go amiss. Red and Blue are a bit jarring so close together and the blue is a bit swamped , especially when the brightness is turned down.

I may make an enclosure to keep it all together and keep the dust off and add a pir sensor to turn the display off when there's no movement. Or I may get bored and dismantle it!

15
3
submitted 1 year ago by Mygoldwatch@lemdit.com to c/arduino@lemmy.ml

I made a thing. A while ago I set up a raspberry pi to log data from a couple Arduino based sensor sensors I made.

Now I made a control panel type thing, which can show data values via the 4x7 digit display, show what is it displaying via the 6 leds, can send information using the r reader which is enabled/changed via a key switch.

Powered by an Arduino nano (made by grove) and communicates with the server through usb serial.

I am quite happy with it (eventually I'll bother to replace the tape with glue)

16
1
submitted 1 year ago by Cybermass@lemmy.world to c/arduino@lemmy.ml

Modules, chips, and everything in between! What are your favorite sensors?

17
2
submitted 1 year ago* (last edited 1 year ago) by irkli@lemmy.world to c/arduino@lemmy.ml

I do a lot of "Arduino" embedded projects that require a small display for operation. I use small LCDs (16 x 2 to 20 x 4) for this, character or graphical, as they're rugged, easy to drive, and above all, SMALL. Under 1.5" x 4".

They're all inherently 5V devices, and most of the useful MCUs are now 3.3V. I've been using I2C serial backpacks from Adafruit as they work at 3.3V and up-convert 5V for the LCD. Very nice. (Except DUE; it has known bugs in it's Wire.h library -- yes, in 2023! -- that cause it to lock up -- not it's not you. On Due, the Adafruit I2C backpack supports an ersatz bit-banged "SPI" (can't use hardware SPI) that solves the problem, but the whole thing seems precarious.)

I'd like to eliminate the backpack for many reasons and just run parallel, 3.3V logic. The Hitachi chip will work, but the LCD itself can't generate the voltage necessary to make contrast work.

I found this discussion on making a negative voltage source for the LCD, applying it on the VO etc pin, and this is easy enough, I'd just add a MAX660 to my board and get software-adjustable contrast out of the deal.

Has anyone done this?

Any suggestions on practical, SMALL, low-overhead character/graphic displays? Adafruit has some small eInk displays, but the how-to page says not to update them more than every two seconds! WTF good is that?!

18
2

I did this with a small Arduino uno kit

19
2
submitted 1 year ago by irkli@lemmy.world to c/arduino@lemmy.ml

I drive a very old car (1960 Rambler American) as my daily driver/long distance trip car, it needs to be reliable. I had an aftermarket EFI system on it which proved to be junk... the whole story is at Rambler Lore

The short story here is that I resurrected a hated transitional technology, the feedback carburetor, and applied modern code to it. Umm microcontrollers have improved somewhat in the last 40 years...

The feedback carburetors are the terminal end of a technology that lasted almost a century, analog computers that get fuel mixture within a couple percent. The feedback carbs are about as good as they can be. There's a lot of passive emissions controls, limiting fuel evaporation, mostly, and fuel metering is surprisingly good -- at one altitude, and fuel mixture varies with temperature.

But a closed loop sensor-base feedback and control system makes them kinda sorta OK even compared to the kind of EFI systems one can install on an ancient engine.

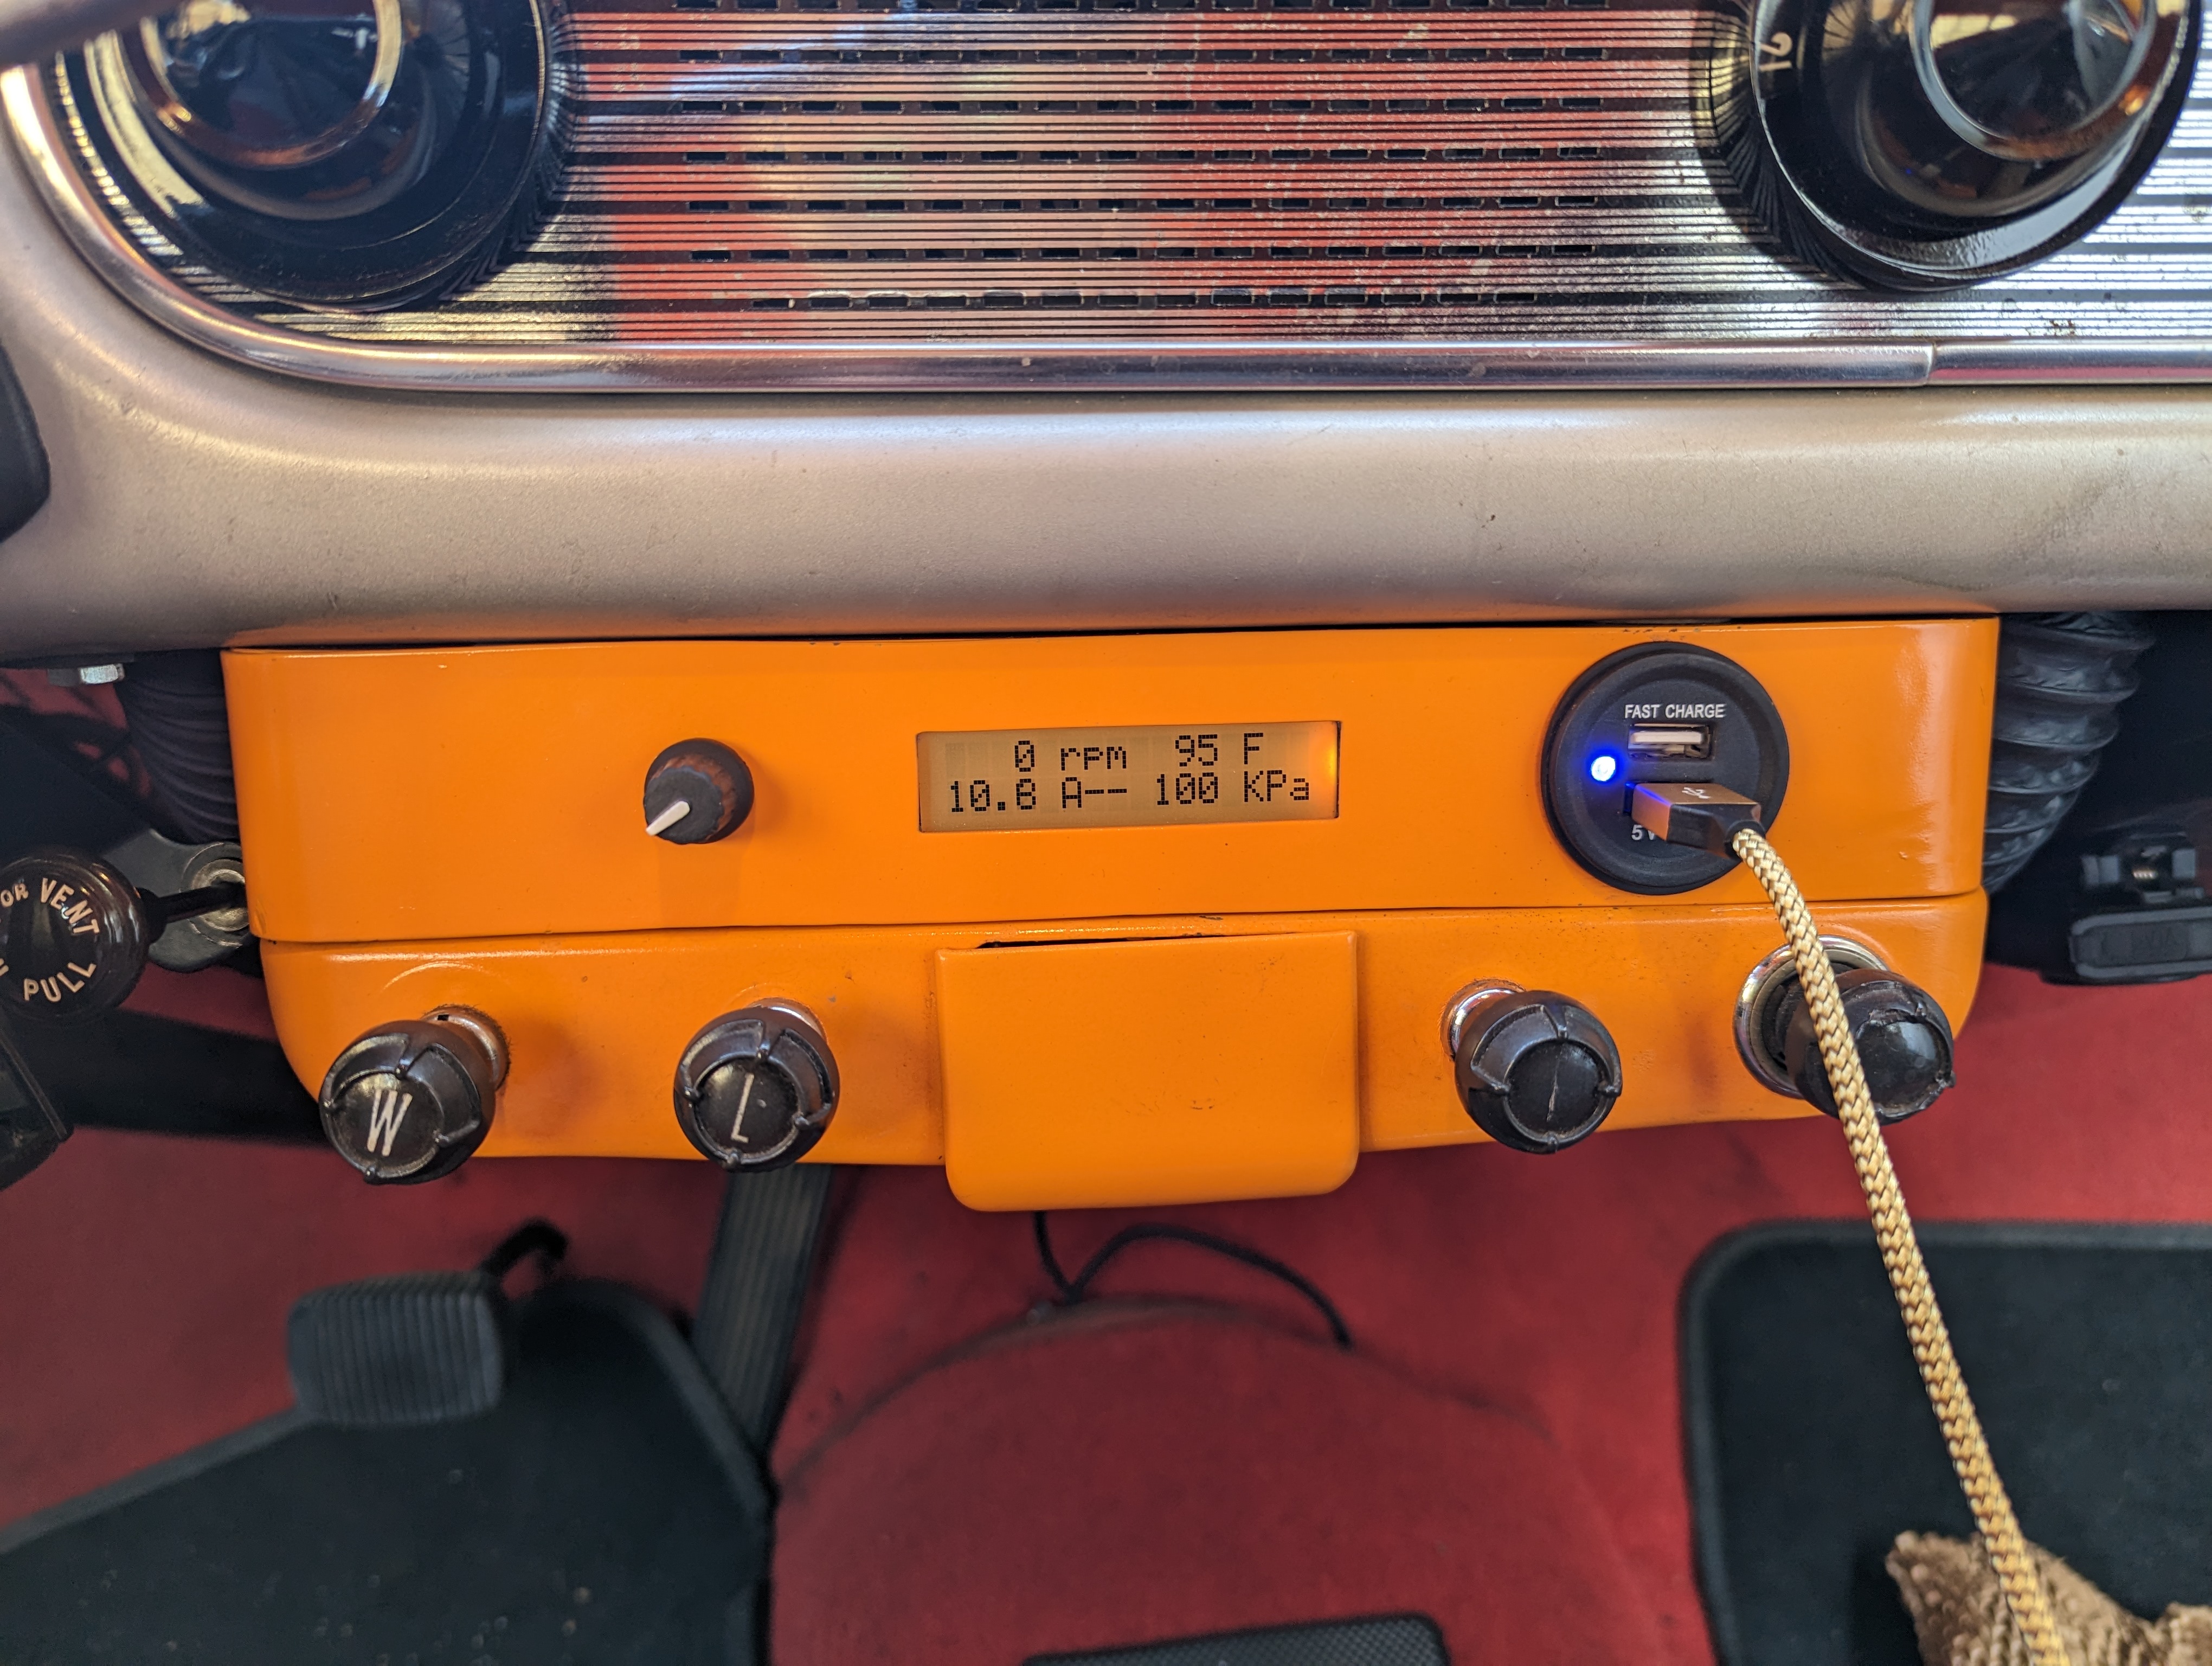
The photos here are of the revised version; the first one is installed and running now. It got me just about 10% better mileage (averaged on a recent 2000 mile trip).

Here's the current one installed, a 16 x 2 LCD and a rotary encoder. Though it's 100% hands-off automatic you can poke around in it, see sensor data, and tune the fuel table. (The one inside the box here is Mega 2560 powered with my custom controller on top of it.)

The rest of the photos are of the new version, "done", on the bench waiting for me to install it. This one us Arduino Due powered, my custom board has improved electronics to support Due's 12-bit ADCs.

The Carter YFA feedback carb has a single control mechanism: a pulse-width-modulated solenoid that adds air (leans out the mixture: enleanment) to the main fuel circuit. It's pulsed at a fixed 10 Hz rate.

The sensors used are tailpipe wideband oxygen, manifold pressure, engine RPM, engine temperature. (The box also watches engine oil temp, transmission temp, etc.)

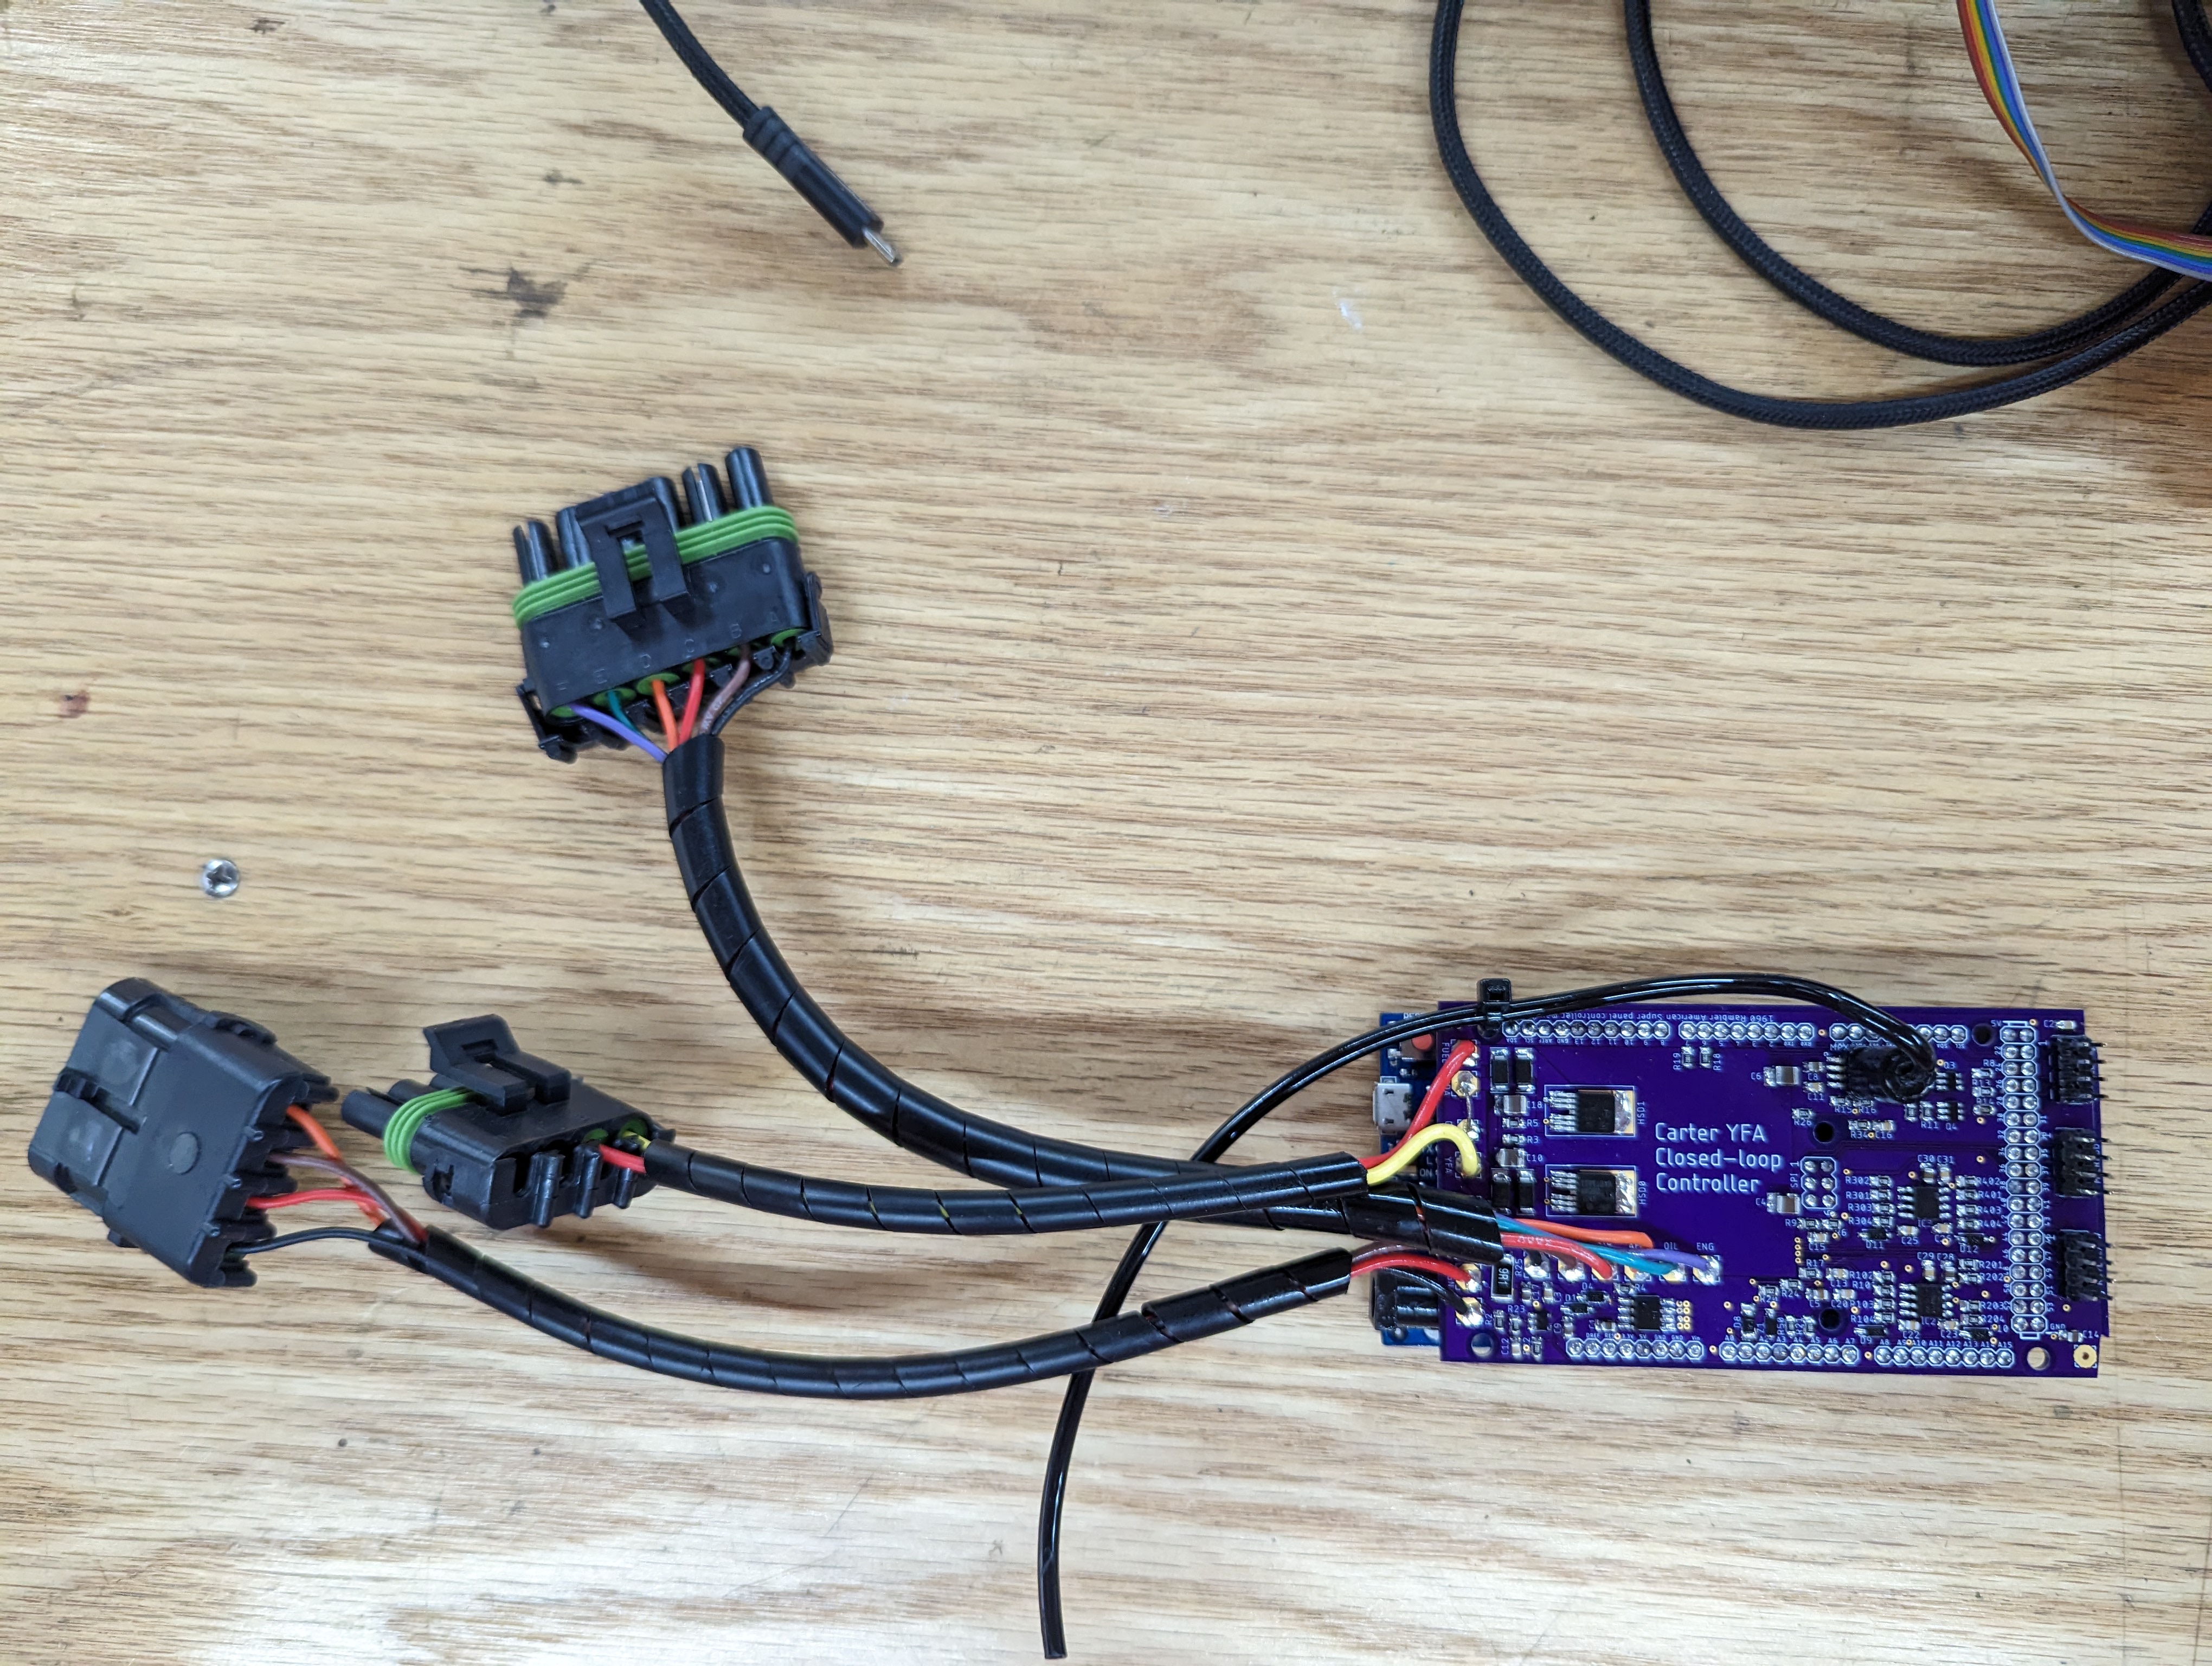
The photo below is the new system ready to go. I built a new metal chassis because this version uses a microSD for storage (the previous Mega 2560 version used EEPROM).

My board is a "shield" that sits on top of the Due. On the right are 8-pin connectors for LCD, microSD, and rotary encoder.

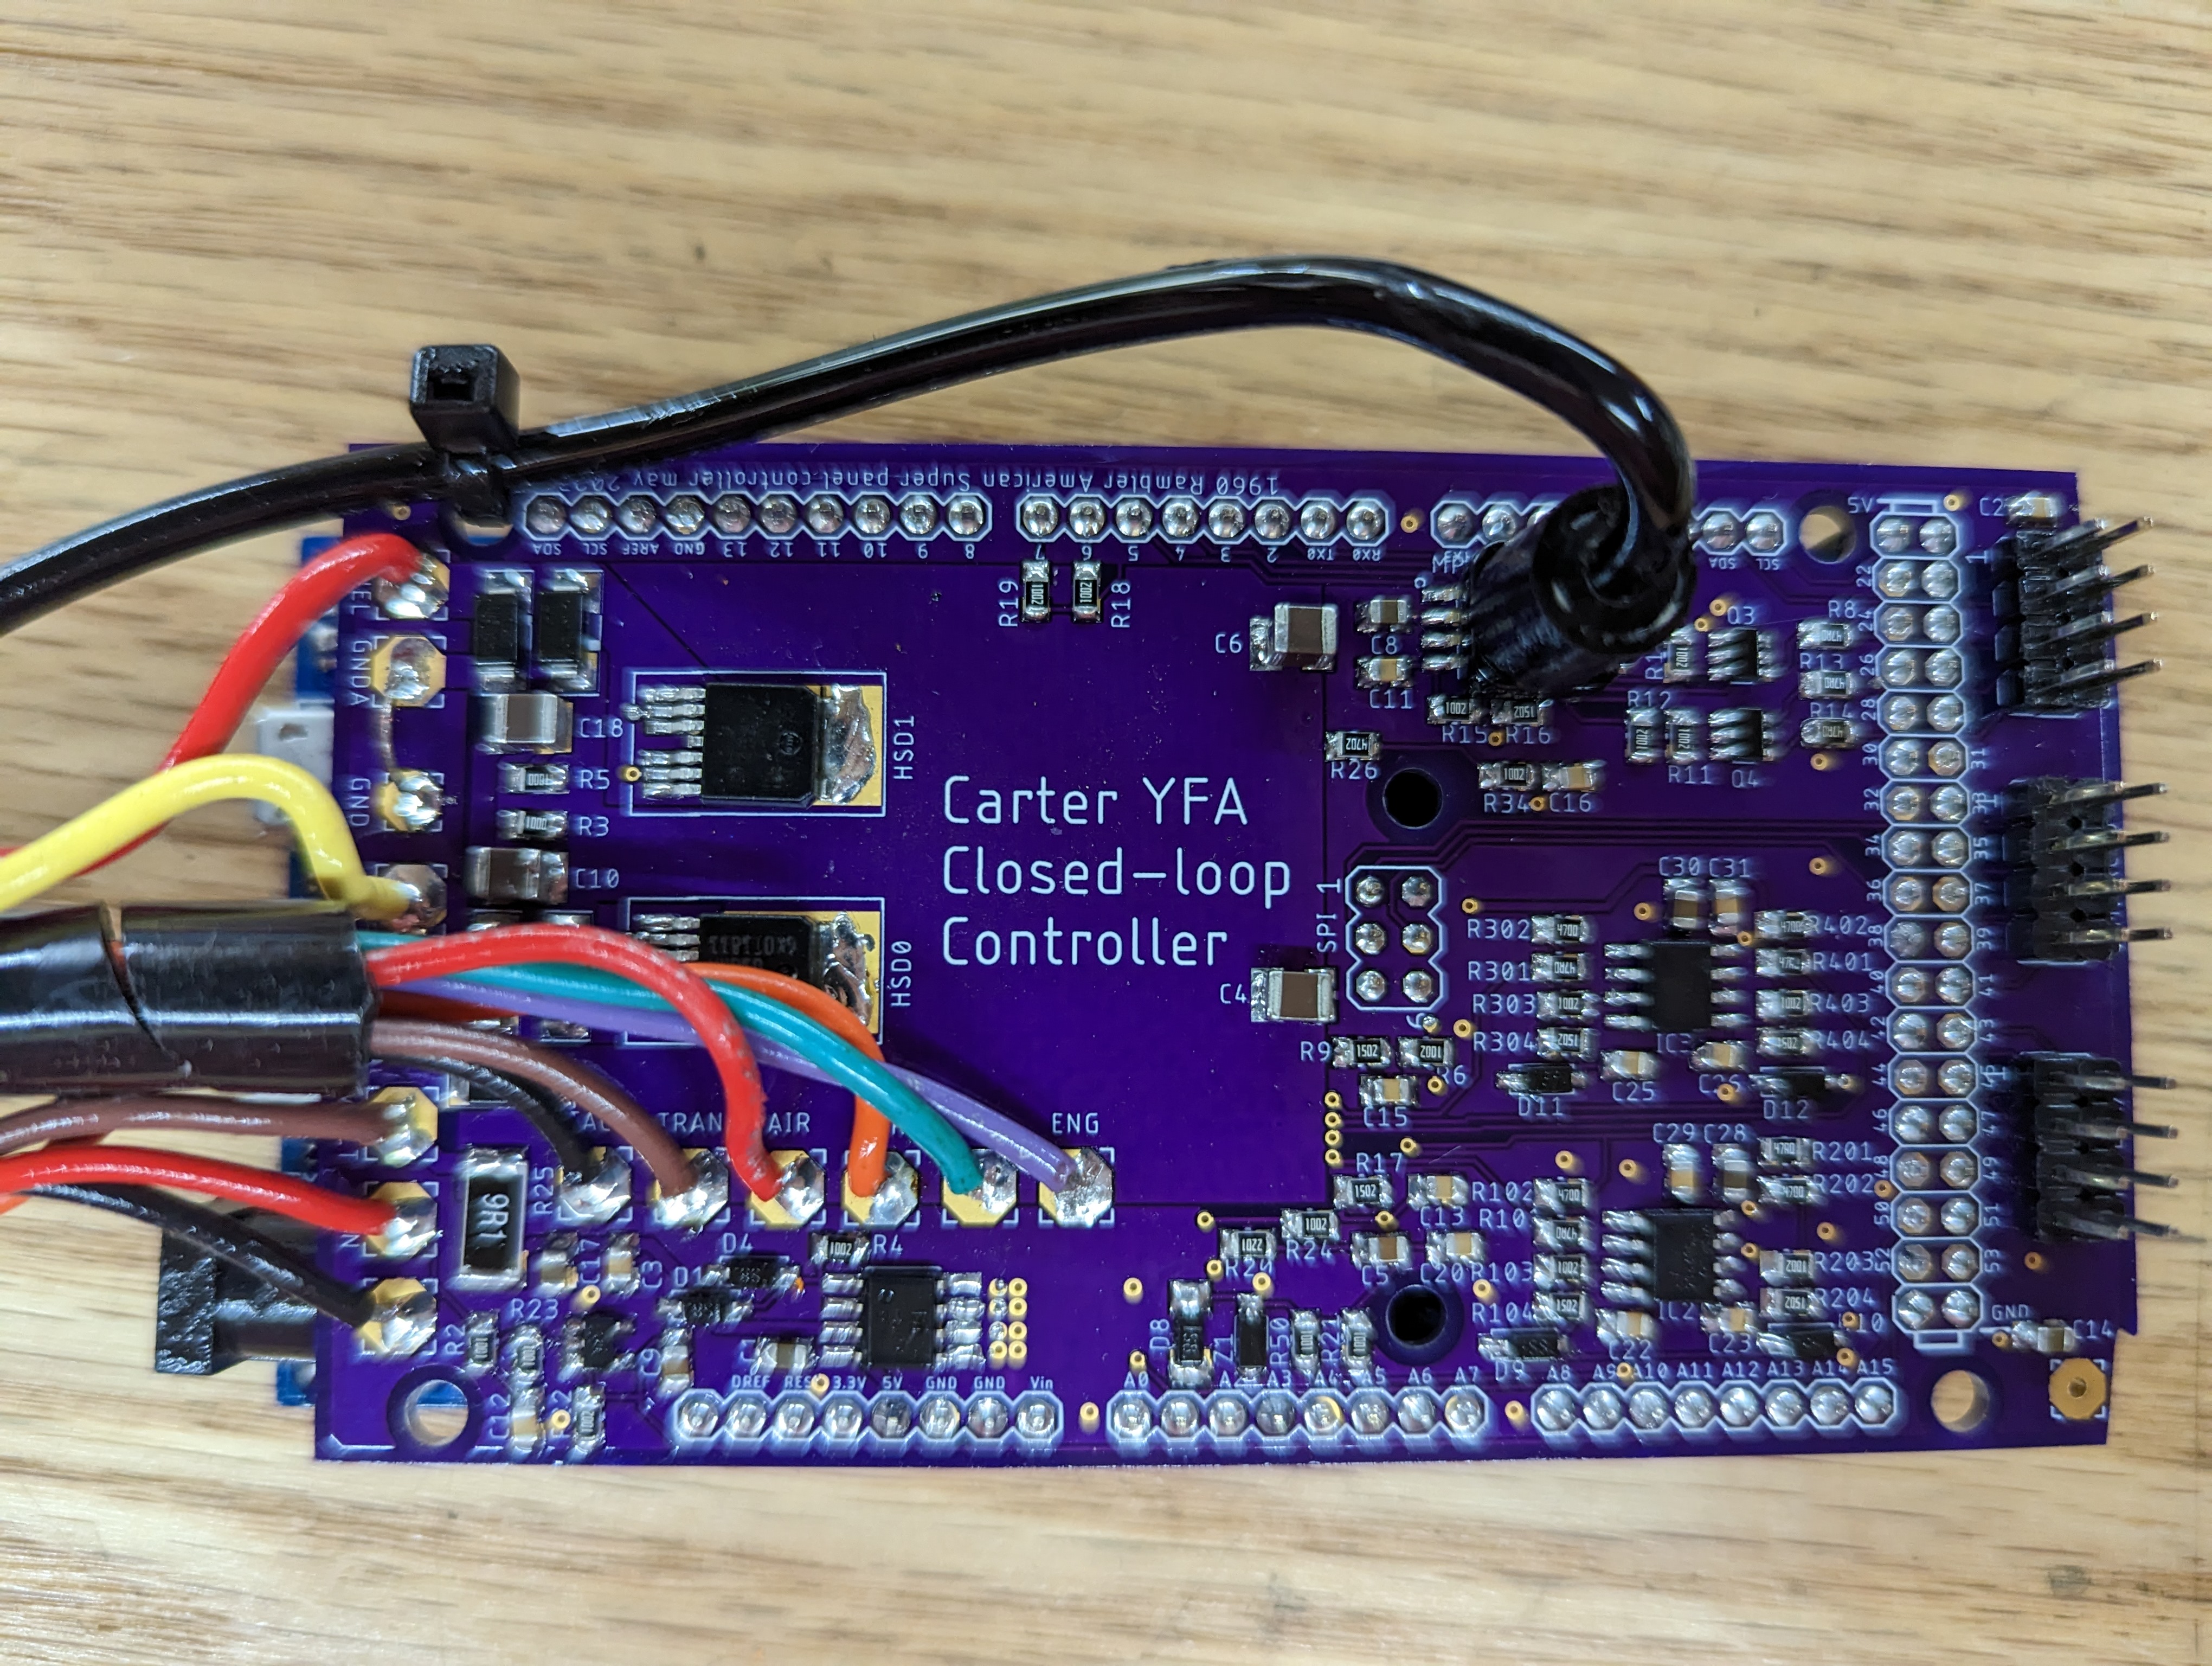
This is the electronics package outside of it's box. The big ugly connectors are Weatherpacks. Automobiles are about the worst environment for electronics, especially old ones. I have another car, a roadster I made, that is run by three networked controllers using this packaging scheme, it's very solid.

I'll write another post about the software....

20
2
submitted 1 year ago by OrakMoya@lemmy.ml to c/arduino@lemmy.ml

Seems like a beast to me! I've been thinking of using it for a DIY drums project that needs a lot of analog reads and processing per second.

21
3
submitted 1 year ago by RandomUser@lemmy.world to c/arduino@lemmy.ml

While not quite Arduino, I have an ESP32 (Arduino IDE) project to pull tide data via API and show it on a HUB75 led matrix. I've got most of the parts working separately but not quite got them all together yet. What is everyone else doing?

22
2
Hey all! (lemmy.ml)
submitted 1 year ago* (last edited 1 year ago) by Ripred@lemmy.ml to c/arduino@lemmy.ml

I've been here for a couple of weeks or so checking things out. So far so good. Since it looks like we're doing this I wanted to say hi to everyone who's migrating or just perusing.

All the Best!

ripred

23
3
Here from Reddit (lemmy.one)
submitted 1 year ago* (last edited 1 year ago) by YellowGas@lemmy.one to c/arduino@lemmy.ml

Visiting here from Reddit's r/arduino before the June 12th blackouts. Really liking how Lemmy operates but notice the Arduino community here is less than sparse. Given time, hopefully we can build this community for Arduino enthusiasts who are displeased with Reddit as a platform. I hope to see this place grow over time!

I haven't been a part of the Arduino subreddit for very long - but I've never seen "Africa" performed with stepper motors before! If nothing else, check out the post lower in this community!

24
5
submitted 2 years ago by Sal@mander.xyz to c/arduino@lemmy.ml

While looking into why a stepper motor sometimes makes a sound while stopped, I found.... stepper motor music covers!

25
2
submitted 4 years ago by SnowC0de@lemmy.ml to c/arduino@lemmy.ml

If you feel tired about the Arduino IDE and you are fan of terminal. I recommend you to try 'ino' as well as micro as editor.

Ino

Ino is a Python tool to build and upload code to Arduino boards. It is also very lightweight and fully open-source.

  1. Install Ino : pip2 install ino
  2. Create and initialize the project:
mkdir project
cd project
ino init
  1. To configure the settings about the board, you can use the following template: name this file ino.ini and add it into the root folder of your project.
[build]
board-model = mega2560

[upload]
board-model = mega2560
serial-port = /dev/ttyACM1

[serial]
serial-port = /dev/ttyACM1
  1. Code your script by modifying the file src/sketch.ino
  2. Build and upload to the Arduino (using the settings of the file ino.ini) run: ìno build && ino upload

Now each time you want to upload the project to the board you just need to run ino buid && ino upload. Ino will use the configuration of ino.ini to build your app.

Micro

This is not directly linked to Arduino but this is by far my preferred editor for terminal. You can use the shortcuts of nano but you have the customization and the code syntax of vim. The default colorscheme of Micro is gruvbox.

If you want more information about this editor, you can checkout: https://micro-editor.github.io/

Conclusion

I personally love them because I hate the default IDE and I am a big fan of developing app fully in terminal.

What do you think?

view more: next ›

Arduino

800 readers
1 users here now

All about Arduino boards and programming.

founded 4 years ago
MODERATORS