22
Mantis Build Guide
(github.com)
Nice. The world needs more hex keyboards!
I used to have two Type Matrix boards long time ago. It got me into thinking about more ergonomic layouts and taught me first Dvorak and later Colemak. I agree with others' comments about poor longevity. I also find that it's not a very ergonomic layout in hindsight.
Learning how to clone this layout in a custom mechanical keyboard is like jumping into the deep end. There may be other ways. E.g. get an XD75 or ID75 and make a layout that's "close enough". That takes PCB design and lots of firmware hacking out of the equation. But you'd still learn about different switches, layers, thumb keys, maybe home-row-mods if you want and ease you into more possibilities of firmware hacking. You may find a more ergonomic or efficient layout than the Type Matrix that way, as well.
Pink switches are very light. I bottom out pretty hard, so they're probably wasted on me. It makes a nice percussive sound in the wooden case, though. But I do find them quite usable with these sculpted keys. I didn't like them on a Cantor with MBK key caps as it was too easy to actuate two keys at once by accident.
For me, Pro Red is probably the sweet spot for light linear switches.
I've been busy building a few Mantis v0.3.3 builds for friends and family. It took me way longer to build these than I had planned, and I still have a few more builds to go before I work on the next version of the design. But I'm getting better at this, and very happy with how these turned out. It's nice to try out different switches. On these boards I used Choc Sunset, Pro Red and Pink switches. They all work great with the sculpted key caps.

The two keyboards in the front use clear acrylic case plates and key caps made of two different resin materials to highlight the home keys. They are translucent enough for the backlight. The one in the back is made with birch plywood plates, painted with 3 coats of shellac to bring out the wood grain and lightly sanded for a matte finish. The key caps are grey nylon. The small holes in the skirts work great for letting the backlight shine through those opaque keys.

I used KB2040 controllers from Adafruit for all these builds and loving the extra space for building the firmware with Vial support. My old v0.3 prototype with a ProMicro also works with Vial, but I had to disable some features and lighting effects to squeeze it in.

Thank you for the reference. I just watched the movie for the first time. I mean I was going for an organic looking shape with these keycaps, but maybe I succeeded a bit more than I intended. I should make a "special" version for Halloween.
The title picture and the first picture in my post both show them installed. Here is a direct link to the title picture.
I updated the 3D-printed keycaps for my Mantis v0.3 keyboard to create more sculpted keywells that require less finger movement for typing.

Thanks to the rotation of the switches on the PCB, this needs only two different keycap profiles, a flat one with 15° tilt of the dish, very similar to the keycaps I had printed for the first prototype, and a tall one with 28° tilt.


The flat keys are used on the home row, the outer pinky key and most thumb keys. The tall ones are used on the remaining keys. I'm not quite happy with the rotation of the inner index finger keys with the taller key profile. Fixing that will require a revision of the PCB, if I want to keep the number of distinct key profiles to just two.

I was able to print these keys very cost-effectively at JLCPCB, by joining 10 keys in a single 3D object. For the flat keys it brings the cost down to 30 cents per key. This leads to more imperfections than printing individual keys, but they are mostly cosmetic and don't affect the usability. The savings are worth it for me to make several prototype keyboards cost effectively.
The updated 3D models, including 10-key versions are on GitHub.

IME, to use git effectively, and make sense of the man-pages, you have to know a lot of the internals of how git works. I found it helpful to read "Git from the bottom up" when I had to start using it professionally: https://jwiegley.github.io/git-from-the-bottom-up/
With the right key mapping the hex grid naturally leads to hand rotation and column stagger. It also takes "1u distance from home" literally because there are no diagonal keys for the index fingers and pinkies that are 1.4u away. It allows keys to rotate in 60° steps rather than 90° steps. That allows for some interesting ways to exploit tilted key cap profiles.
I may ask the opposite: why squares? That's just as arbitrary, if you think about it. I learned typing on a mechanical typewriter that had round keys.
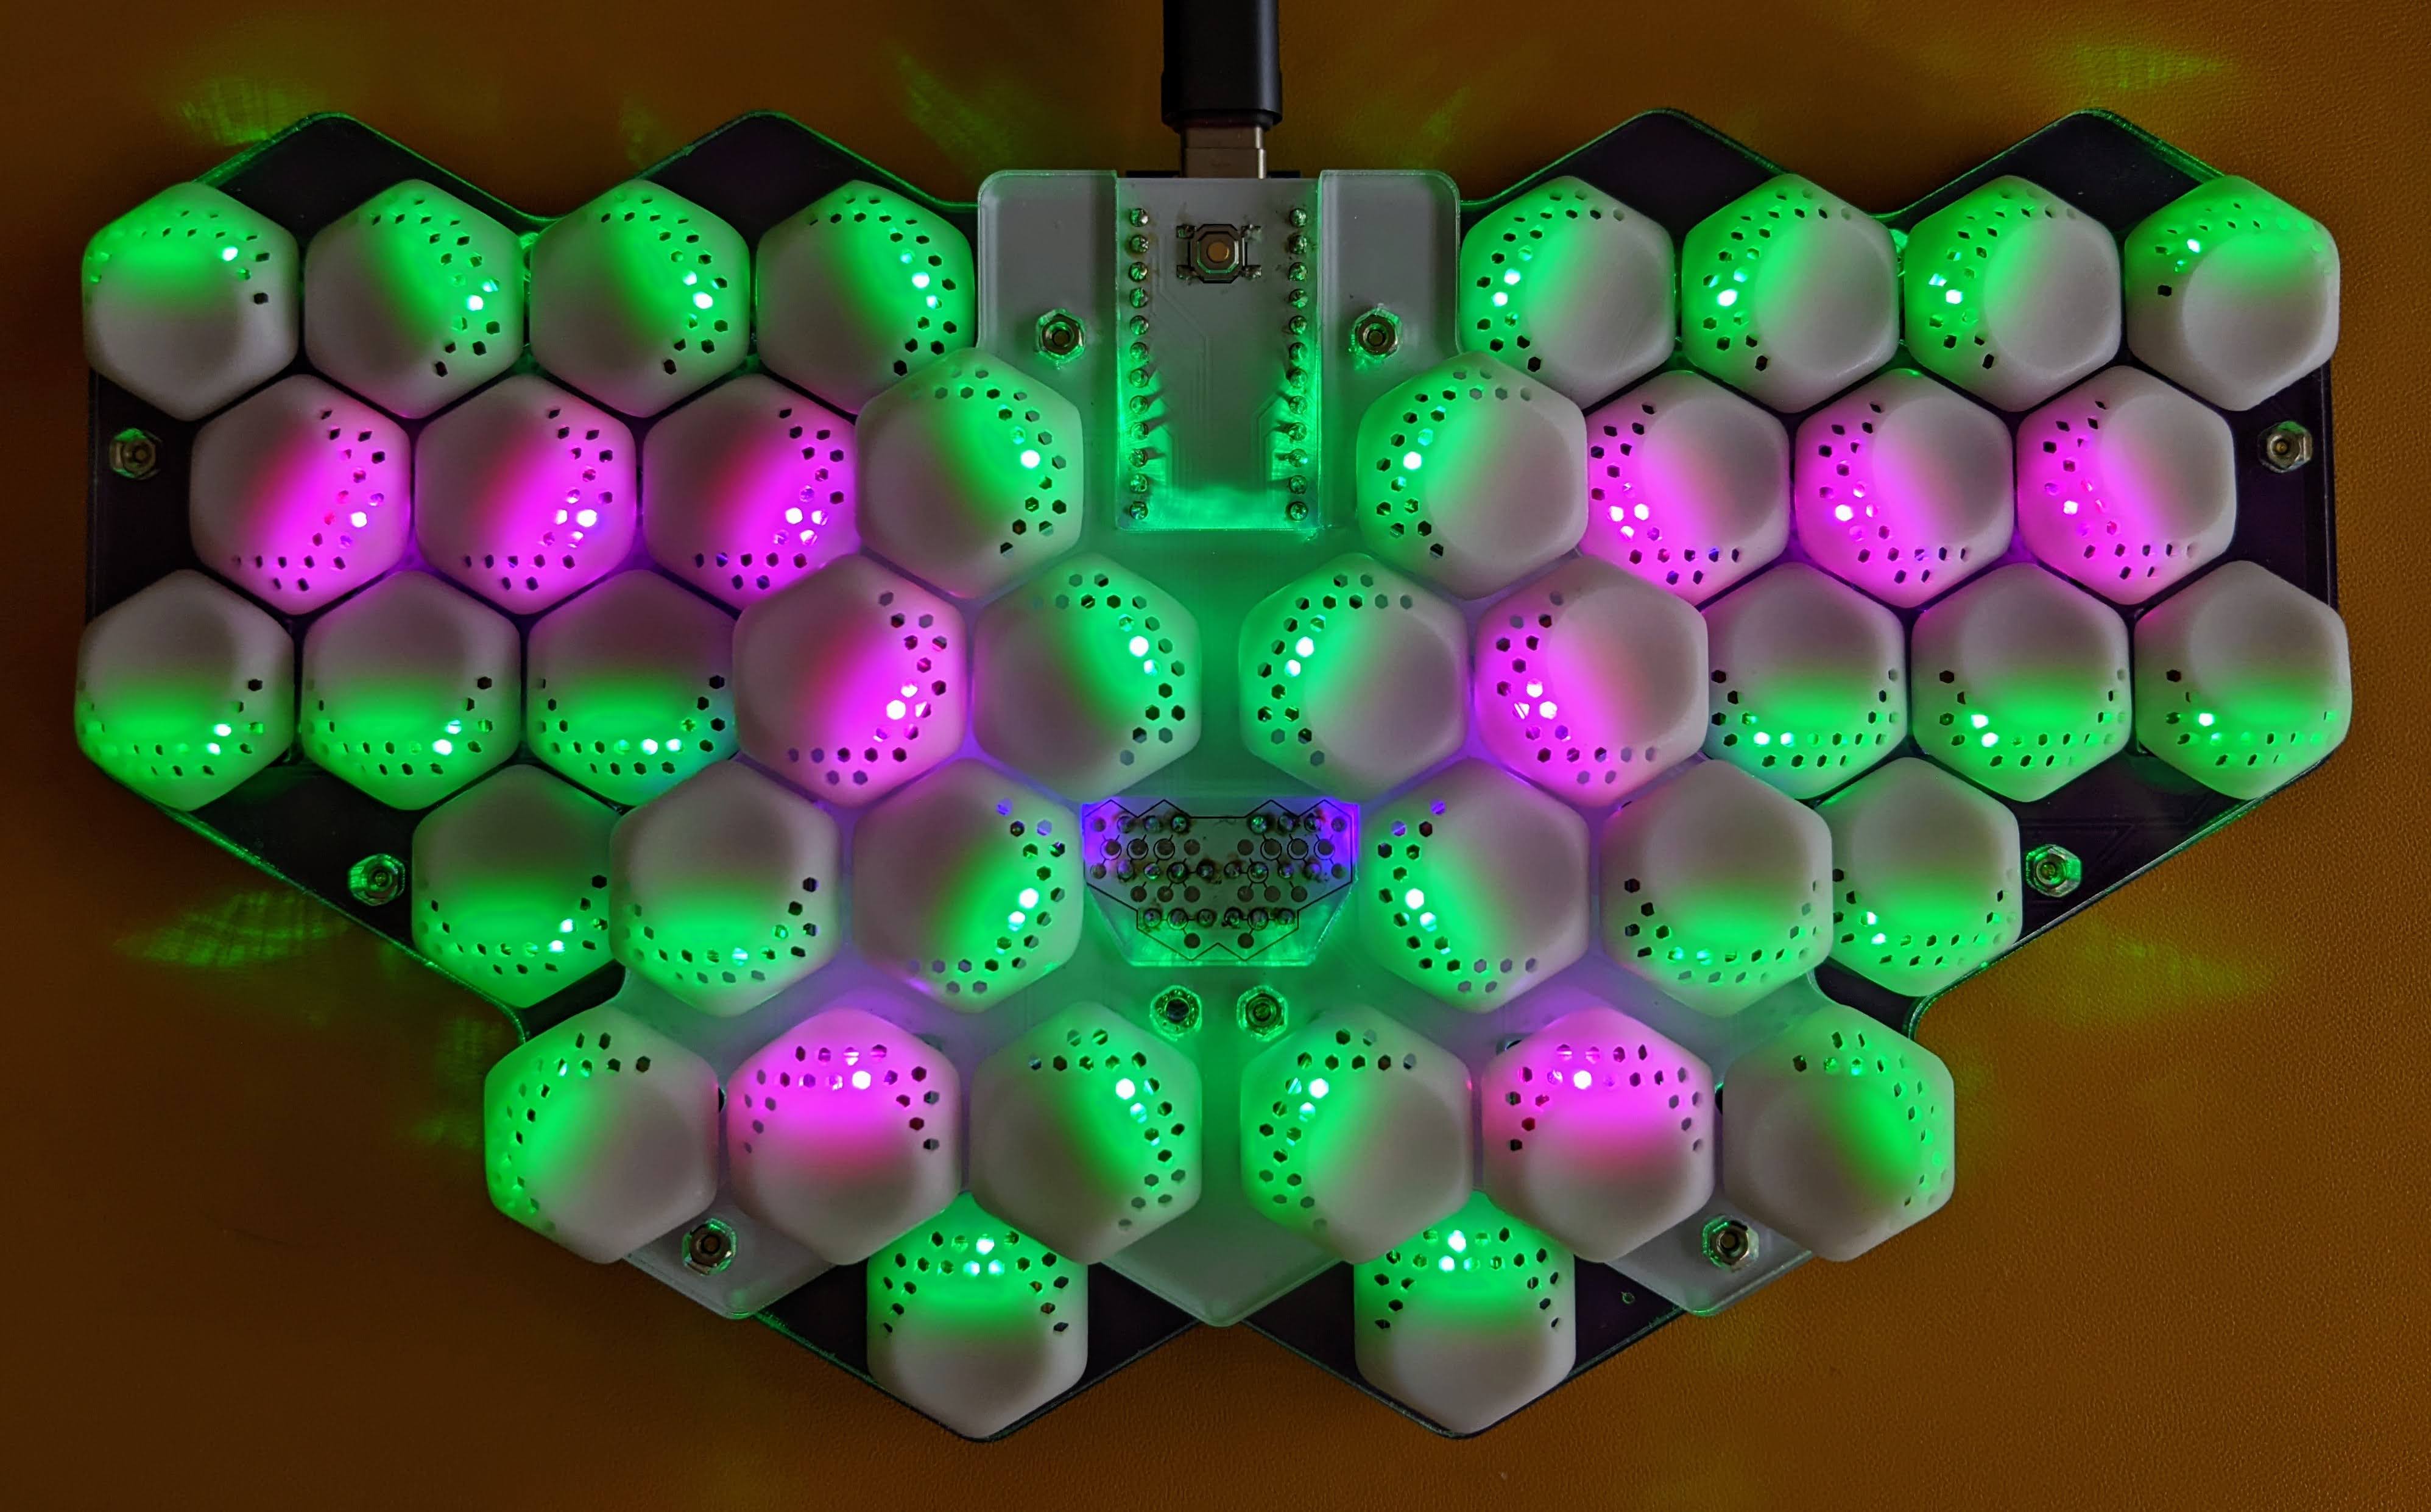
I teased Mantis v0.3 with two previous posts. I finally finished building it over the weekend and updated the QMK firmware including RGB Matrix support. I've been typing on it all day and it's a joy to use. The layout and keymap are mostly the same as what I had on v0.2 before.
Shout-out to PCBWay for sponsoring the manufacturing of the first batch of prototype PCBs and key caps. The acrylic case plates were made locally in Toronto at Hot Pop Factory.
The design and firmware are mostly up-to-date on GitHub (still need to finalize some minor tweaks to the case plates). Here are some more pictures.
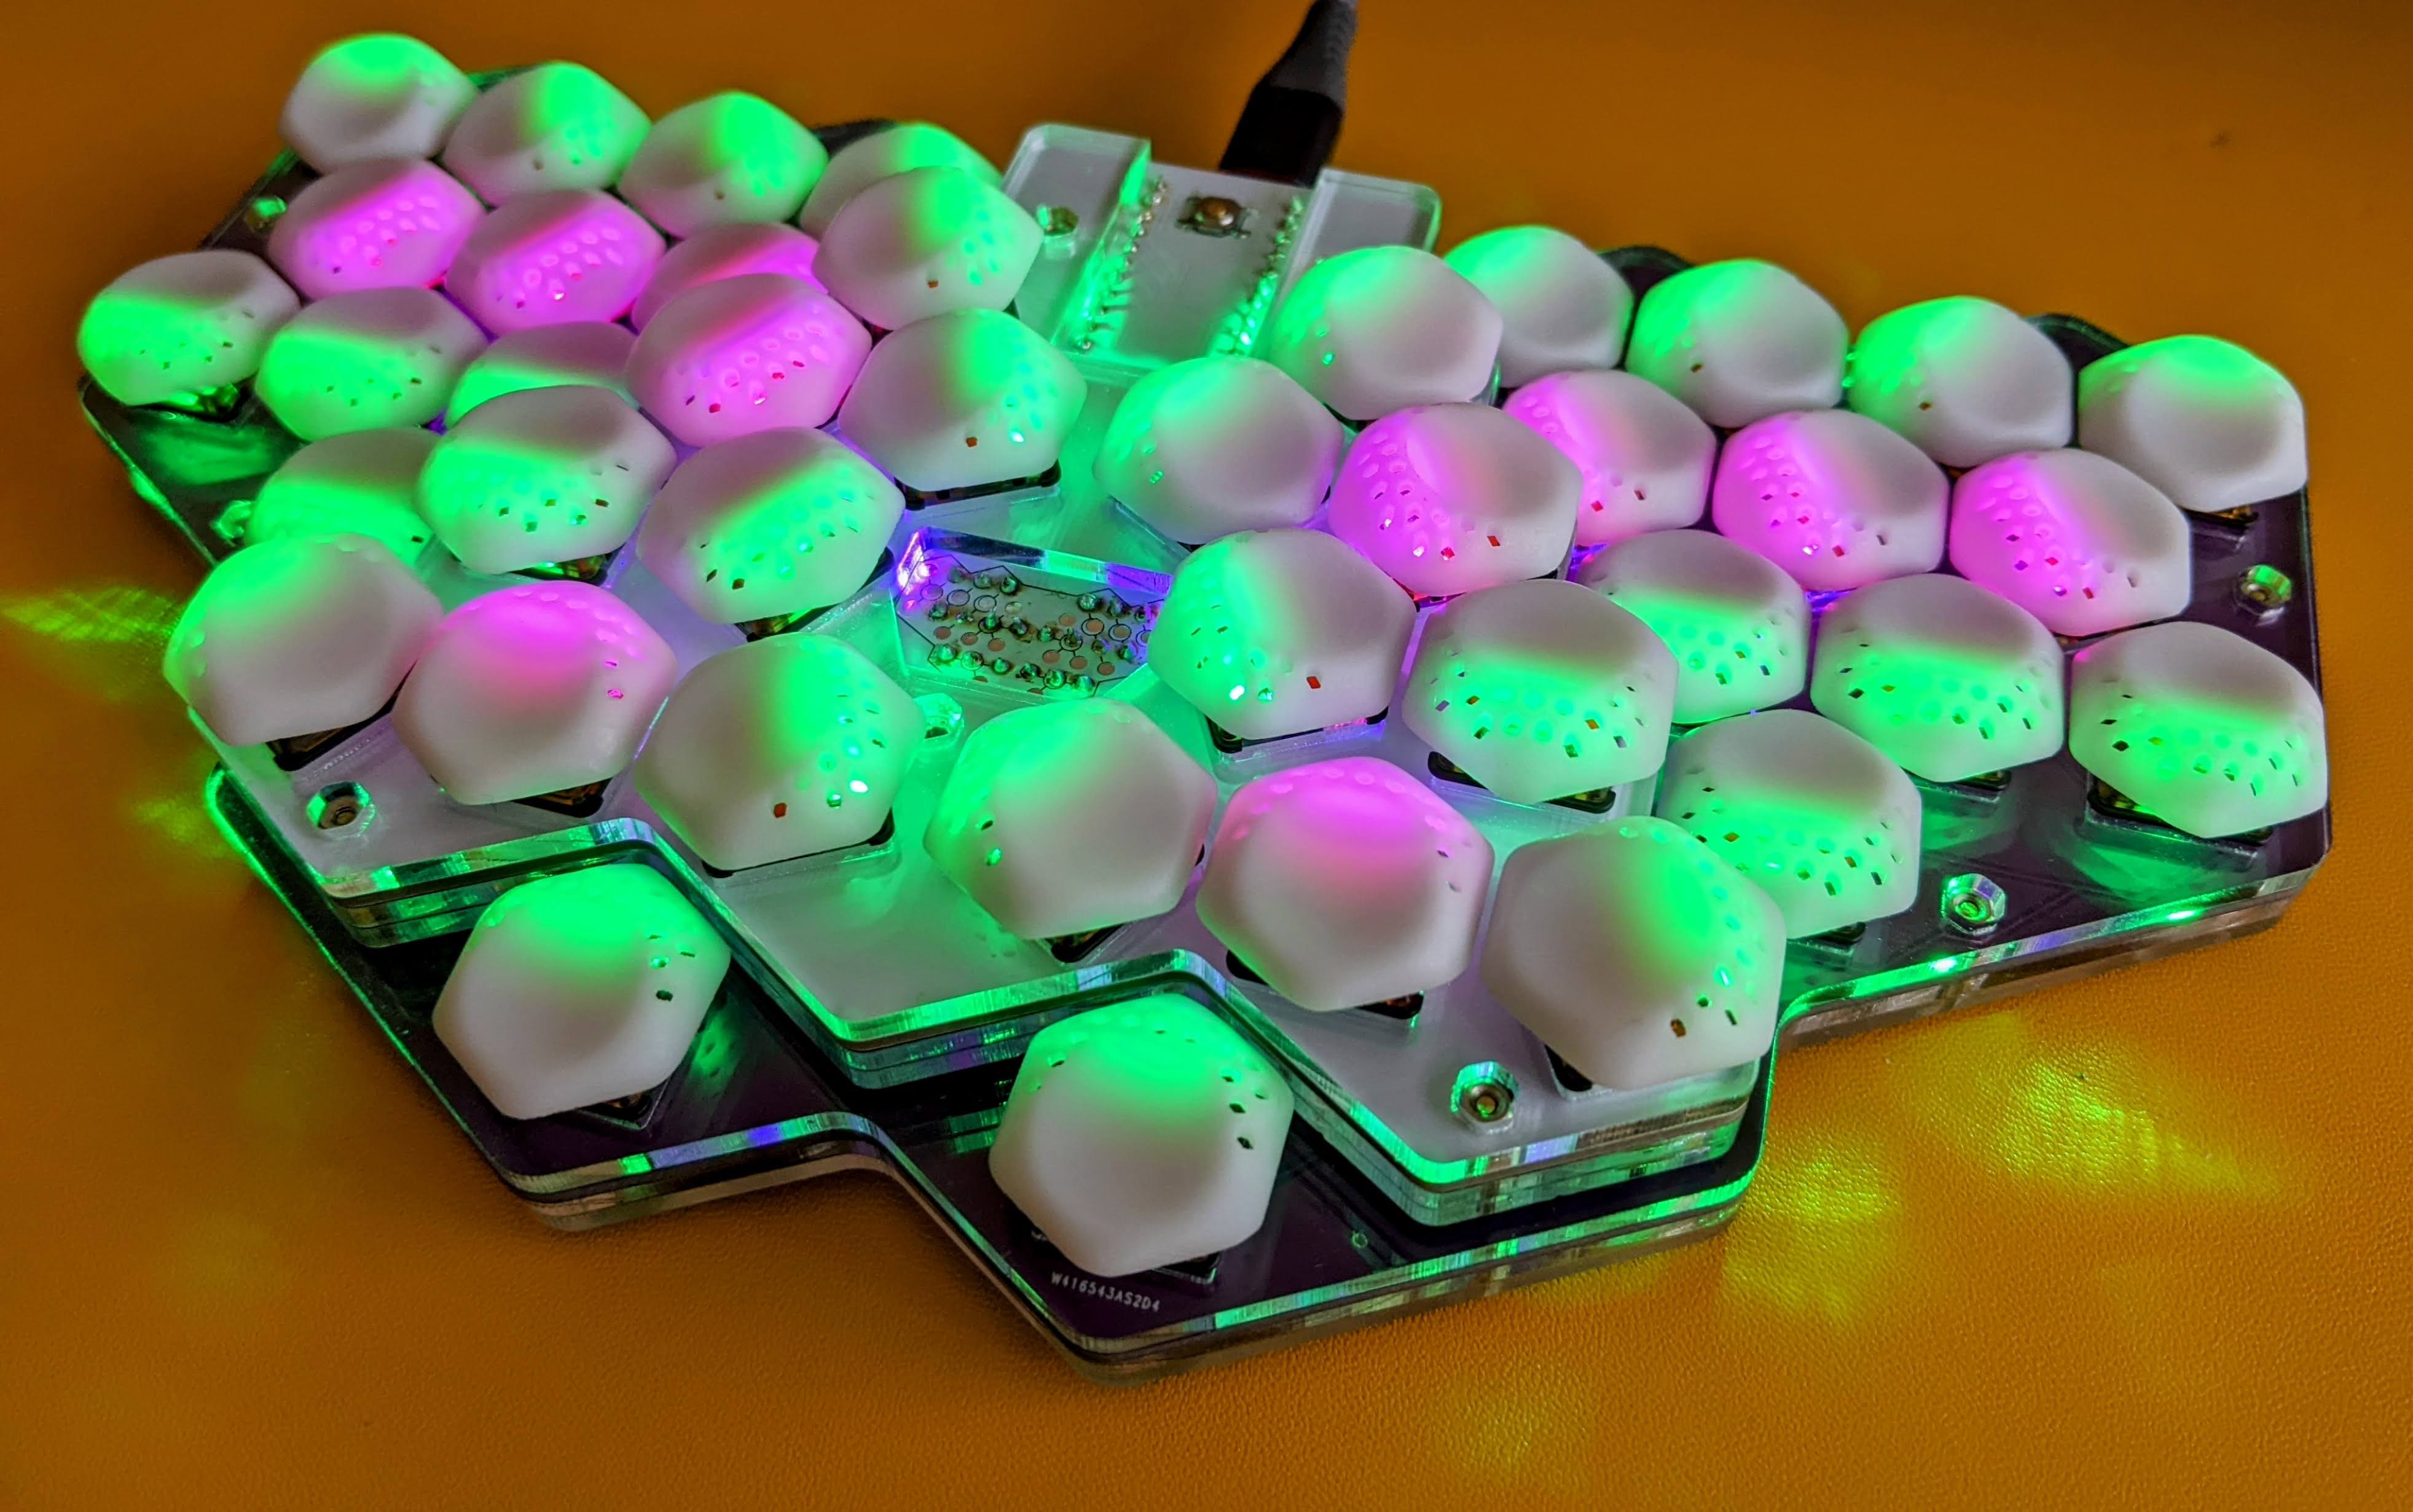
I need to spend more time with the RGB Matrix features in QMK. For now I'm using the ALPHAS_MODS mode to highlight the home row and home thumb keys.
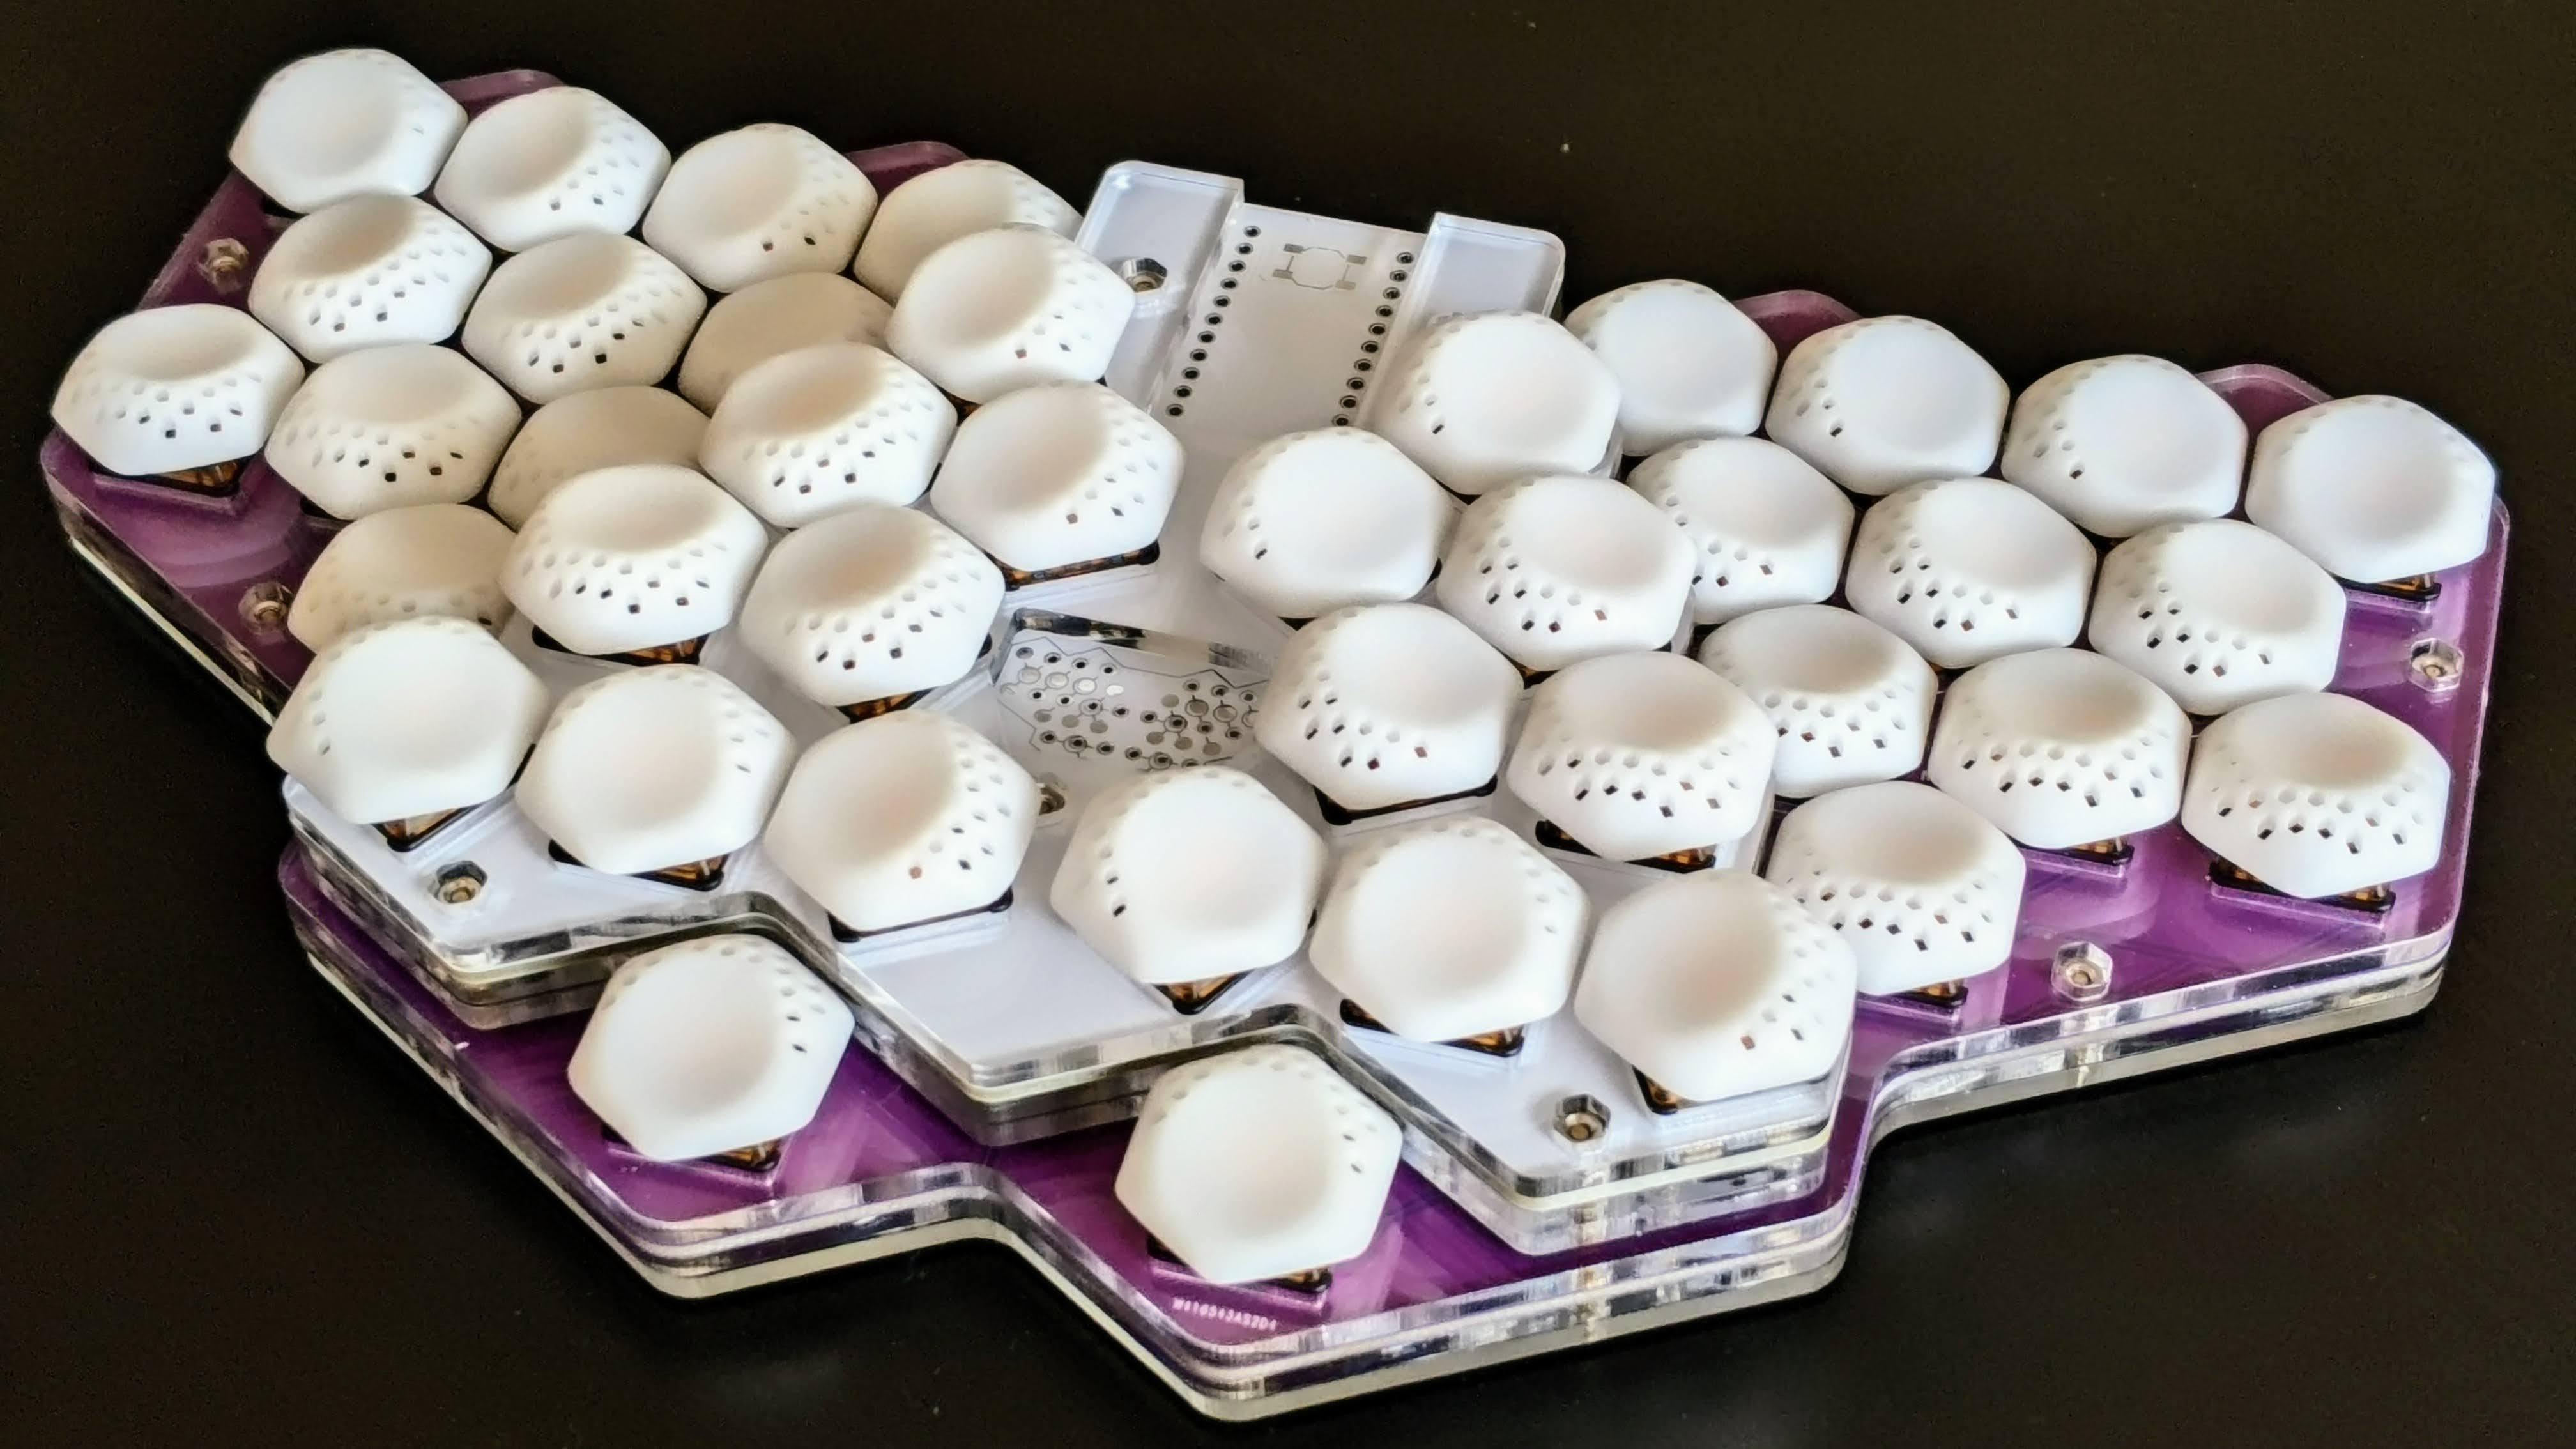
Here is the same perspective with the LEDs off, which makes it easier to see the curves of the key well. The key cap is my own design, 3D printed in resin by PCBWay. They came out great. I only needed to remove some small left overs of supports from the bottom where it interfered with the switch stem. No big deal, my thumb nail was the only tool needed. The stems feel very solid so I was not worried about swapping key caps on and off a few times during the fit and build process. The shape and dimensions are true to the design, so they fit pretty tightly to the switches and their neighbours. The surface of the spherical dish feels slightly textured, a bit like a PBT key cap. The little holes in the keys were meant to allow light to shine through. But the material turns out to be translucent, which is nice, so I'll have the next batch made without those holes.
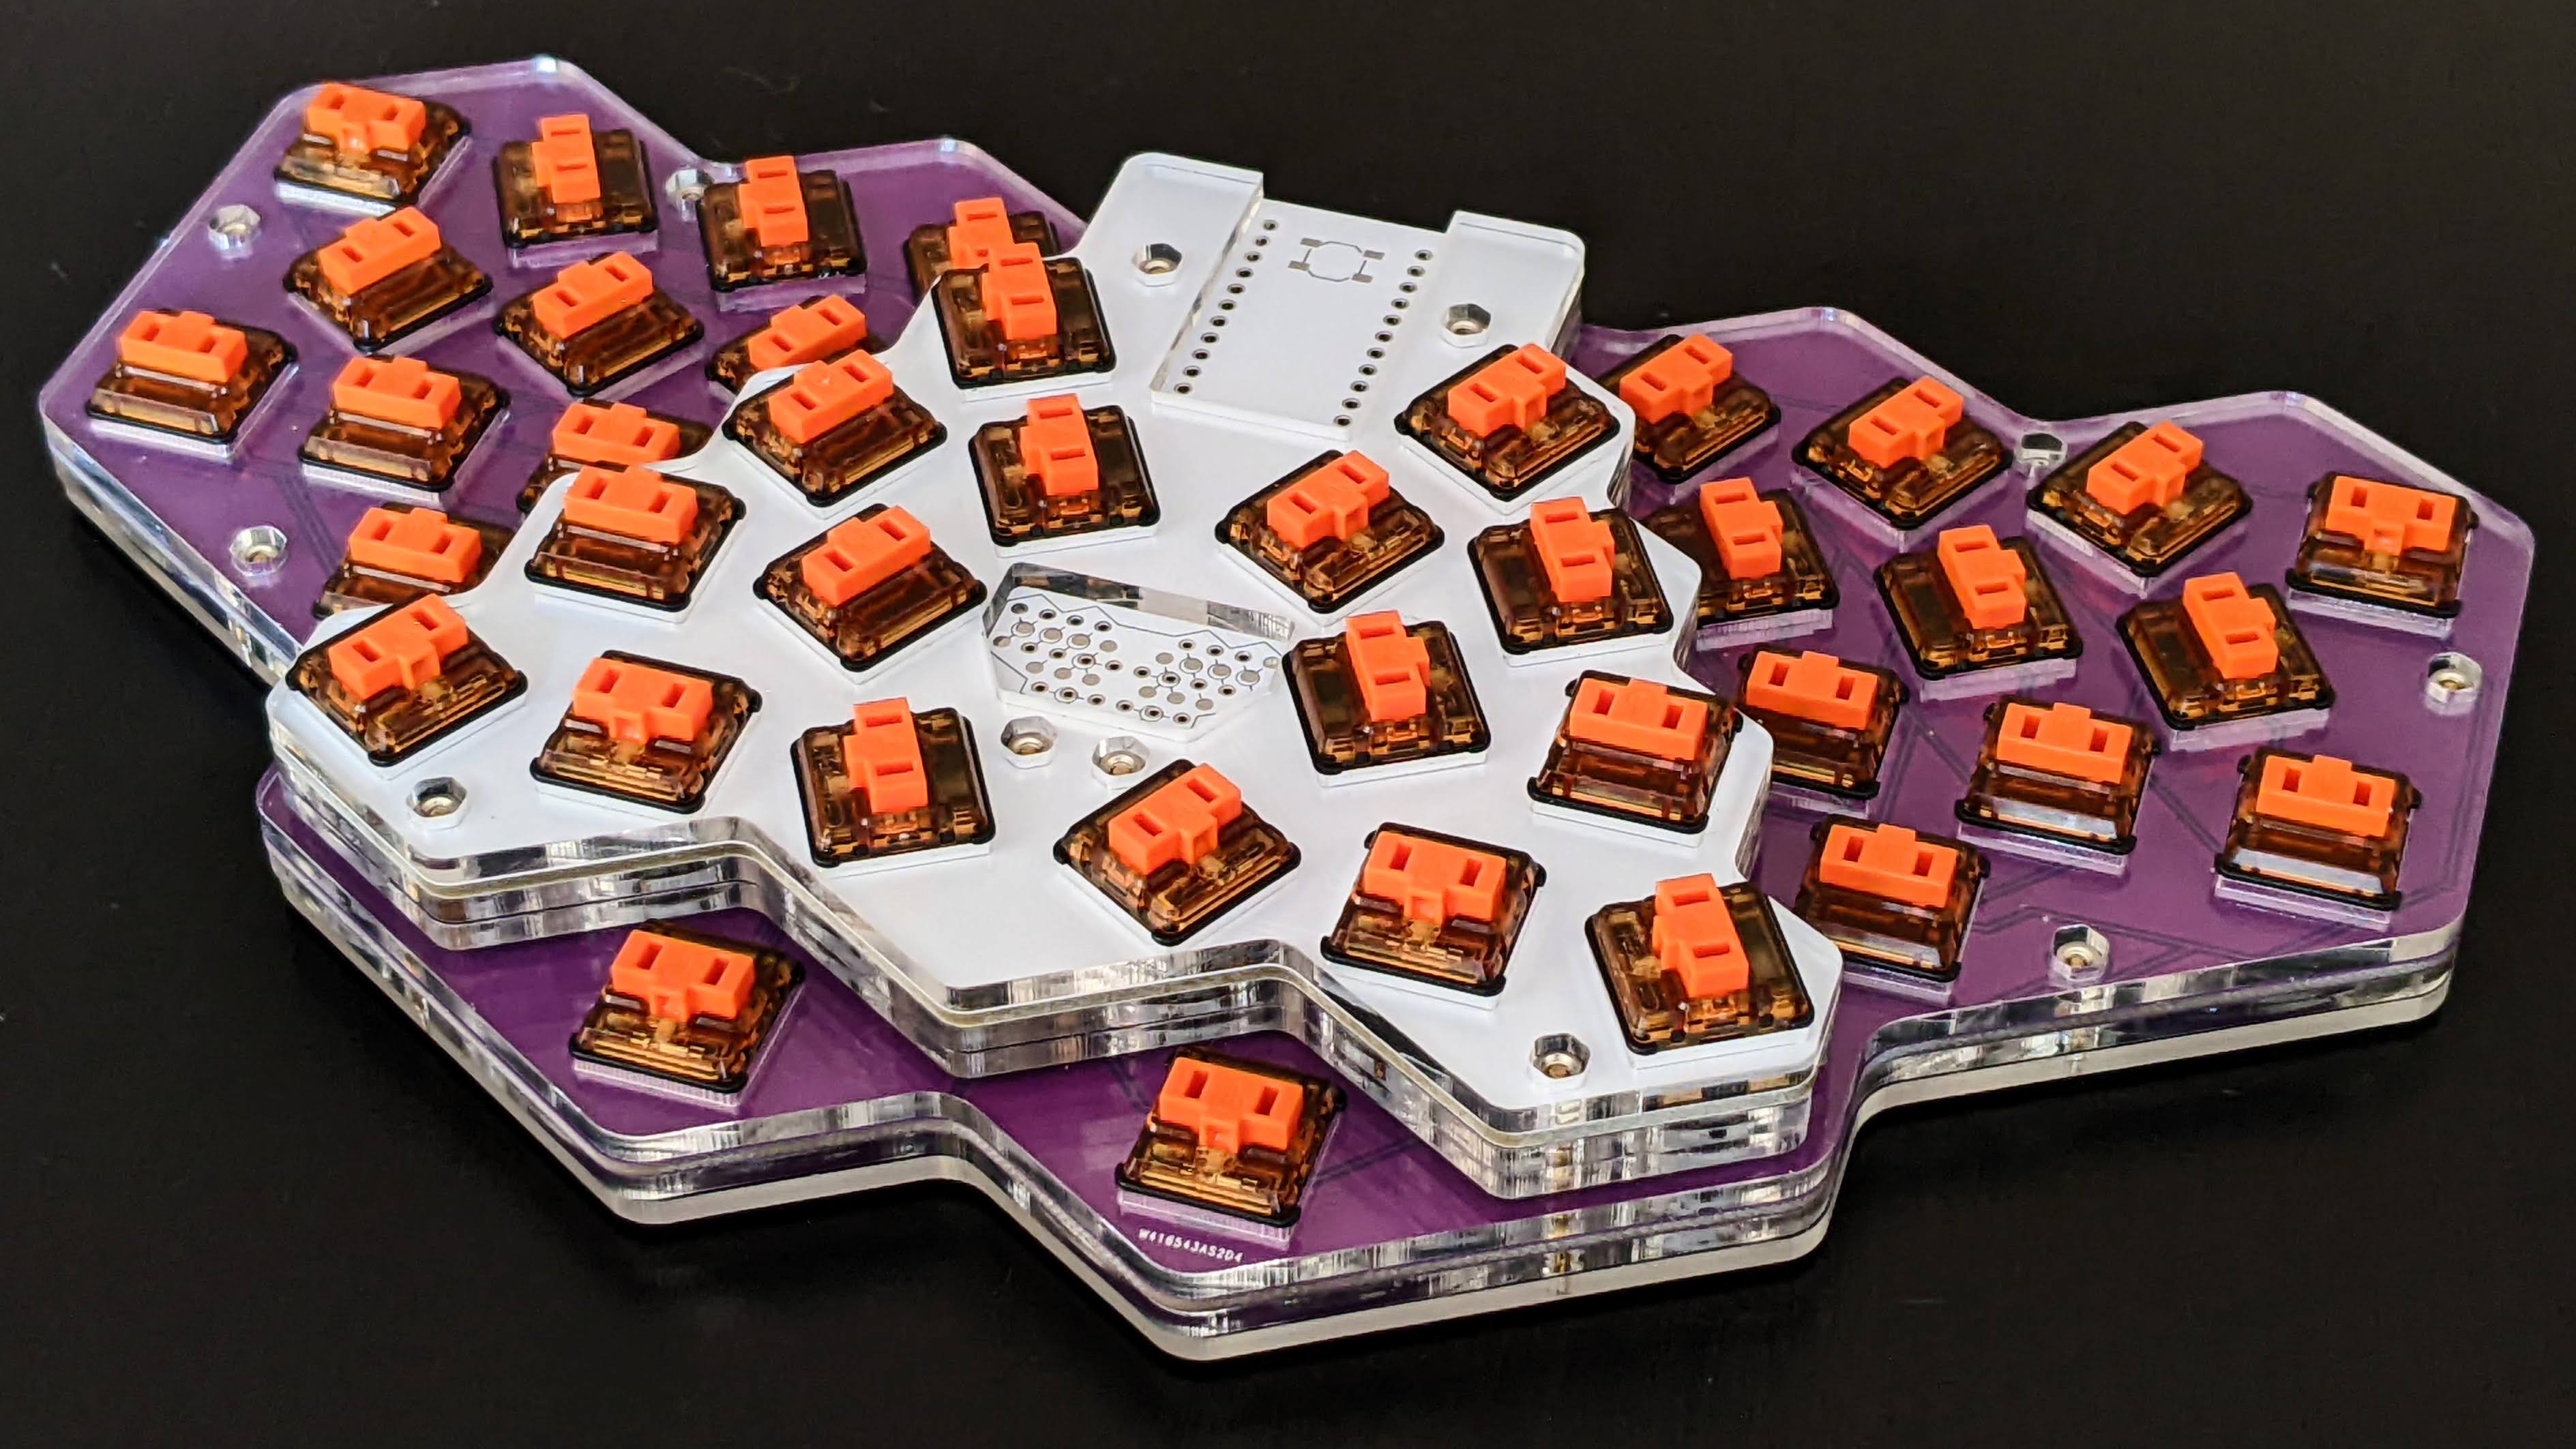
The key caps are designed parametrically in OpenSCAD. I generated only a single key cap profile for this build. The key well shape comes from rotating the switches in 60° increments on different rows and thumb key positions, as well as the raised PCB for the index finger and most thumb keys. I built this one with Sunset (tactile) switches that I took off one of my v0.2 builds. They sound and feel good on this keyboard, but I'm going to build a second one with linear (Pro Red) switches for comparison.
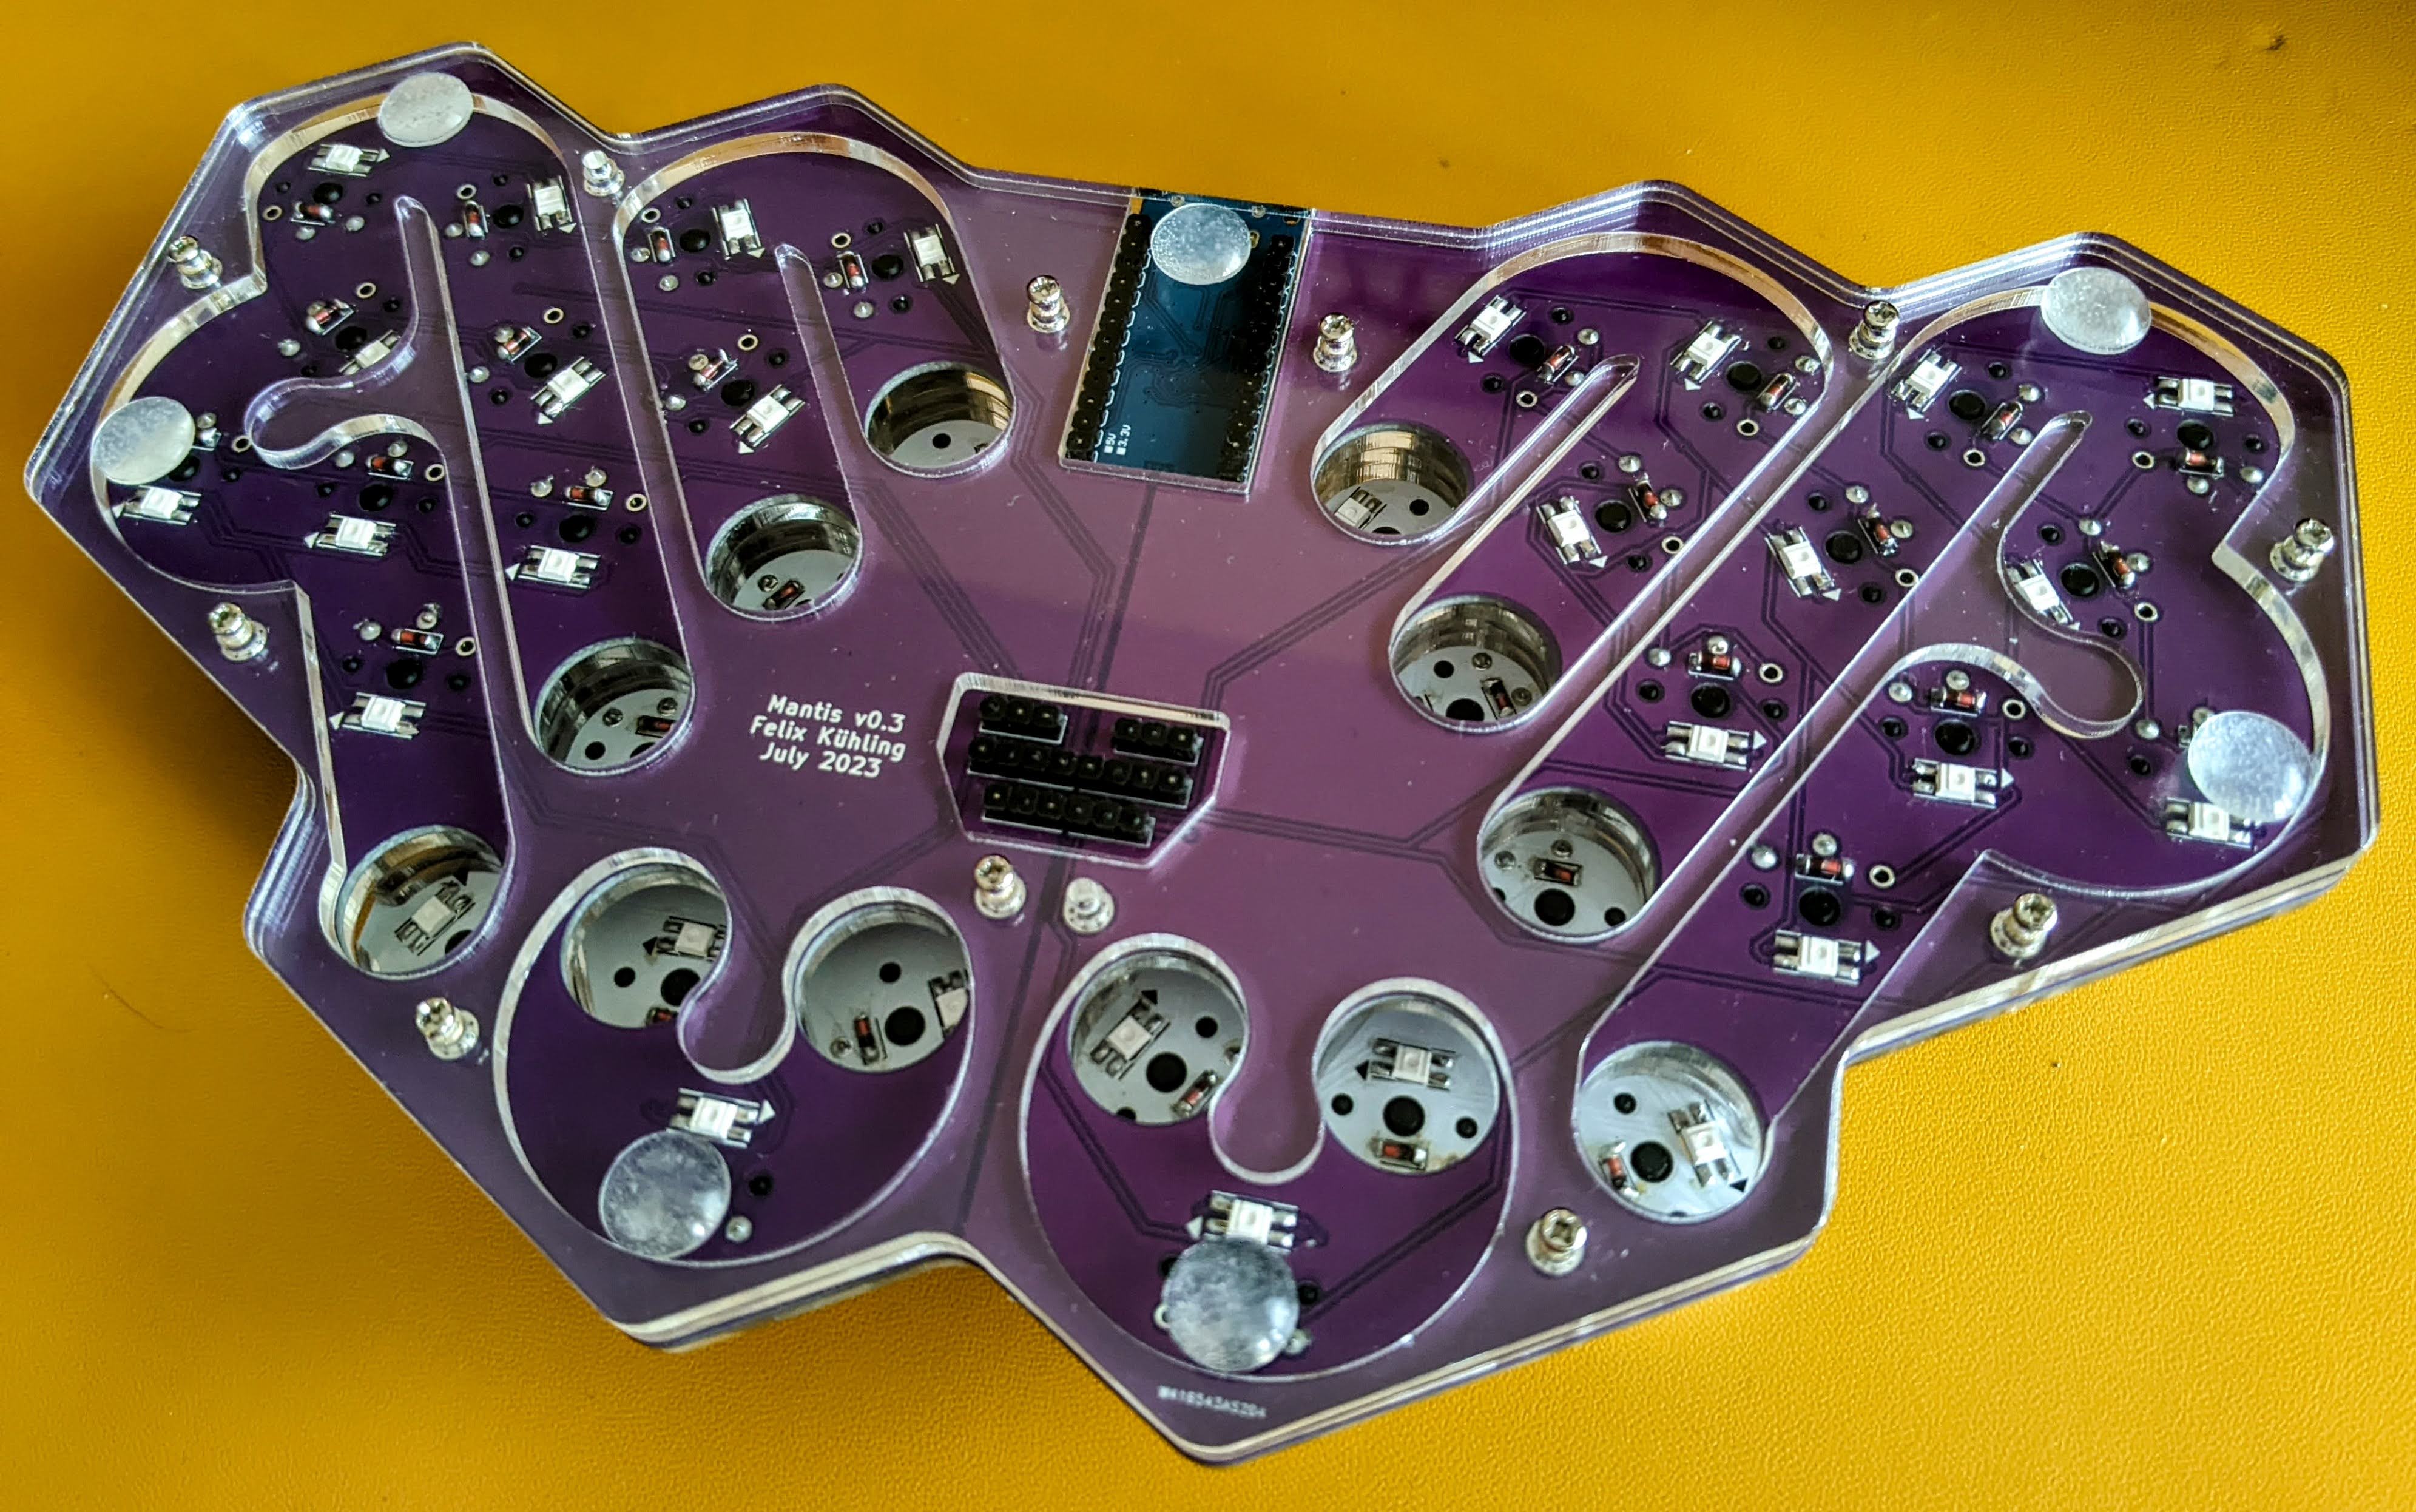
The bottom view shows the reversible split bottom PCBs that make it slightly cheaper to manufacture in small batches. The fit is really good, with basically no gap between the PCBs and a perfect fit with the single-piece switch plate. I chose the more expensive purple solder mask for aesthetic reasons. It does look nice and I like the contrast with the white top PCB and key caps. Diodes and LEDs are surface-mounted from the bottom and sit inside the sound channels that meander under the switches of the two keyboard halves. I couldn't make this design work with hot-swap sockets, so the switches are committed to this keyboard now.
I'll do a sound comparison with and without the mid-layers that contain the sound channels at some point when I build the second prototype. Meanwhile I'll finish writing a build guide and do some more work on the firmware: add support for Vial and and play with the RGB features. Then I want to design a 3D printed version of the case, which would enable a simple one-stop shop way of ordering all the non-standard components from PCBWay or other PCB manufacturers that also offer 3D printing services. If that requires changes to the PCBs, it may turn into v0.4.
I fell into this rabbit hole when looking into all the options available when ordering an Ergodox EZ. I discovered the Iris keyboard and really liked its compact shape. I ended up not placing the order for that Ergodox and built myself an Iris v4 instead.
Iris turned out to be a good way to ease myself into the world of DIY split ergo boards. It's affordable, easy to assemble and has enough keys to ease the transition from full sized keyboards. It's a good starting point for experimenting with layers and other features that eventually may lead you to 40% or smaller layouts.
The little holes are for the LEDs to shine through because I wasn't sure how opaque the 3D printed material would be. Turns out that the holes are probably not needed.
My layout for v0.2 is here (I'm using the Colemak version): https://github.com/fxkuehl/qmk_firmware/blob/mantis-v0.2/keyboards/mantis/keymaps/default/keymap.c
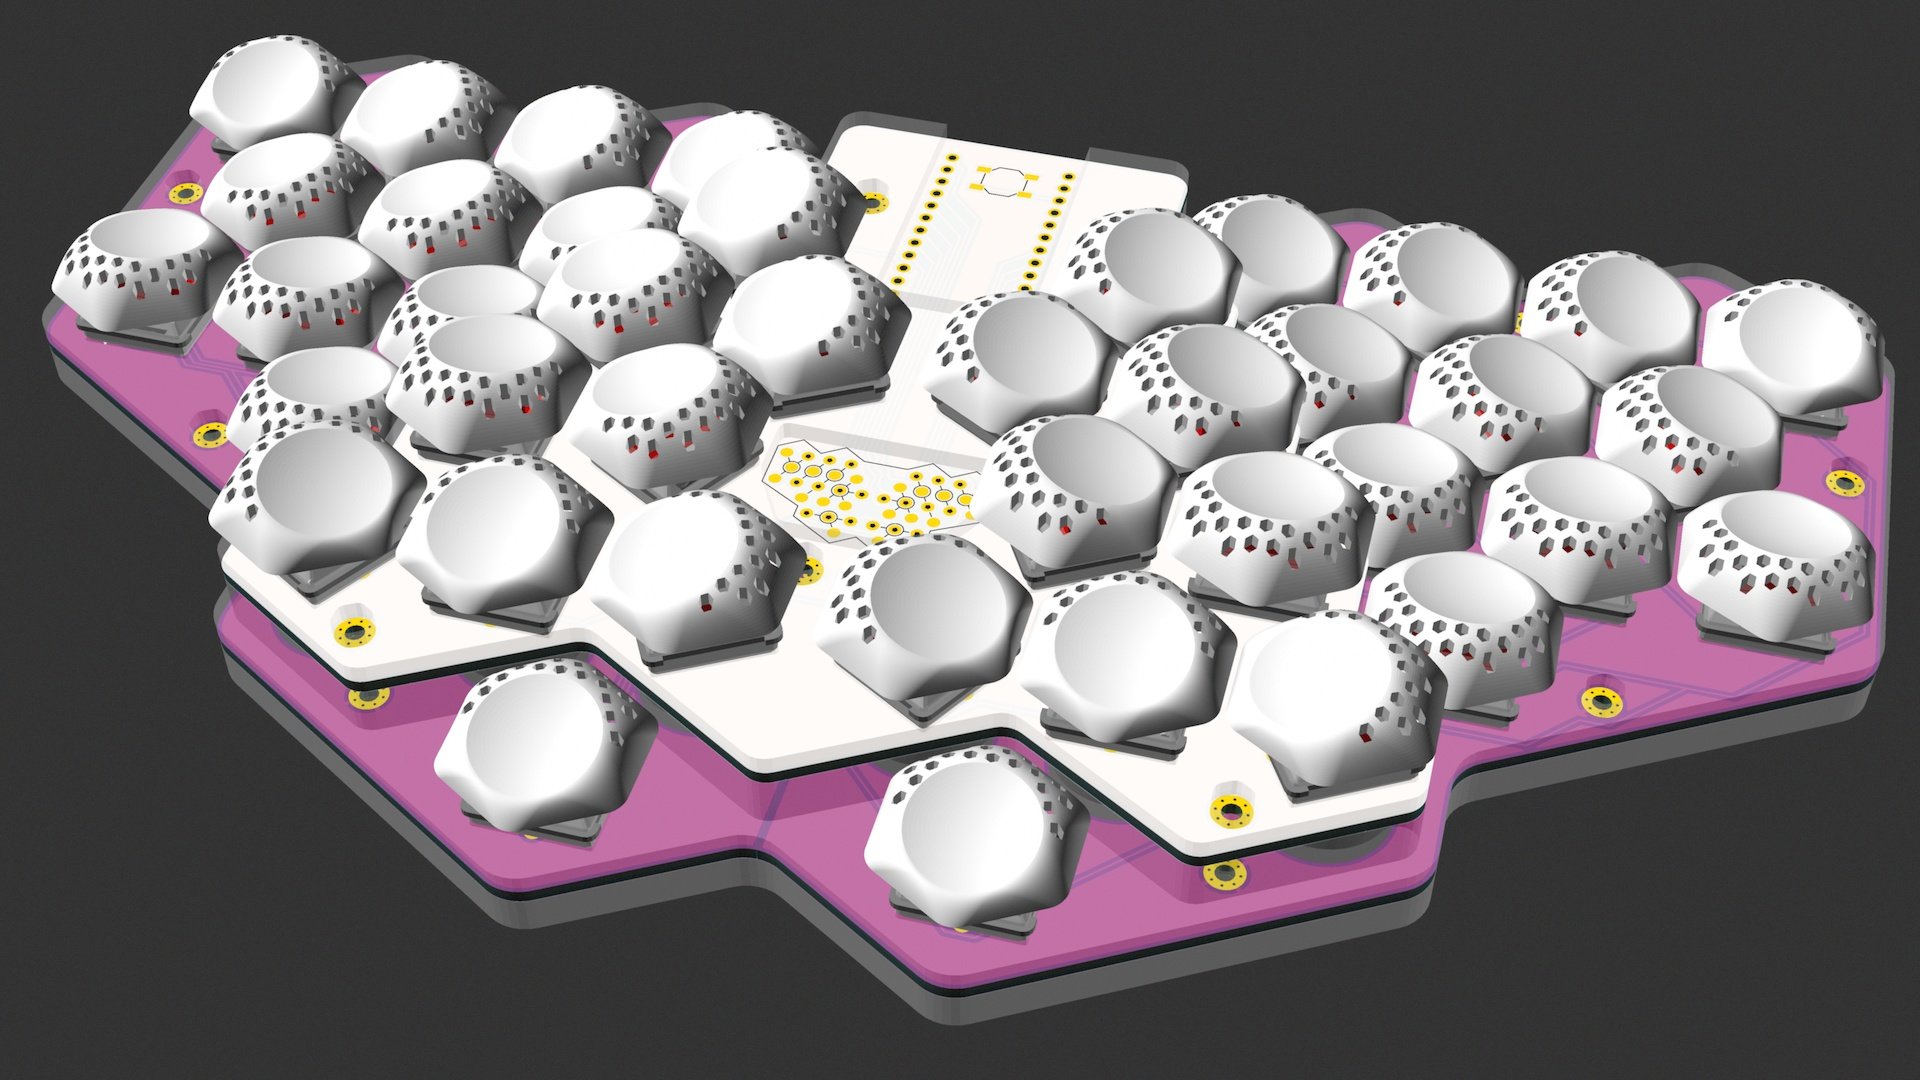
I'm excited to use my first post on Lemmy to share an update about the design and some renders of the next version of my Mantis keyboard. I ordered the PCBs, plates and 3D-printed key caps this week. I'm hoping to assemble the first prototype within the next two weeks.
Lots of firsts for me: 3D printing, laser cutting, RGB LEDs. I'm really hoping that I didn't make some big mistake that can't be fixed with a drill and some bodge wires ...
[edit: picture to save you a click and a length read]
Check out lowprokb.ca. Their excellent sunset switches are on sale right now. They have other choc switches, too. And they ship from Canada.
I find it easier to maintain two layouts (QWERTY and Colemak DH) if I use them on physically different keyboards. QWERTY on standard row-staggered, Colemak on ergo keyboards. When I was mixing both layouts on standard keyboards, I found it harder to switch and made more mistakes.
The "half-swept" version of Sweep does that already: https://github.com/davidphilipbarr/Sweep/tree/main/Sweep%20half-swept
The easiest way to make the board flippable if to mount the controller upside-down on one side. Half-swept uses solder jumpers for all the pads of the controller footprint, which does basically the same thing as flipping the controller.