1
5
submitted 14 hours ago by UnfairUtan@lemmy.world to c/diy@slrpnk.net

Hi,

I have an old xiaomi 20 000mAh battery bank with two non working USB ports.

I've bought another one to replace it, but I'm wondering if there is a way to fix the ports.

The problem is that the case seems mostly sealed, and I see no way of opening it.

If you have some tips on how to approach this I would appreciate it ❤️

2
14
submitted 2 weeks ago* (last edited 2 weeks ago) by Zara@lemmy.ml to c/diy@slrpnk.net

Hi,

I would like to build myself a DIY DVR

Here what I'm targeting

  1. The software is FLOSS

  2. Have a community/free/gratis version that can handle >= 16 cameras and it's usable (meaning not crazy restricted)
    or
    is paying, but not crazy scheme (like subscription etc..) So you pay once, and you can use that version forever for unlimited number of cameras.

  3. Lightweight on resources ( can run on a Single-board computer )

  4. Can handle Hardware compression.

  5. Can handle Passthrough recording (IP camera)

  6. Have a HTTP server User interface.

  7. Can record audio, when the camera provide it.

  8. Motion detection (possible to enable at certain times)

  9. extra: Written in Python

  10. can record in H265

Thanks.

If you have any reference or any good (recent) article I'm all ears :)

3
19

I've actually done a couple posts about softcover books on my movim blog, this one and one previous one. The Fully Automated softcovers are a little fancier, but this one I think is a good example of the benefits of being able to just make a book when you want a physical copy.

I have a few advantages in this project: my SO had already bought a bookbinding kit and book which I was able to use, and I have access to a free color printer, and, through my local makerspace, a plotter printer which can print on canvas. Everything else, the graphic design, the interposing, etc, was done using free tools like GIMP, an online pdf cropping website, and https://momijizukamori.github.io/bookbinder-js/.

It looks like one of the advantages of this hobby is suddenly being able to get physical copies of books that aren't available as anything other than PDF ebooks. I've got a handfull of favorite books from various authors which were extremely self-published, sometimes as serial fiction later edited into a PDF. One or two eventually got a limited print run, or the author made it available on a Print-On-Demand site, but at this point, I think I've found and bought all of those. That leaves a few that I'm very happy to finally be able to hold in my hands while I read them.

Vatsy and Bruno was one of those. Written in 2010 by Adam "Rutskarn" DeCamp, and published on the old version of https://www.chocolatehammer.org/ , Vatsy and Bruno is a high-strung, noire, dark-comedy-adventure story set in a radio-era city under the thumb of vague oppression. It's a fun story, and one that feels like it should be typewritten on paper (preferably cheap, grubby, fish-stained paper with some suspiciously blood-like smears).

Making this one actually took a bit more prep work on the files.

I started with the PDF DeCamp released on his website over a decade ago. This, unfortunately, wasn't really sized or laid out for bookbinding (re. the wide margins, the page size, and all the page numbers being on the right side of the page). I could get really fancy with editing this, but it's just for me, so "good enough done quick" was the order of the day.

I wanted to print this with no extra trimming, so I planned to use 8.5x11 paper folded in half. Unfortunately, the PDF was, itself, scaled for 8.5x11" paper, and when you fold that in half, the aspect ratio changes. So when I fed the PDF into (the tool I use for interposing the pages](https://momijizukamori.github.io/bookbinder-js) it stretched it vertically quite a bit. It was also showing some fairly large margins, which was unfortunate as those came from the original file. So keeping things "good enough" I threw it into an online PDF cropping tool, cropped it closer to what I'd need, and let it stretch the file a little.

I spent a good bit more time on the cover.

The original covers were also the wrong aspect ratio, but they had almost everything I needed.

I used them and a cover from one of the three sections the story was originally released in, to bash this together:

The cover, spine, text, and back cover were all made from DeCamp's own art, just re-arranged to fit this aspect ratio. From there, I followed the same process as before, but with much faster prints (no giant backgrounds) and no trimming the pages (no giant backgrounds) so that part was easy.

Fold, punch, sew, glue:

I took each signature (stack of four pages meant to fold together) and folded each page in half with the bone folder, being careful to make sure I knew which side was 'in'. Then I nested them together.

I made a guide to lay out the six holes in each signature, and used it to punch holes through the fold with the awl. Then I sewed them together following the Penrose Press Pretty Perfect Paperback Guide:

Once the book block was all tied together nice and neat, I clamped it and glued it with three coats of acid-free PVA glue.

My book clamping station certainly looks ragged enough to do the title characters proud.

While it was drying, I swung by the makerspace and printed the cover. I need to remember to oversize these by a few millimeters, because the first one is always a little small. Ah well, maybe I'll find someone with a bookbinder's guillotine someday.

I folded the cover and glued in the book block just like with the previous project.

I find it easiest to attach the cover in three steps, back, spine, front, but I'm sure real bookbinders have better systems. I start with a flat smear of glue down the inside of the back cover, right beside the bound edge and to set the book block down on it. Then I glue the spine with the book upright (this time I tried on top of the bone folder, which has a similar shape). Then I glue the front cover. I squirted some acid-free fabric glue down the spine and used a paperclip to work it further down, to where it hadn't stuck, and then held it in place by hand for a bit to get a closer fit. I like this stuff, it bonds well and it seems to set much faster than the PVA. This time I also used it to glue the bound edge of the front of the book block to the inside of the cover too, so we'll see how that works out.

The results:

Cover size aside, I'm pretty pleased with it. If ever there was a book to glue into its cover the wrong way around, this would be it, but I got that right this time. I'm glad to be able to read it properly, and to finally be able to put it on my shelf.

#DIY #bookbinding

4
25
submitted 3 weeks ago by Peter1986C@lemmings.world to c/diy@slrpnk.net

cross-posted from: https://lemmings.world/post/11714128

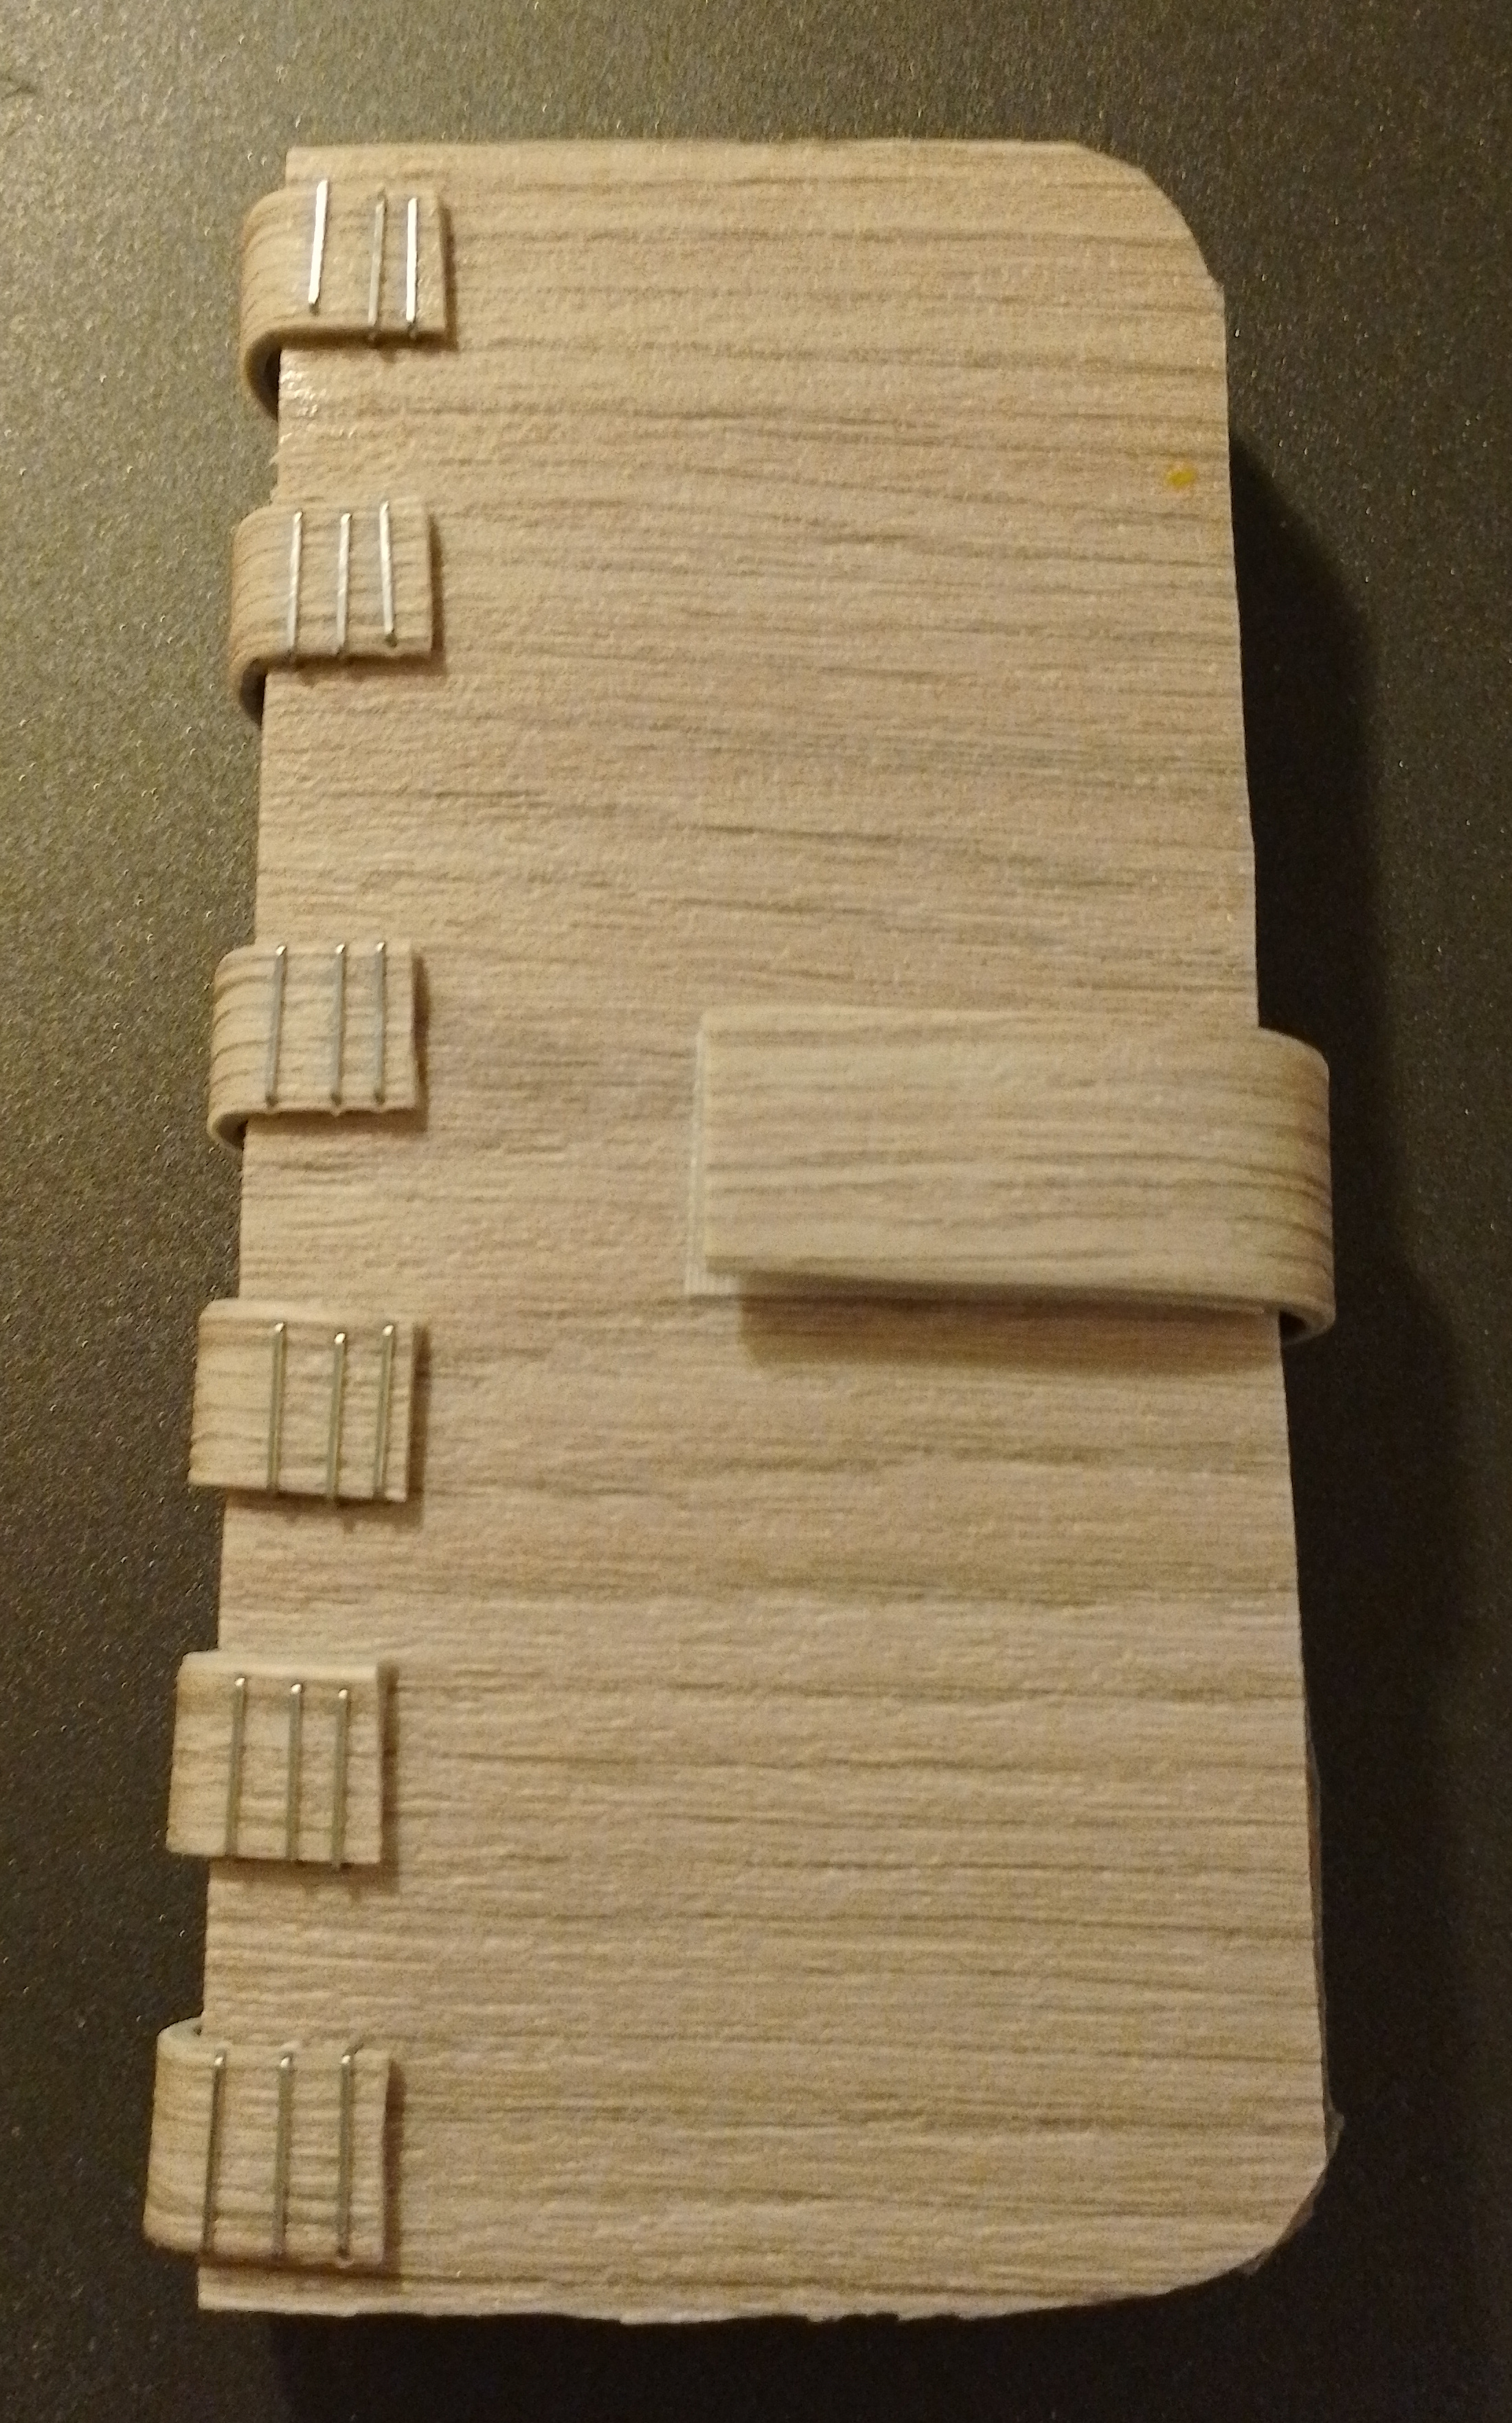
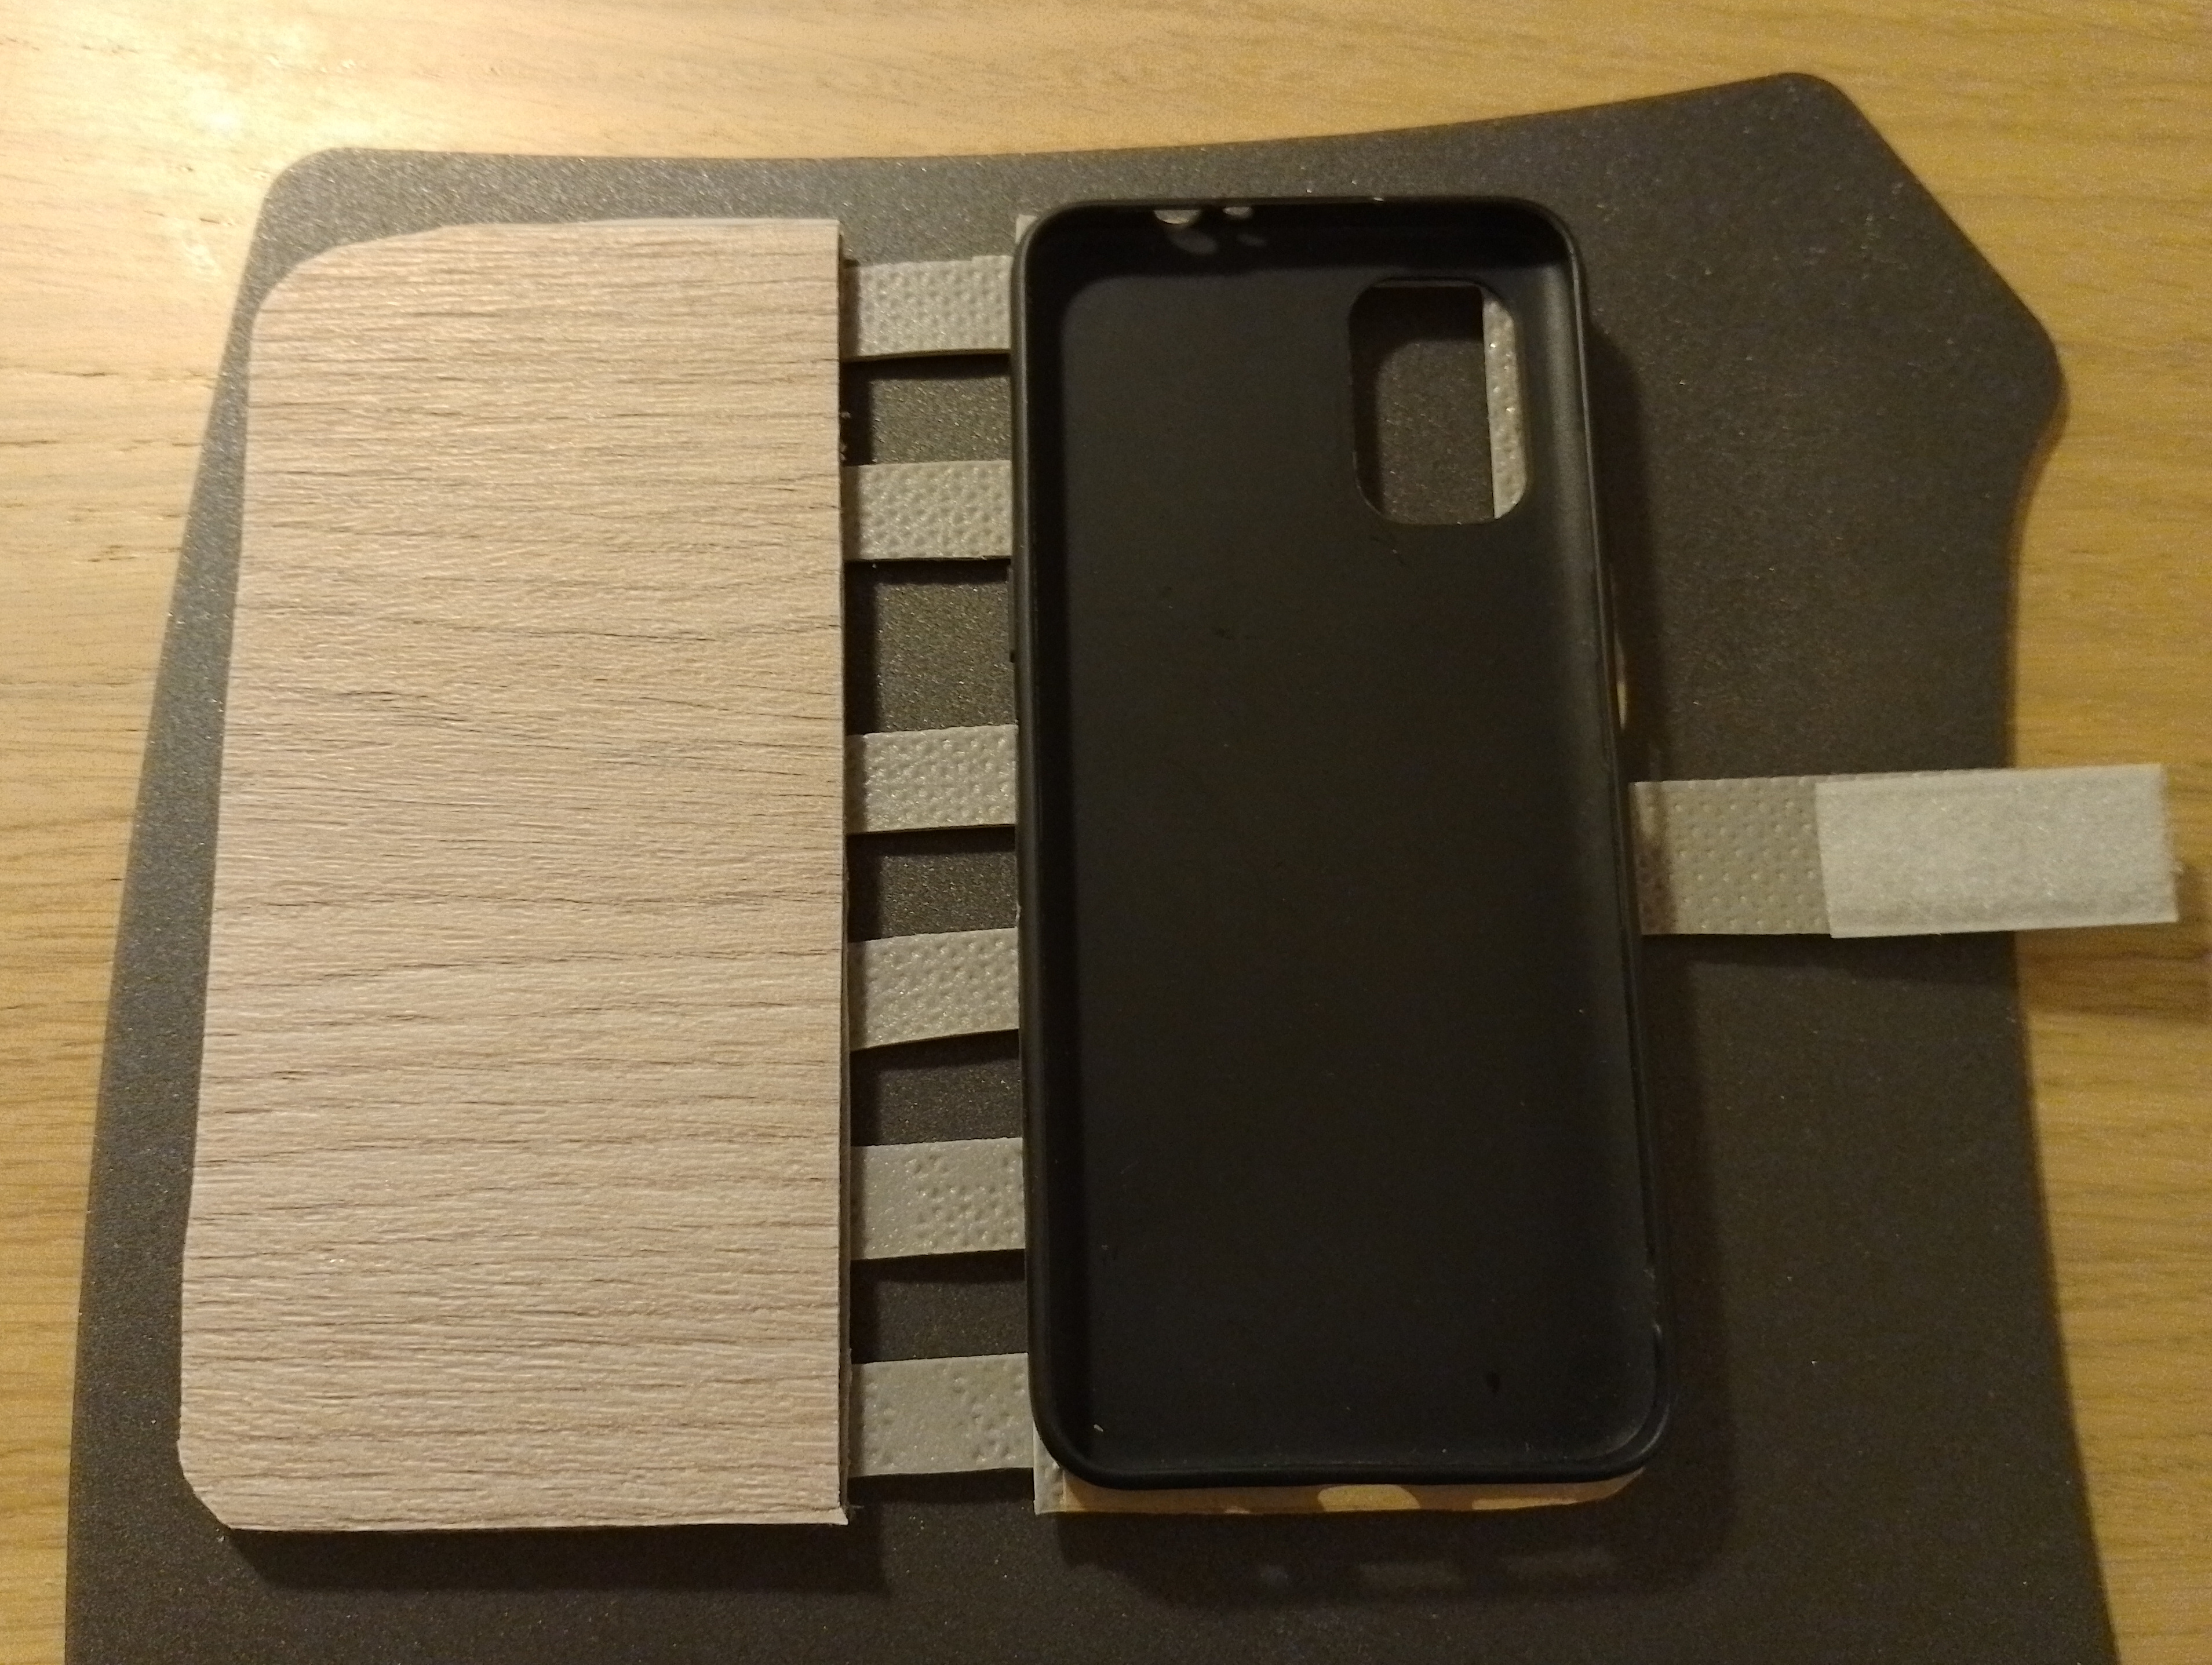
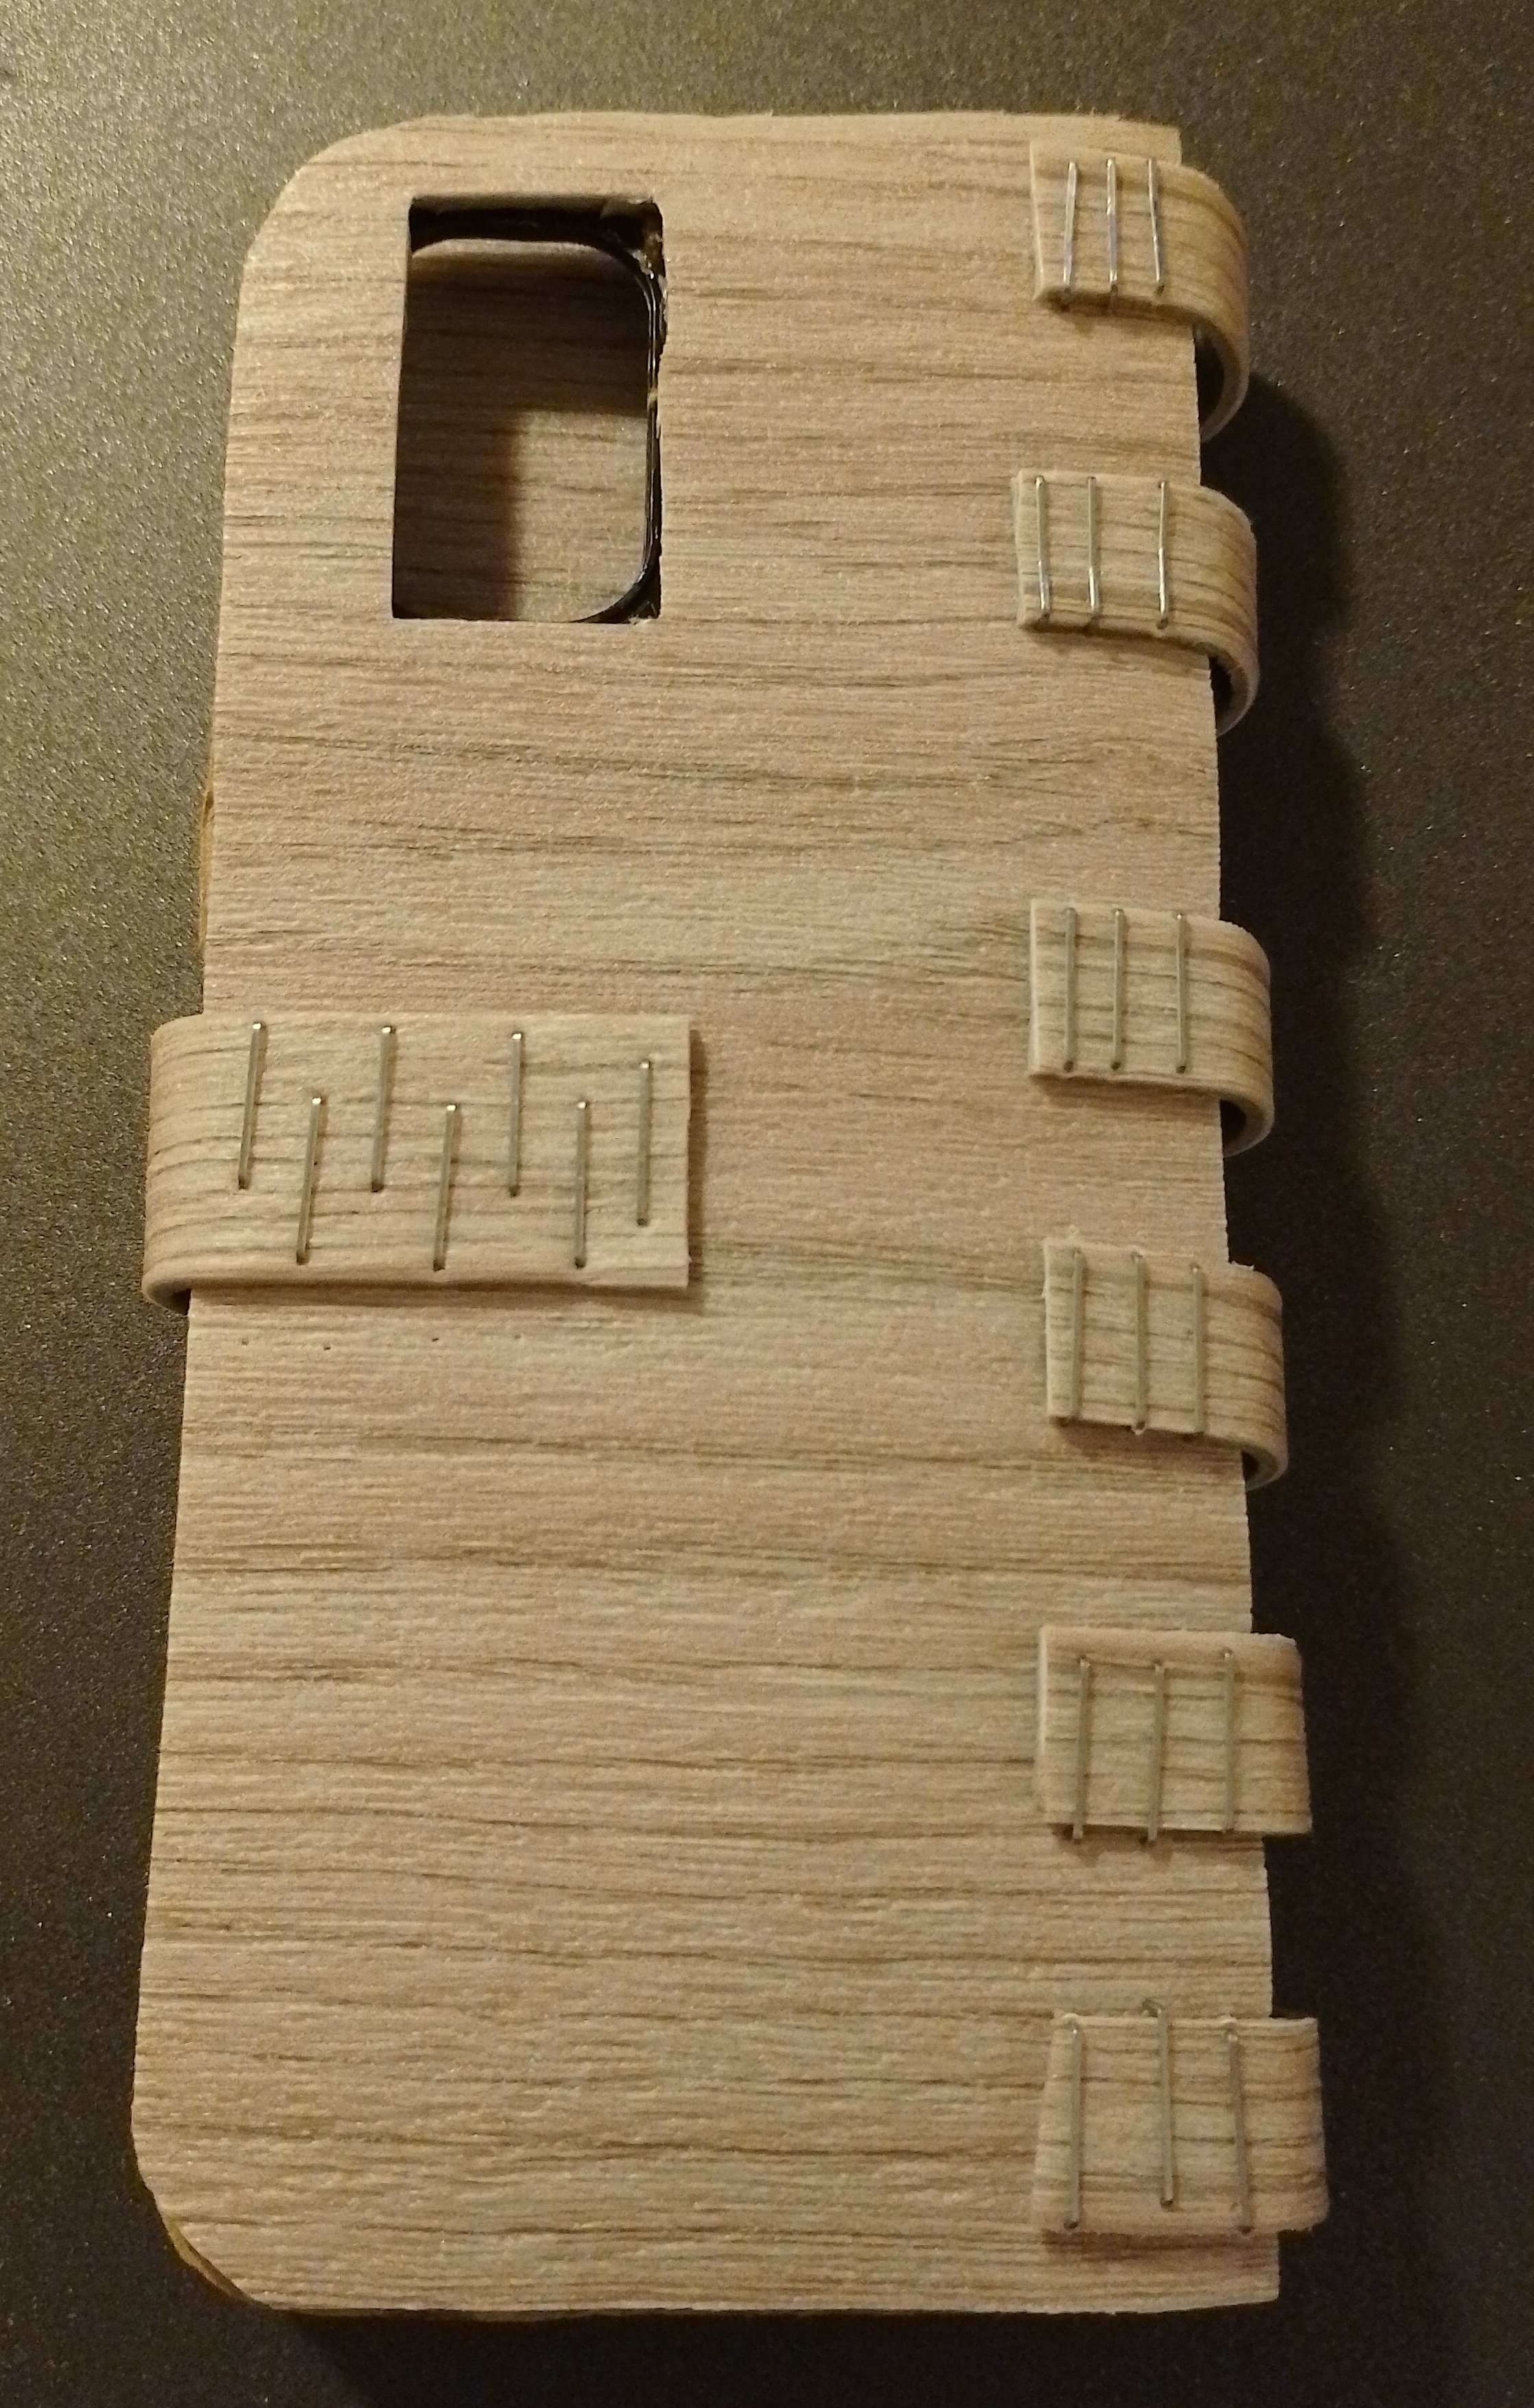
I tried to make a phone "wallet" case. I used the inside of my old one (what you press your phone into), cardboard from a an old box and some leftover vinyl flooring. I originally wanted to glue everything but ended up stapling some bits. these pics where hastily made and don't do the thing justice. Let's see how well this holds up (I seldom have it in my pocket so that helps).

5
21
Solar Theremin With Arduino (www.instructables.com)
submitted 3 weeks ago by poVoq@slrpnk.net to c/diy@slrpnk.net
6
80
submitted 4 weeks ago by hamtron5000@slrpnk.net to c/diy@slrpnk.net

hi all. i live in western Colorado, in the desert part rather than the mountain part, and it's HOT. and sunny. my house has a long west-facing wall full of large windows, and we've been keeping the blinds shut all day but it's not helping. i'm thinking of installing awnings.

my questions are, a) have you done this or something similar, and if so what did you do, b) are there awnings available that are NOT just plastic? and c) any other hints, tips, or ideas would be welcome.

7
29
submitted 1 month ago by MelodiousFunk@slrpnk.net to c/diy@slrpnk.net

My bathroom tub fixtures have seen better days. Pretty sure they're original to the house (~60 years). We have fairly hard water, and the prior owners were not the best at maintenance so no clue how long these slow leaks have been going on. But the shower handle is stuck hard on the valve, and the bath spigot is crumbling away and similarly fused in place. Hot and cold come off easily.

Does anyone have any tips for freeing the one handle and spigot? I've tried light tapping with a mallet on the back of the handle to no avail. The spigot seems bound pretty tightly, to the point where I'm concerned about damaging the pipe if I apply too much torque.

As for the leaks, I haven't decided if I'm going to just replace the valves, or try fiddling with/replacing the packing nuts. This is my first time messing with plumbing, but either way seems straightforward enough after watching a few videos.

Any tips/tricks/suggestions appreciated, thanks!

8
27
Drawer Slides (lemm.ee)
submitted 1 month ago by Brutticus@lemm.ee to c/diy@slrpnk.net

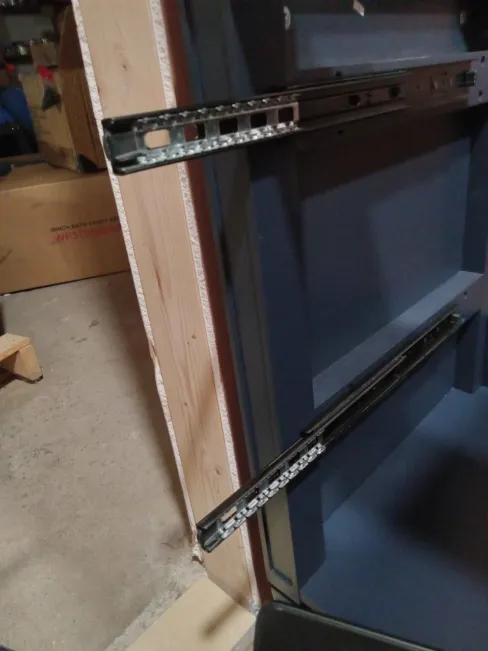
I bought this cheap bathroom vanity off of amazon and we assembled it. We cannot get the drawers on. These silver things get in the way. When I get them mounted in a way I feel is correct they prevent the drawer from closing all the way. I haven't dealt with anything like this.

Does anyone know how to mount it? I'm sure once its done Ill feel like an idiot for how simple it is.

Thanks

9
5
submitted 1 month ago by amanda@aggregatet.org to c/diy@slrpnk.net

We have an electric cargo bike that’s served us really well. We bought it second hand at a pretty affordable price because the battery was shot. Fortunately we found a great local repair shop that could replace it, and we now have a pretty great bike.

Unfortunately the drum breaks on the front wheels are getting really bad after about 12 years or so, and our local bike repair shop is at a loss for finding new parts. The front wheels are mounted on an axle that’s controlled by hyudralics (which gives the bike a great turning radius), so they’re a bit special. The original hubs are Sturmey Archer XL-SD’s, but they don’t seem to be available anywhere.

Does anyone have suggestions for what I can use instead? Has anyone hacked their way to one-side-mounted front wheels for a three-wheeled bike, eg by using a through axle?

10
38

I recently started trying to learn bookbinding (and because I never liked practicing by making something I didn't need, I'm starting with a 266-page solarpunk TTRPG rulebook I helped make).
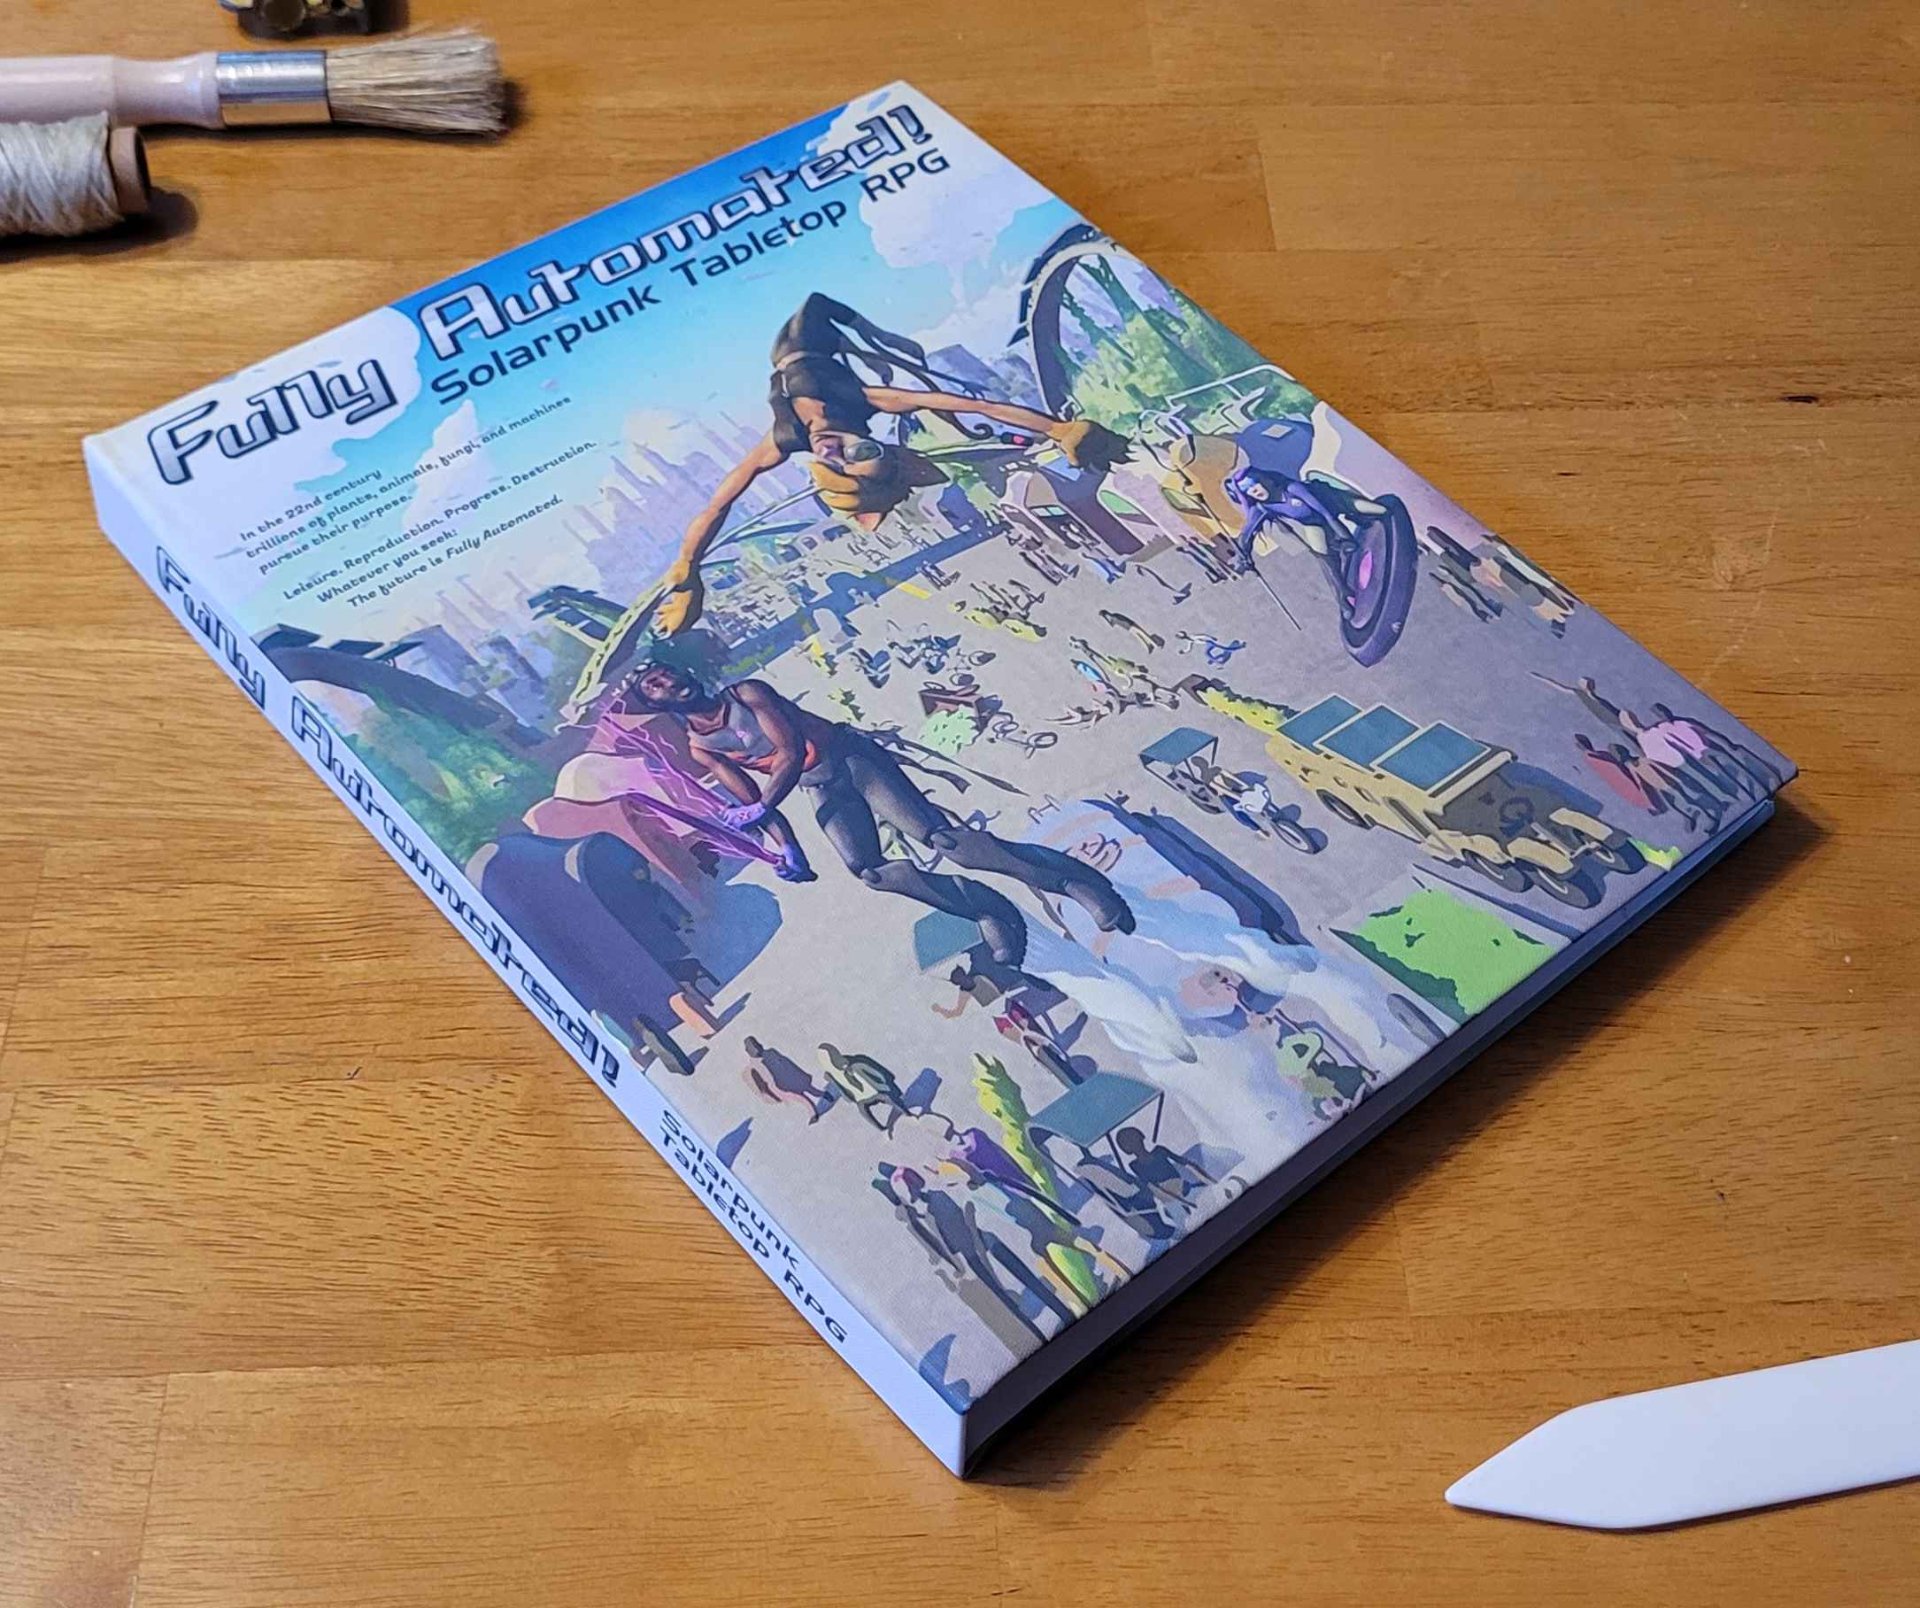
I joined the Fully Automated discord a while back, mostly because I was looking for a place to talk worldbuilding in the genre. I read the lore/setting part of the rulebook and it actually helped me start thinking bigger than I had been around ways the world could be better. If there's a solarpunk timeline from our modern day, through conflicts and crumbles and collapses, gradually rebuilding towards something eutopian, then they're much closer to that high-tech, post-scarcity end-state than the solarpunk stuff I normally write. But there's something kind of fascinating about that world, and it makes for a great place to tell stories.

I offered them the use of the art I'd already made, and then I got involved in writing and editing the lore, including contributing a couple sections around rural areas and reuse, which, true to form, they expanded into something bigger than I had come up with on my own.

Since the game is an open source, all-volunteers thing, we didn't do a print run, just released a series of PDFs. But I have free access to a printer that can do 11x17, a plotter printer that can print on canvas, my SO's unused bookbinding kit, and enough patience to learn to bind at least a few copies, so I decided to give it a try.

The first step was rearranging the pages into signatures. These are small pamphlets of folded papers that get sewn and glued together to form the book. This turned out to be way easier to do than I expected, as there are several online tools for interposing PDFs. I found and really like this one: https://momijizukamori.github.io/bookbinder-js/

This allowed me to take the regular letter-sized (8.5"x11") PDF and rearrange it into signatures of four or five 11"x17" pages, with two pages per side. It handled reordering the pages so they work correctly once the signature is folded together and stacked with the others. We also took these interposed files and made them available on the FA! website.

Once I had the interposed version, I could print off the signatures:
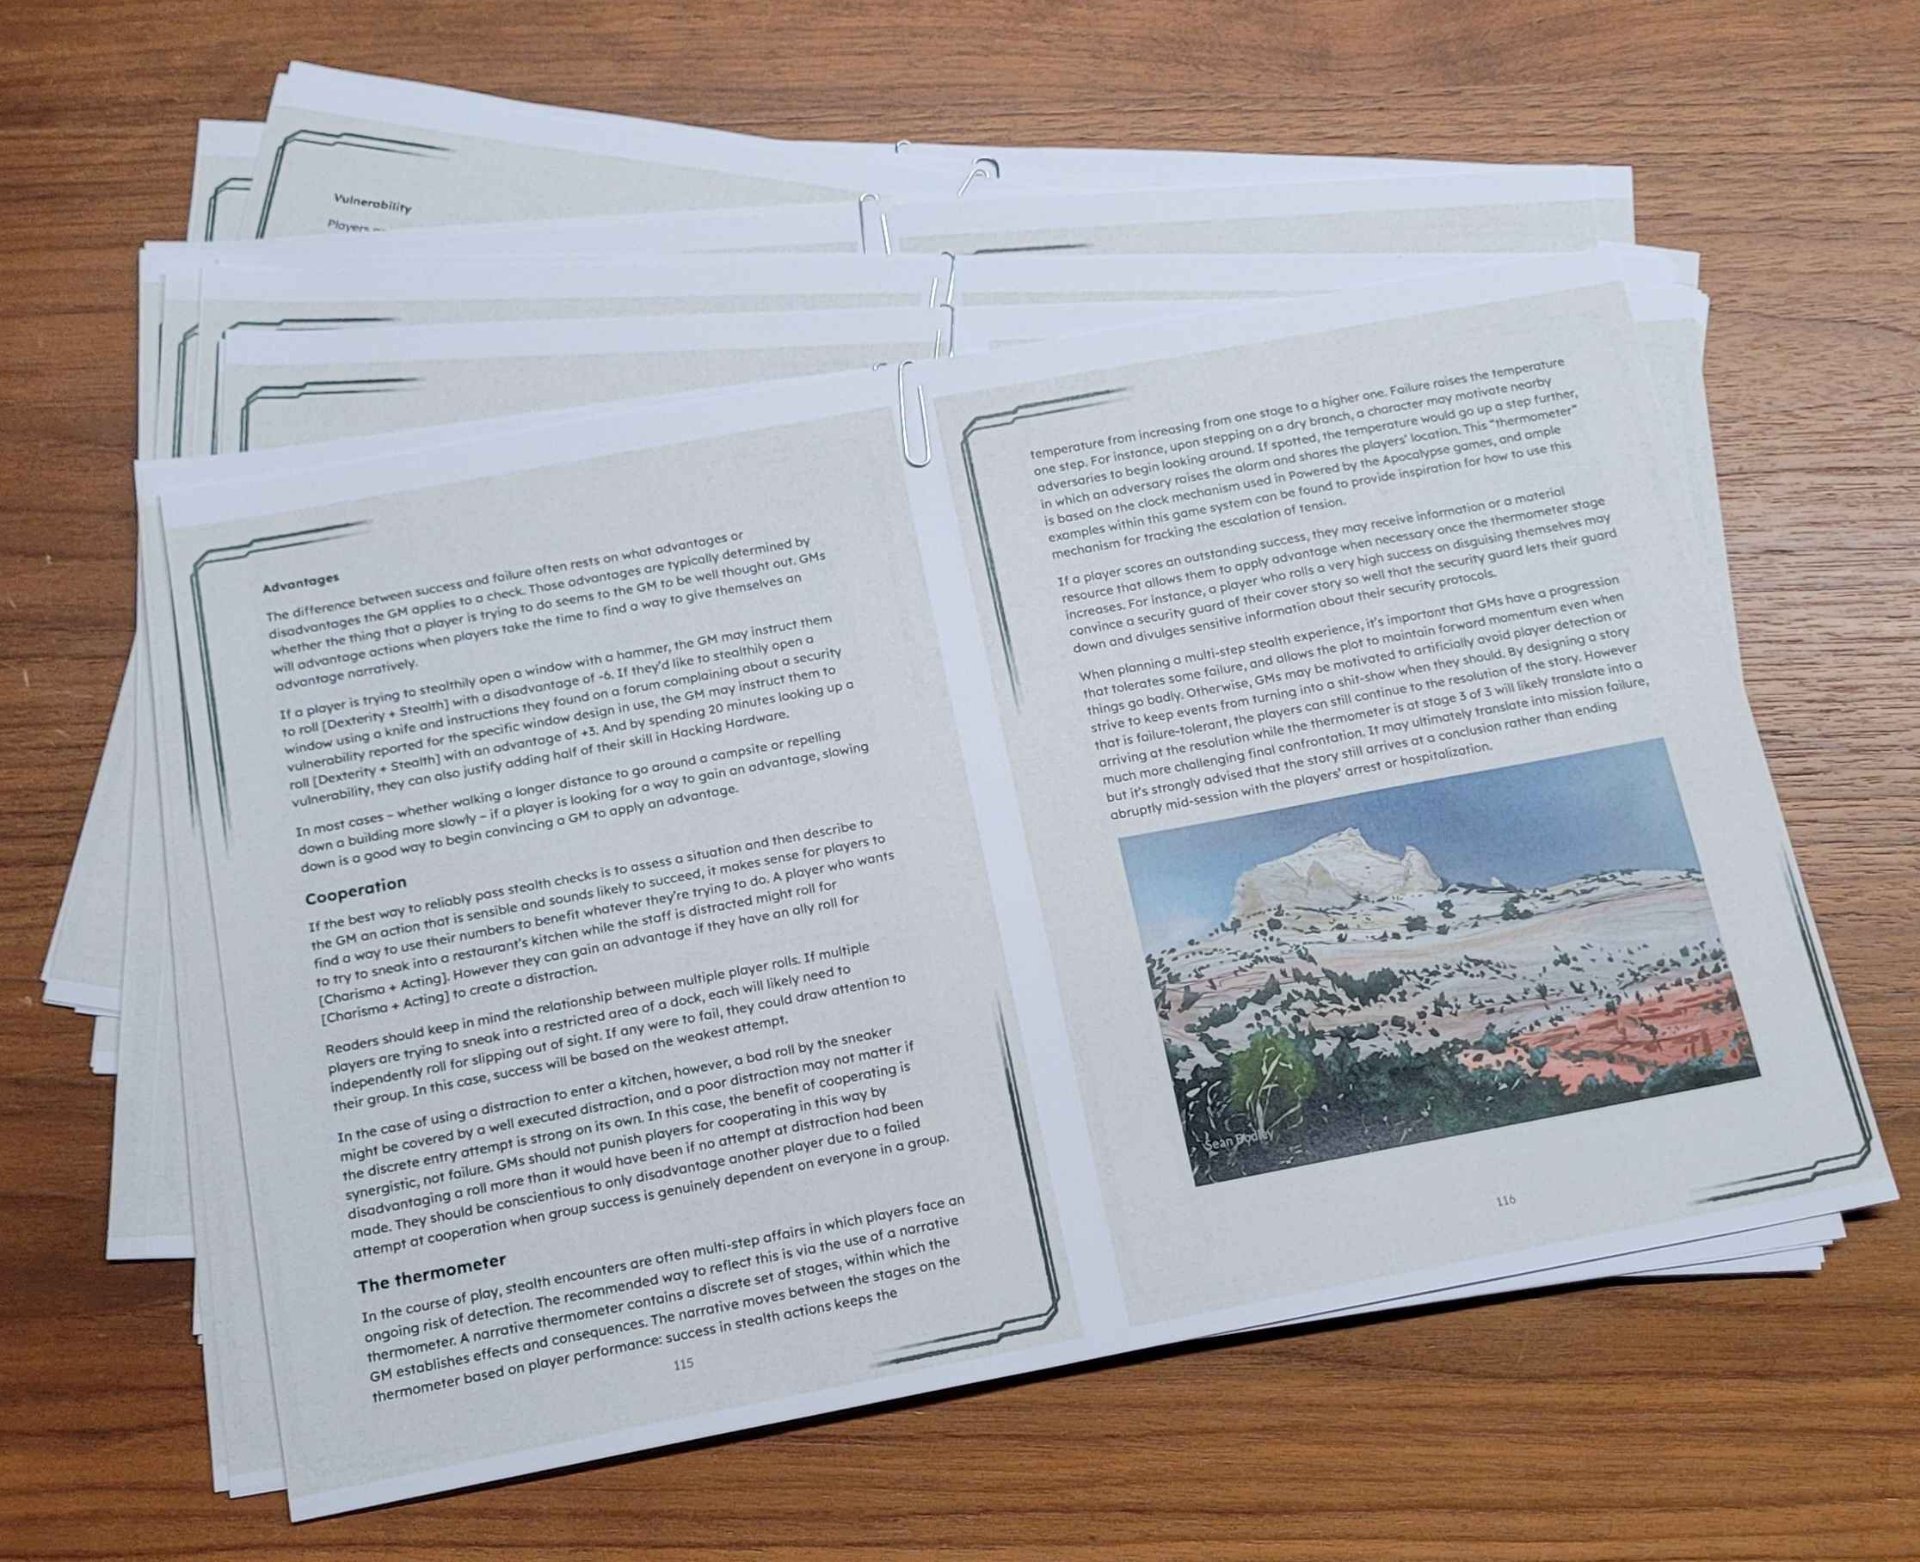
I really recommend printing each signature separately so you can paperclip them together and keep careful track of which pages are inside it. It's really, really easy to completely lose the plot on the numbering - I almost couldn't figure out how to put a four-page signature back in order once or twice, if it had been mixed with other ones I'd have been really confused. But it's easy as long as you keep them in their sets and remember which side is up (because its the only sheet/side where two page numbers show in order).
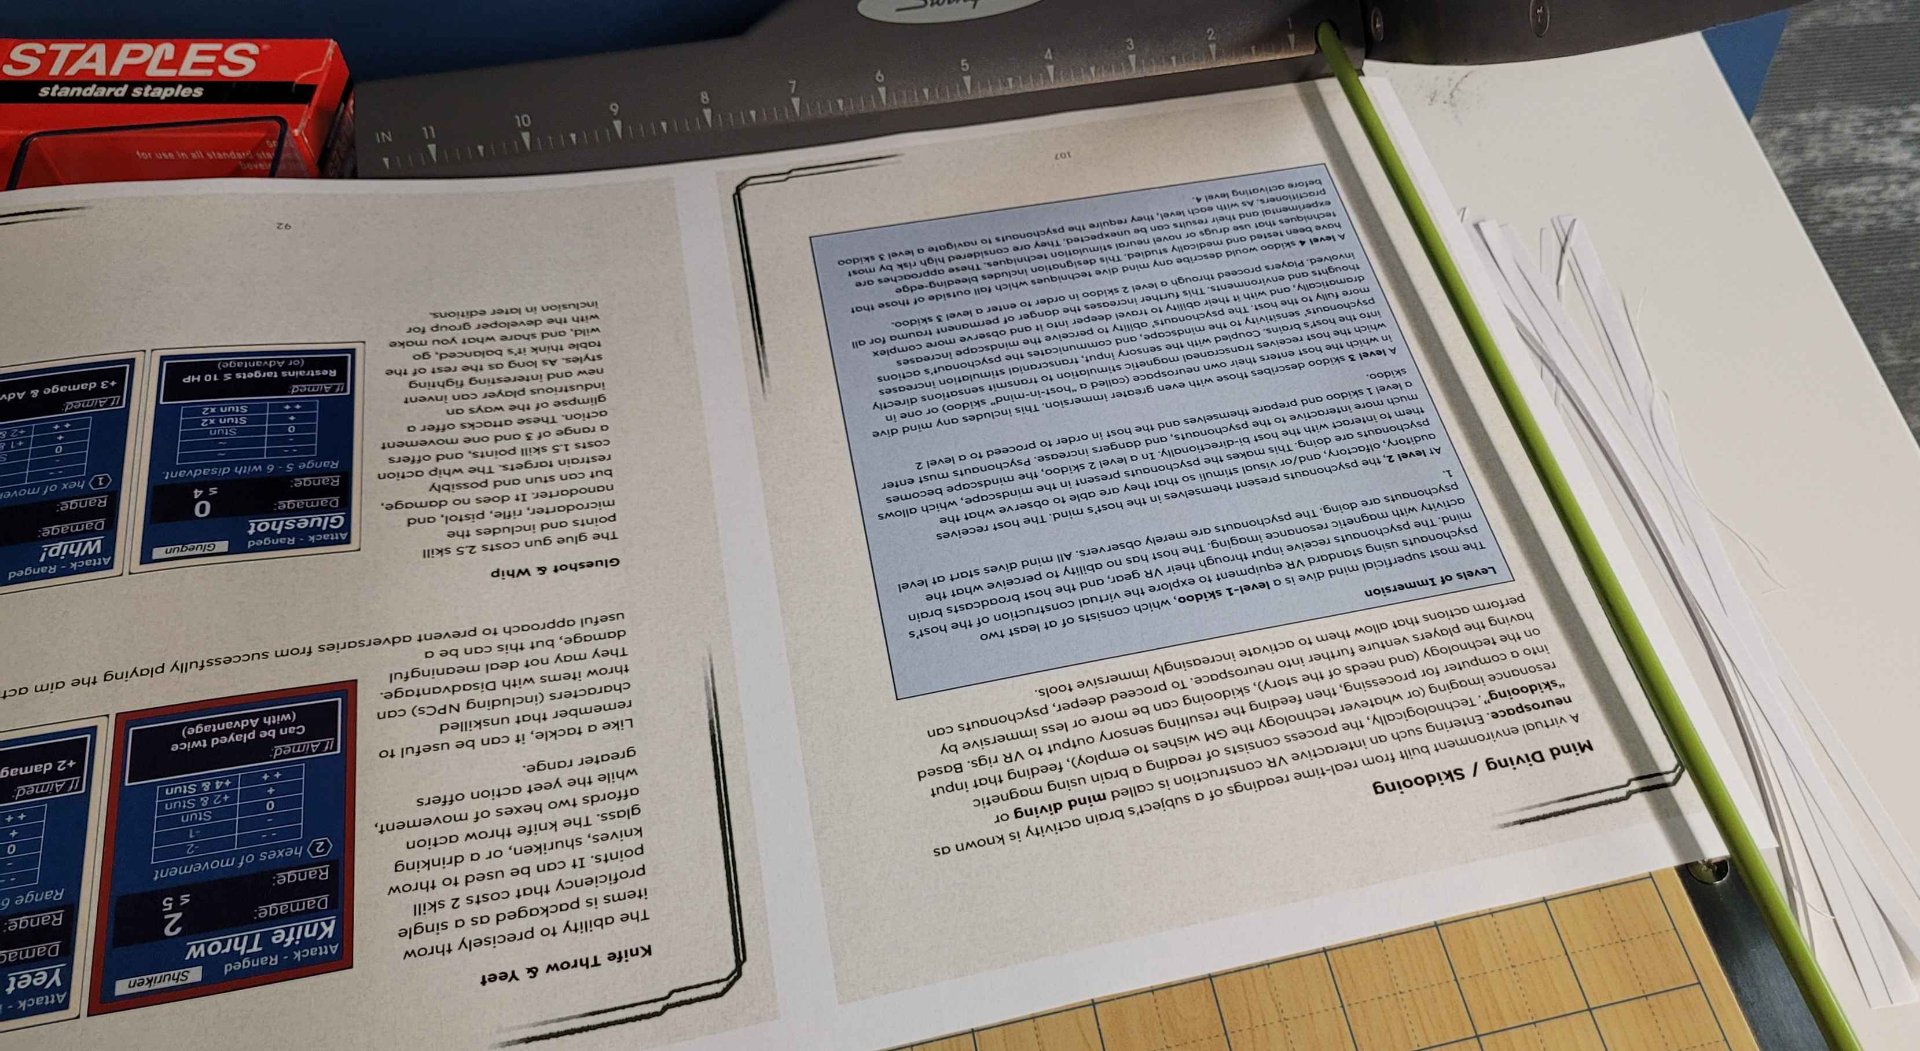
The free printer I had access to couldn't print without leaving a margin so I had to trim them by hand. I started off using a papercutter on the short sides, but eventually switched to using a straightedge and scalpel on all the sides.
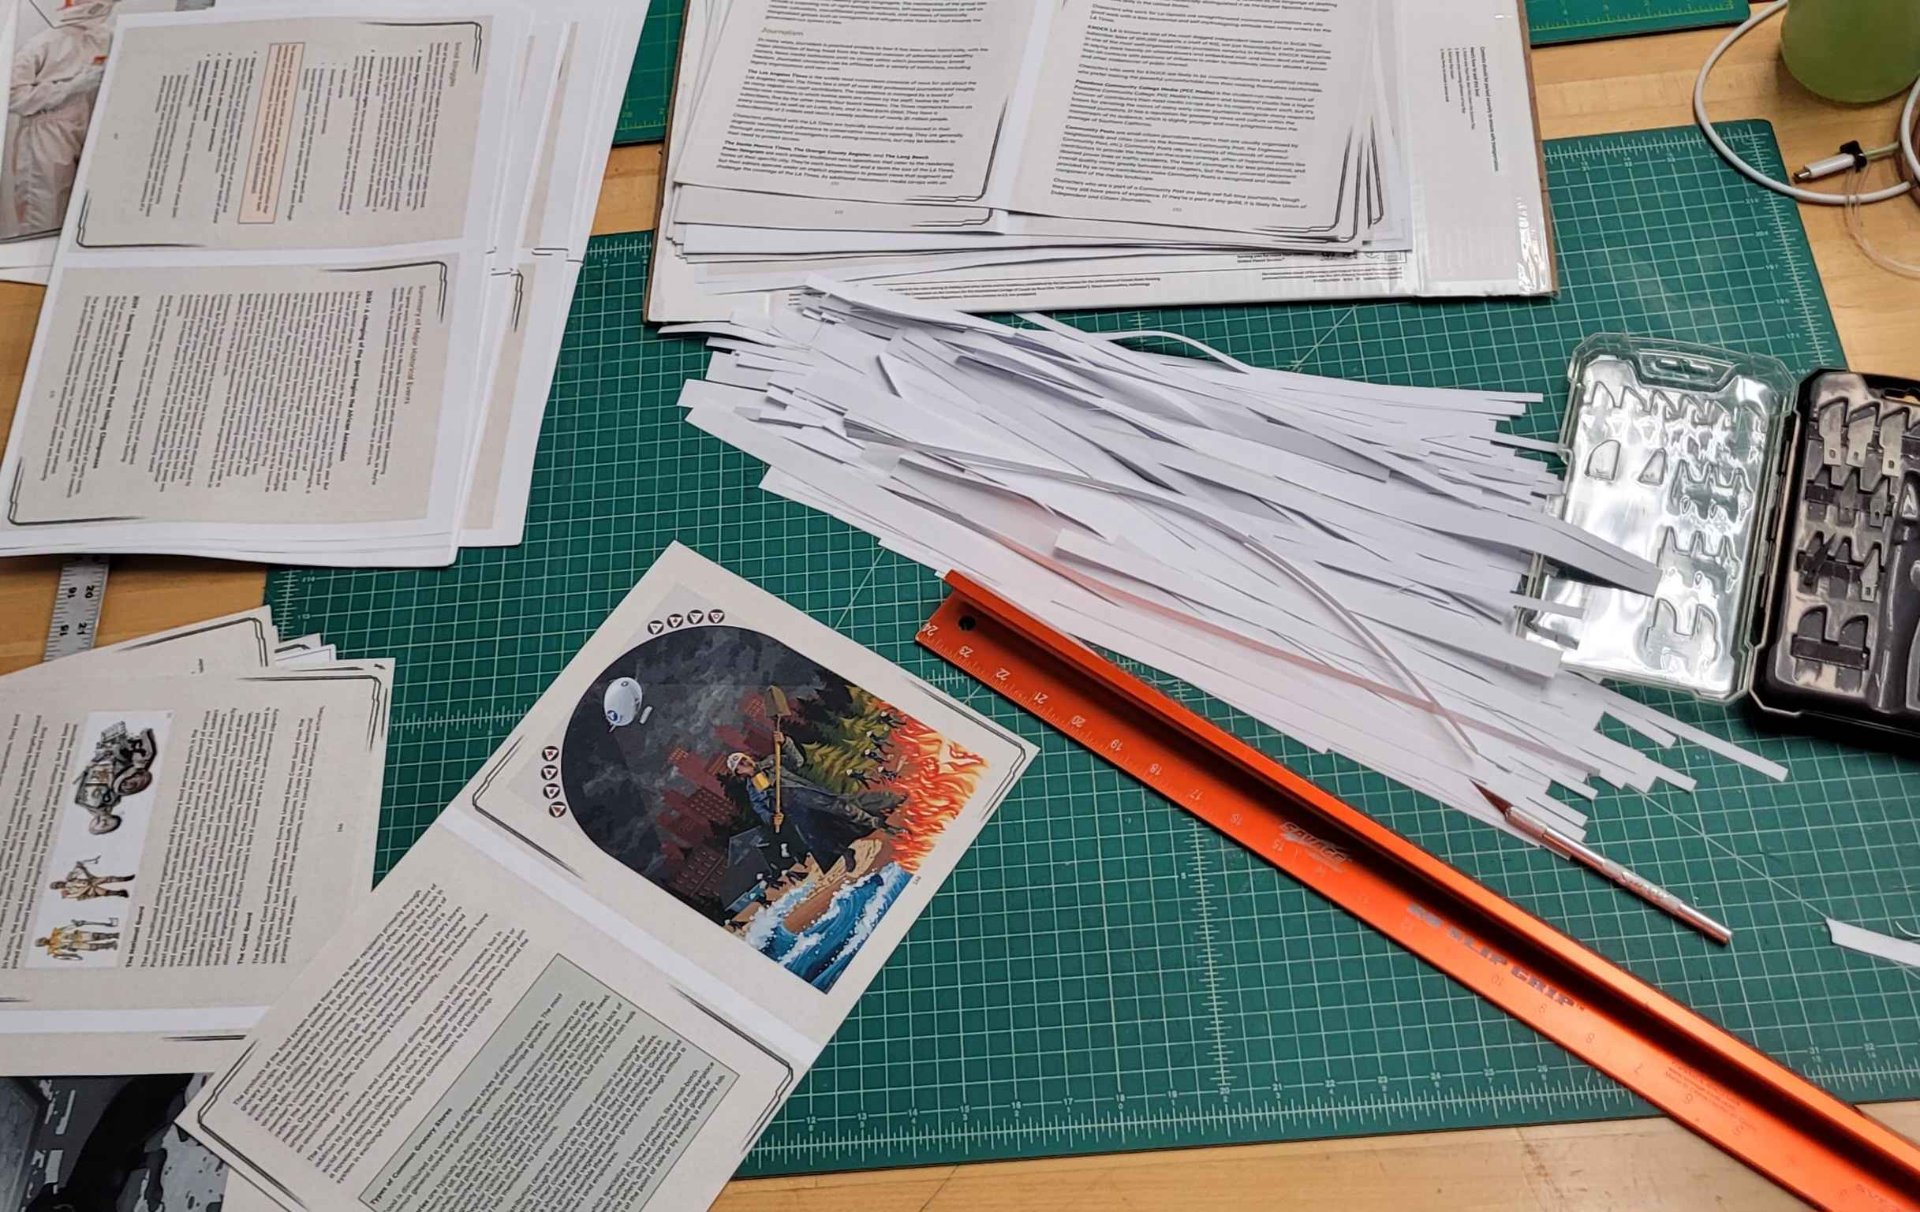
The next step was folding the signatures folio-style using a bone folder:
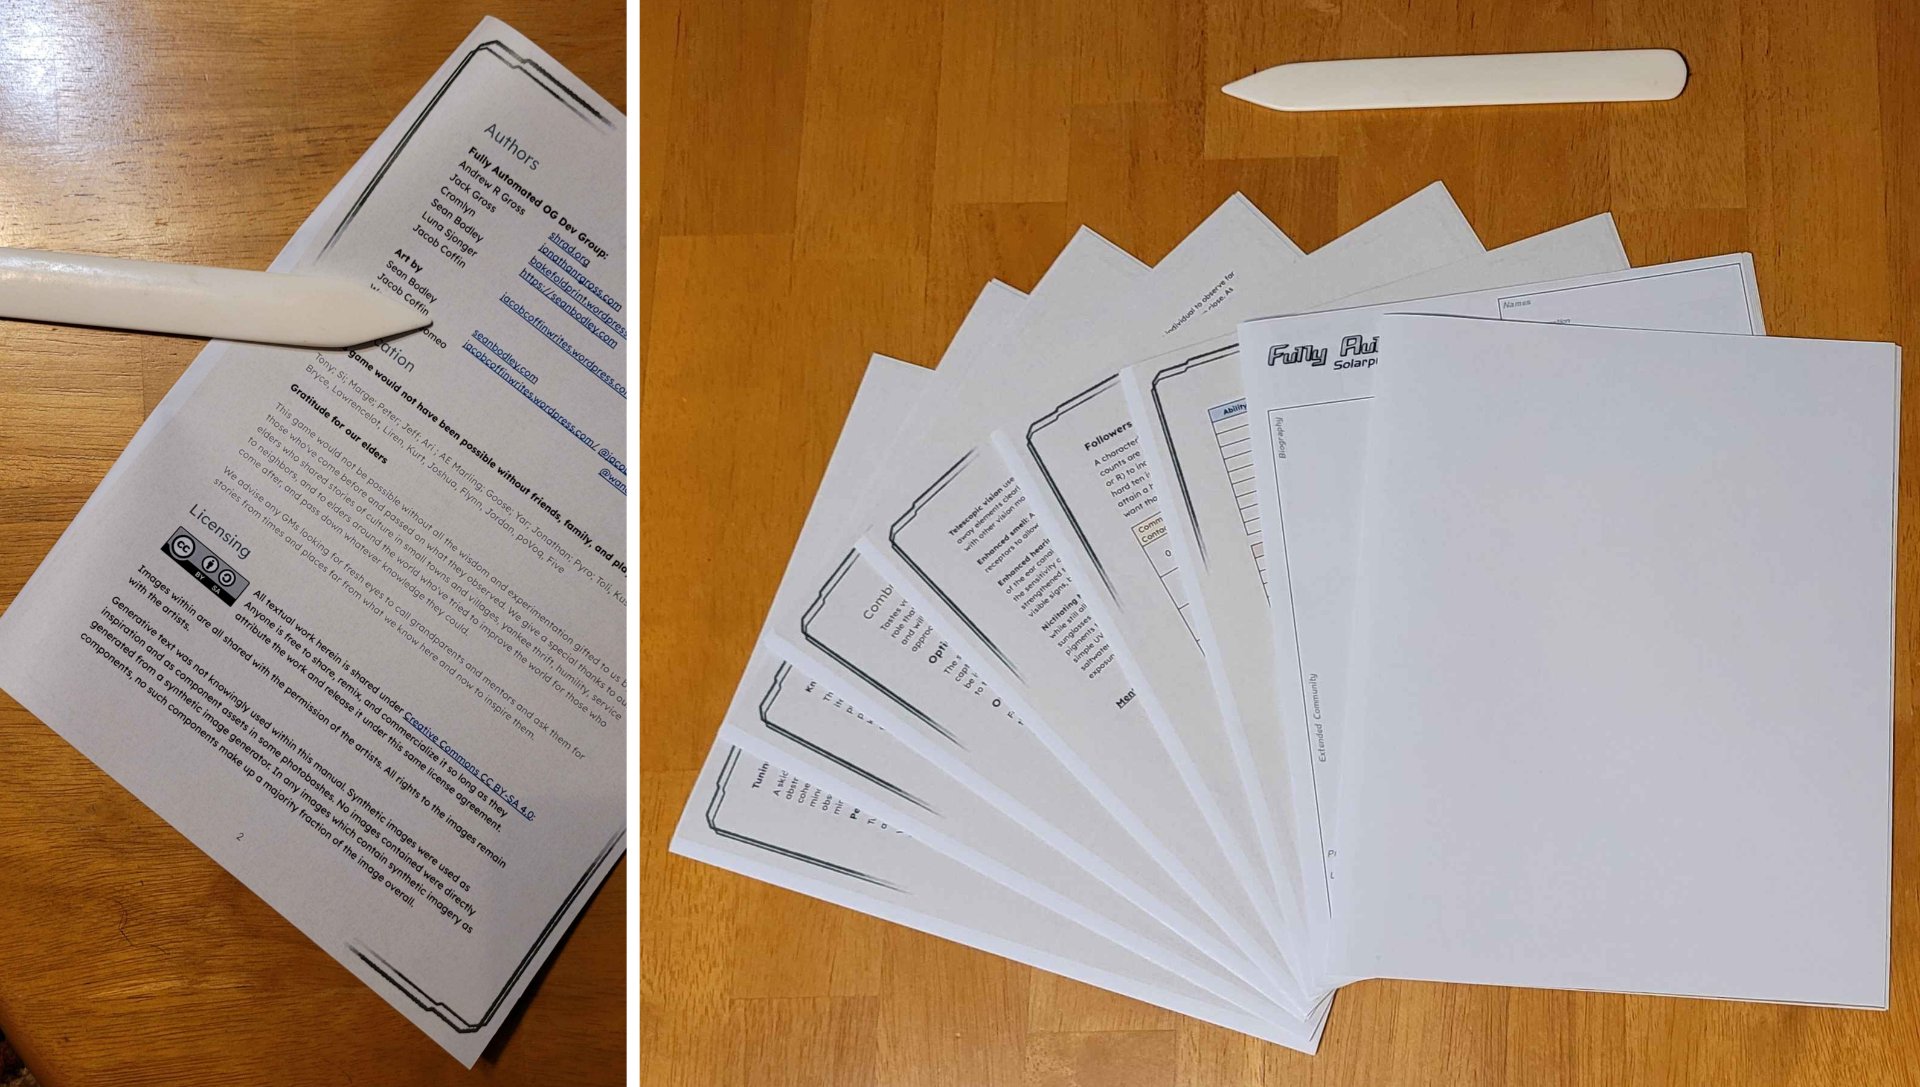
And then punching holes so I could sew them together. Some guides have you sew each signature separately, then sew those together, but the one I followed (and recommend) does them all at once.
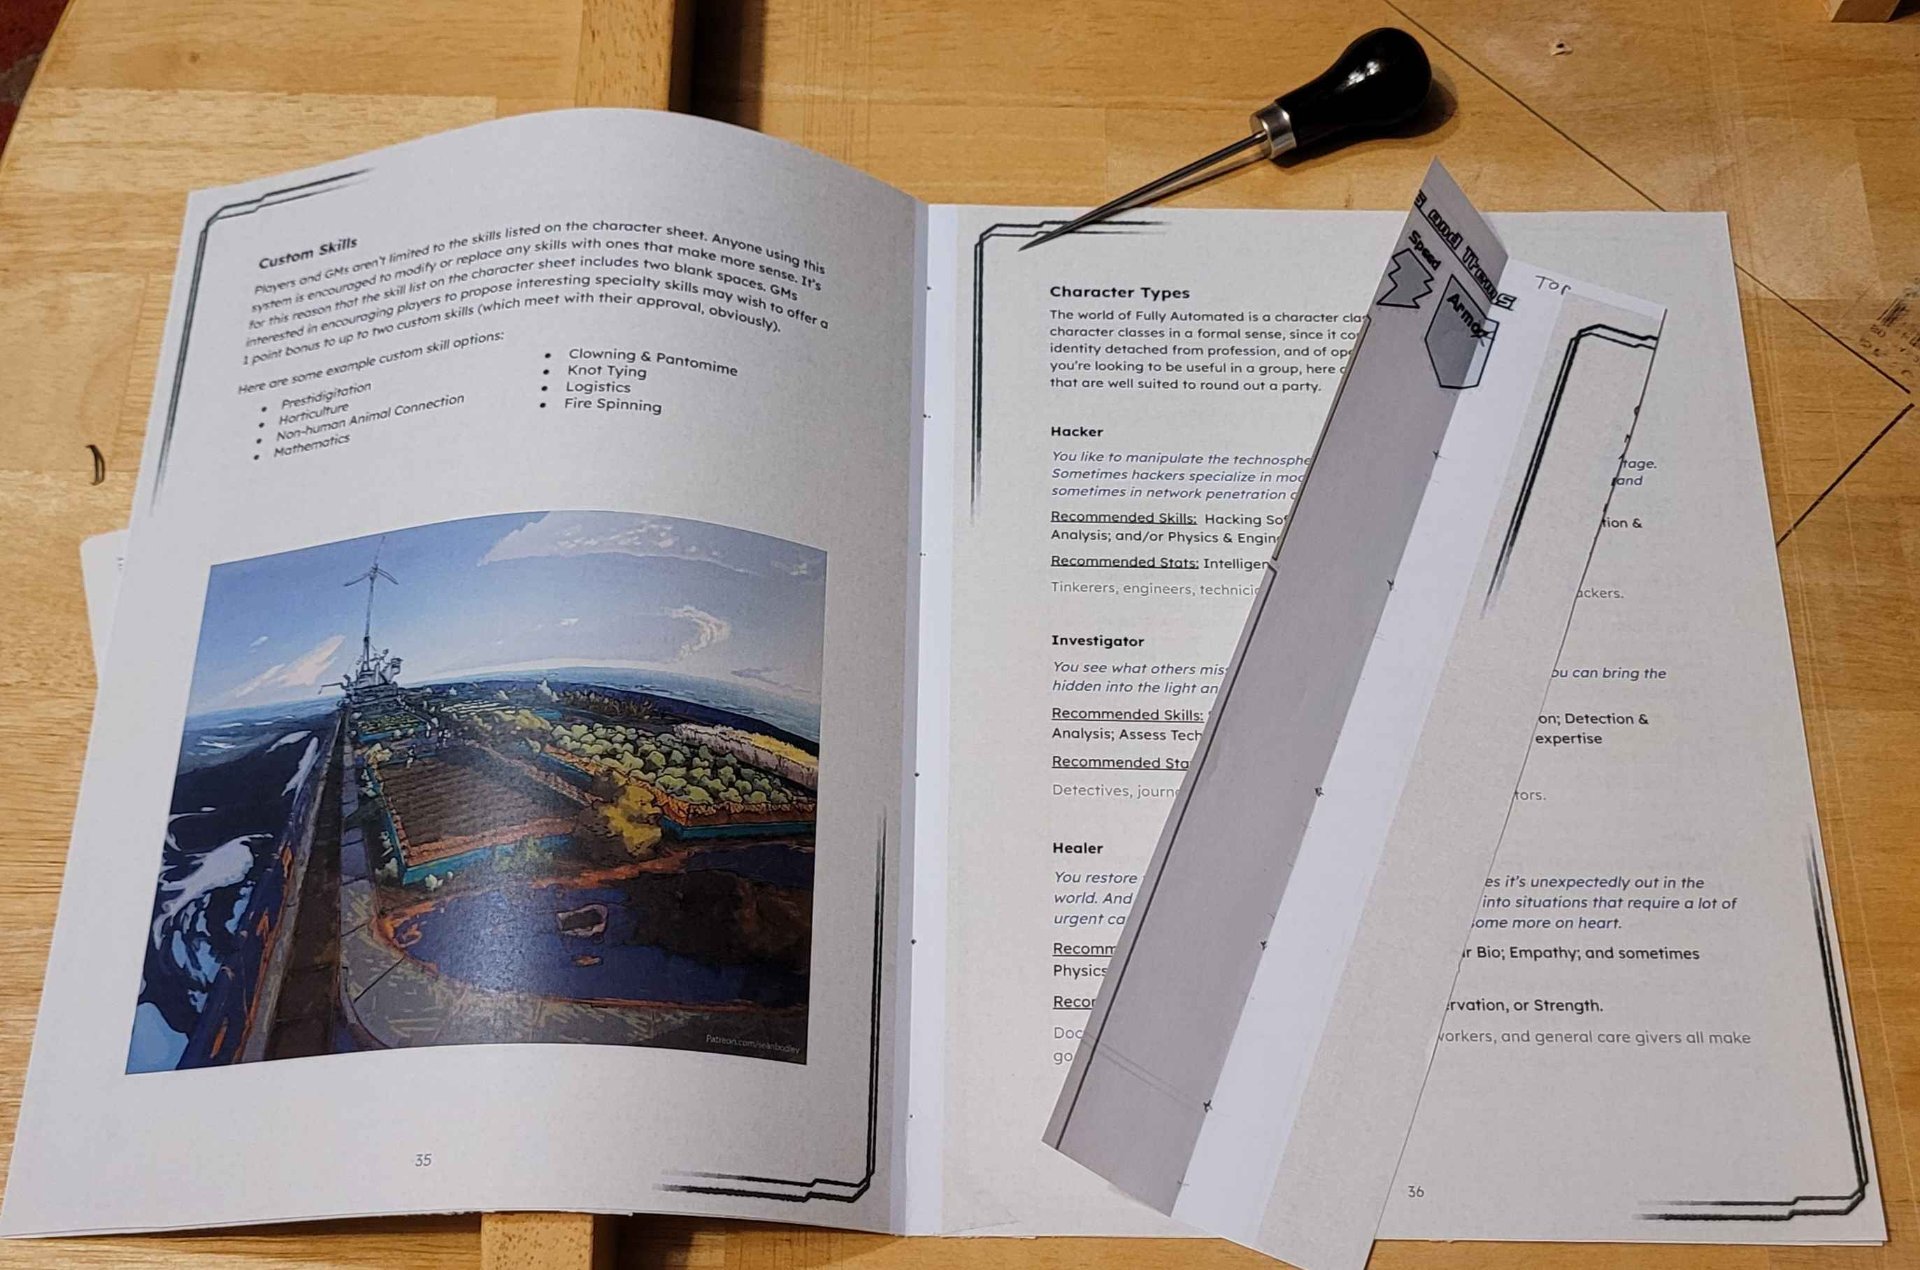
The folded piece of paper is a template marked and punched so all the holes in all the signatures line up as closely as possible.

Next, I sewed it together using the Penrose Press guide, being careful to pull the threat as tight as I could before tying it off on each signature. I really like how secure this seems to make the binding.
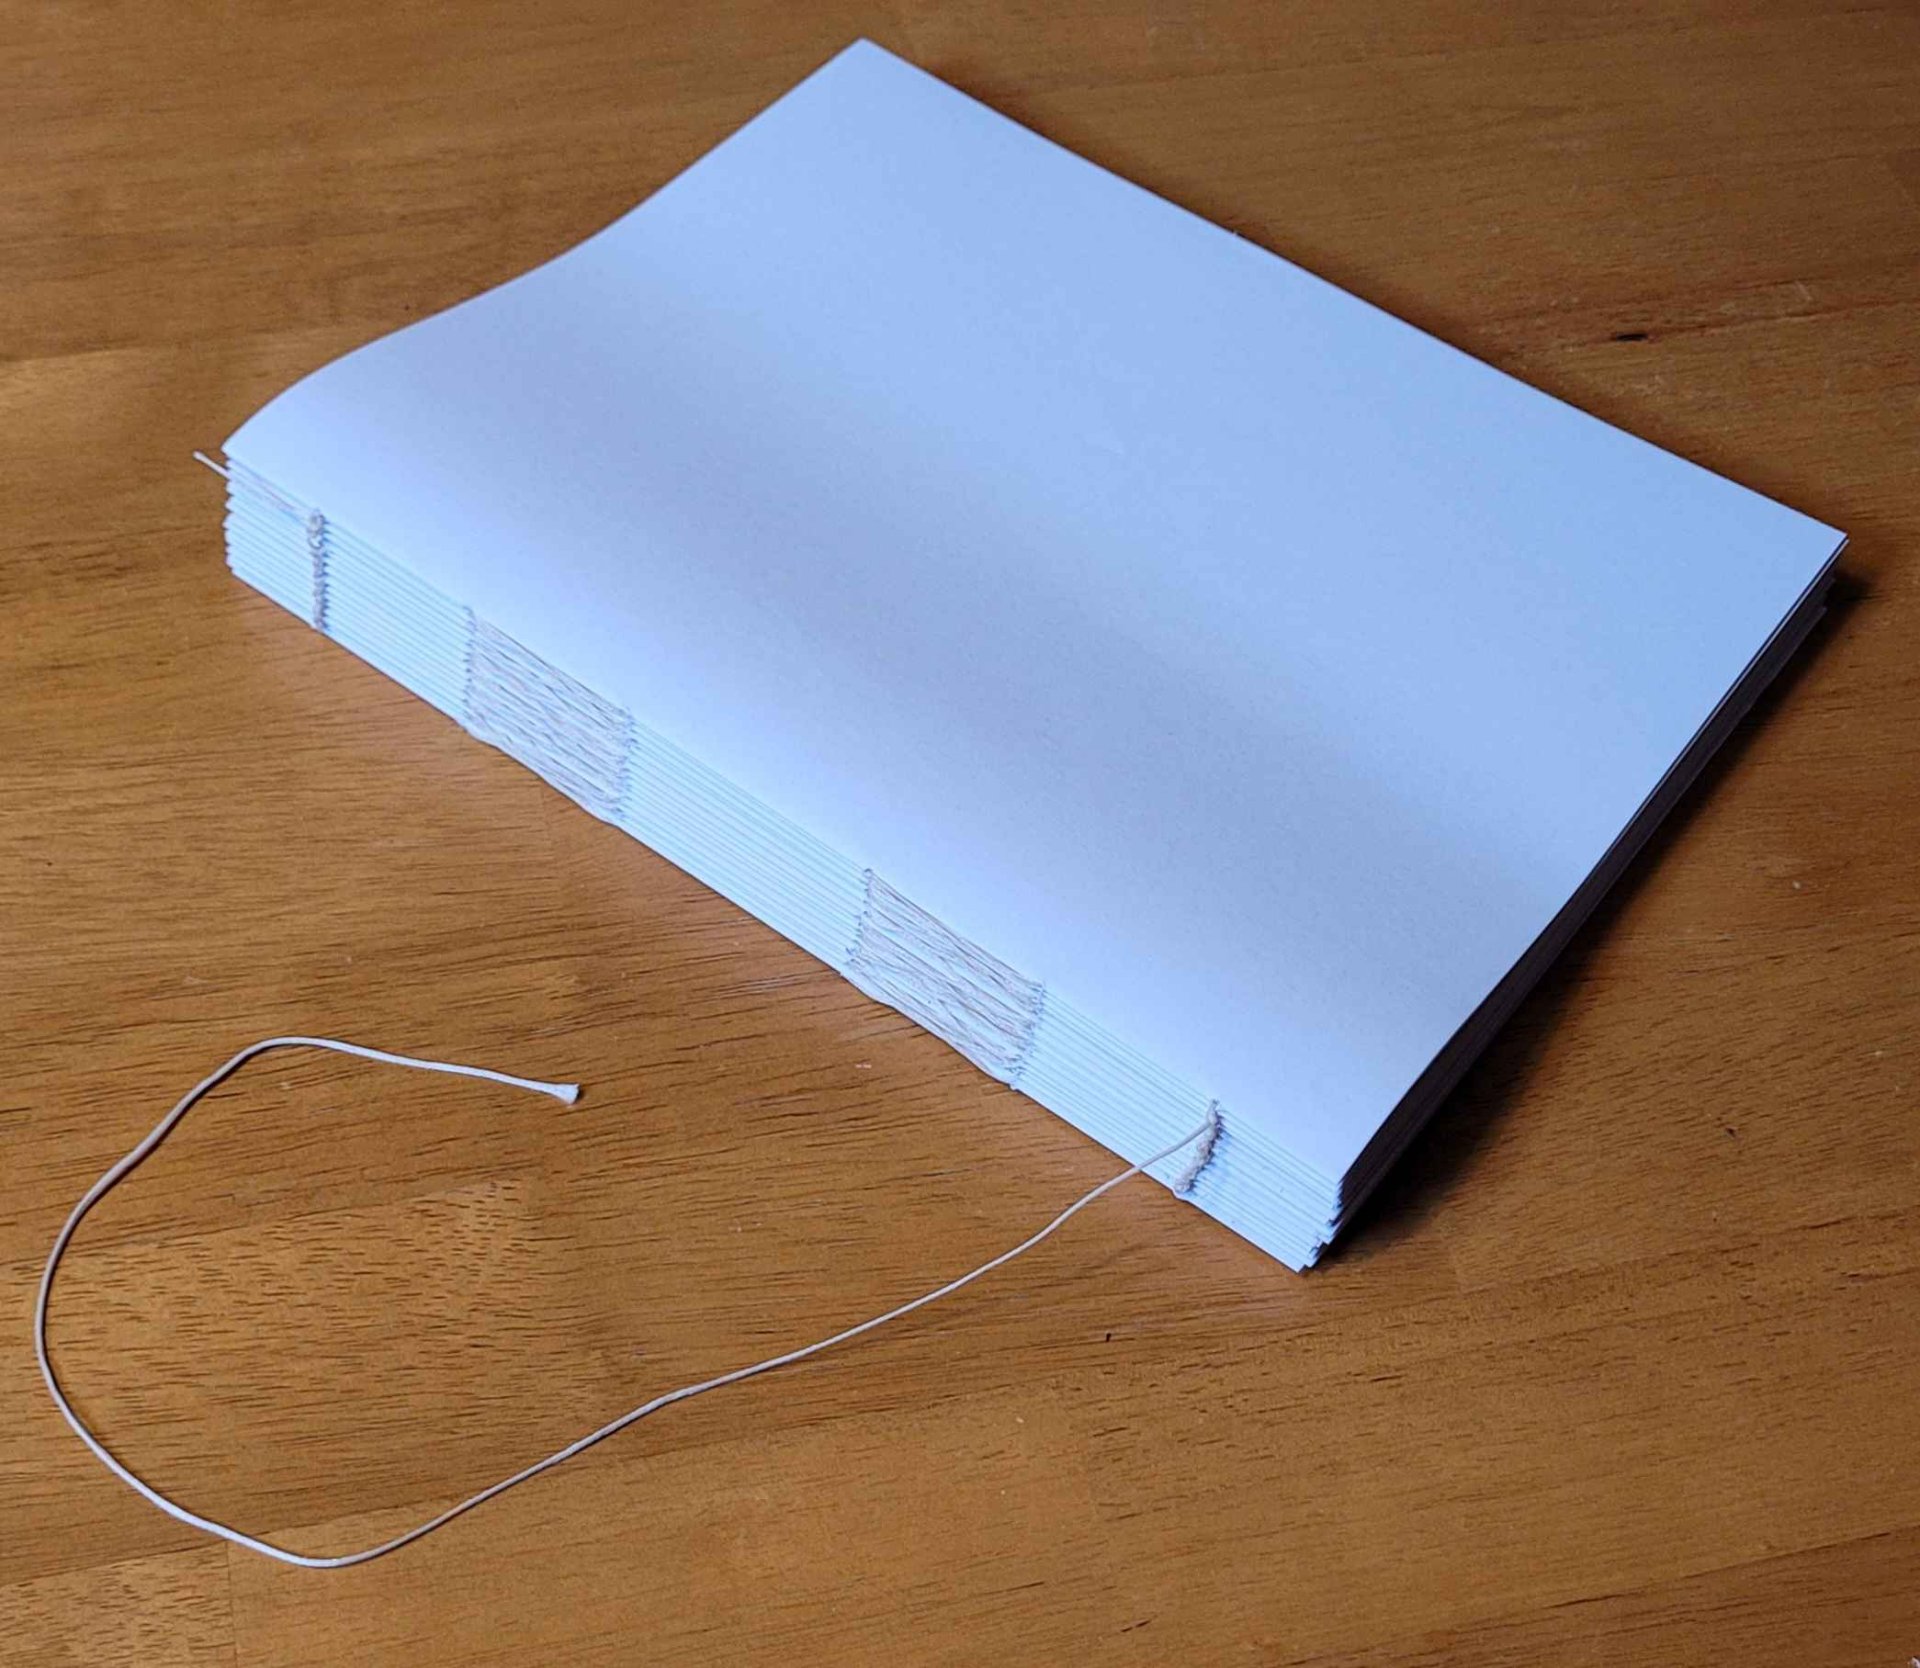
Even if you tie it tight though, it'll still have some gaps. That's were clamping and gluing it helps! The guides I followed suggested just stacking books for weight at this part, but I went ahead and built a really ugly book press with a piece of scrap particleboard, scrap 2"x4", some wax paper, and a couple deck screws. I pre-drilled the holes, wrapped the boards in the wax paper, and screwed them together so the book block could be clamped between them:
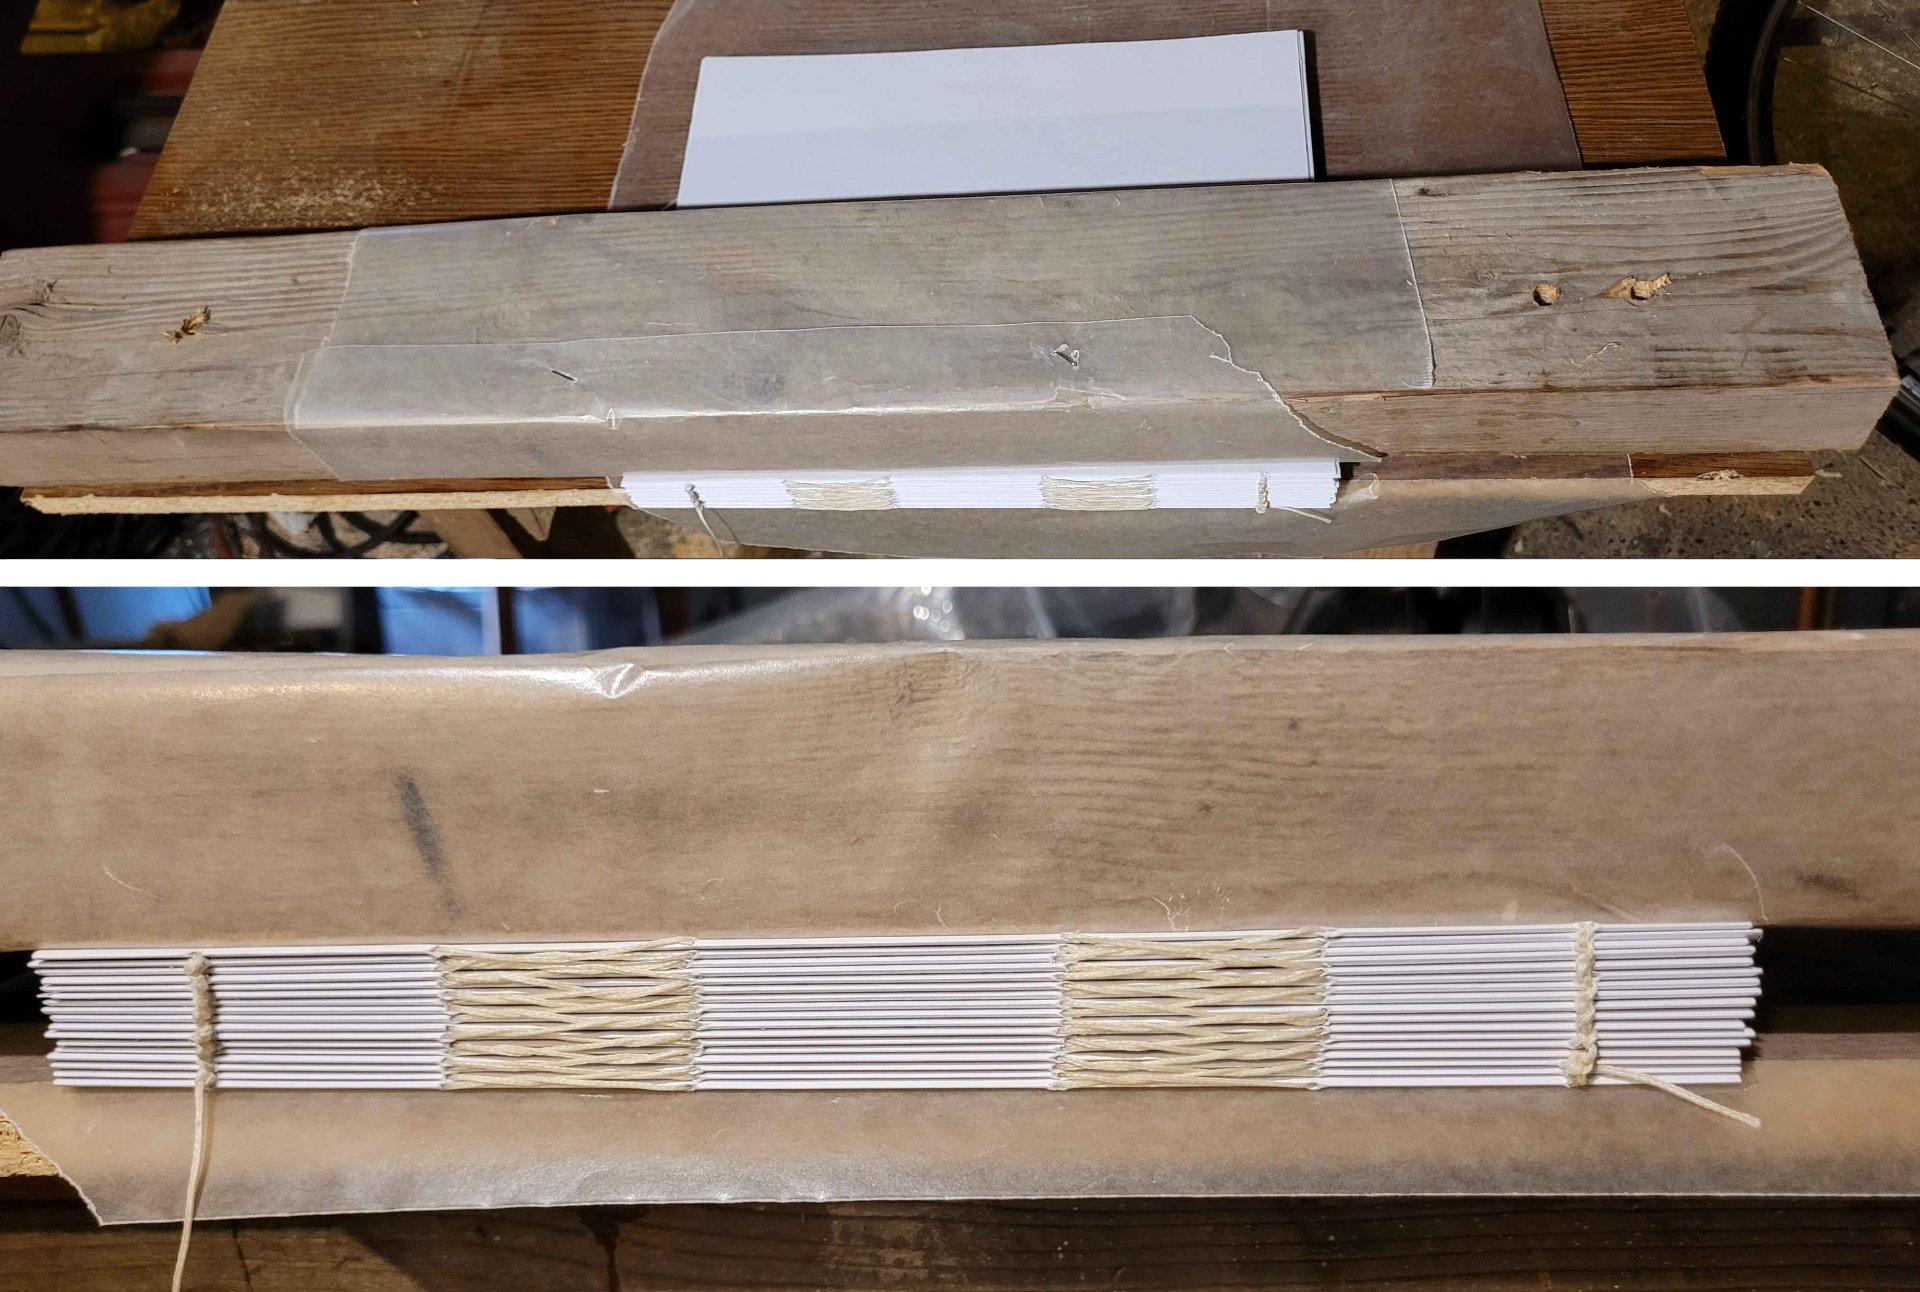
That's when scope-creep hit and I switched plans from making this first copy a softcover book to making a hardcover.
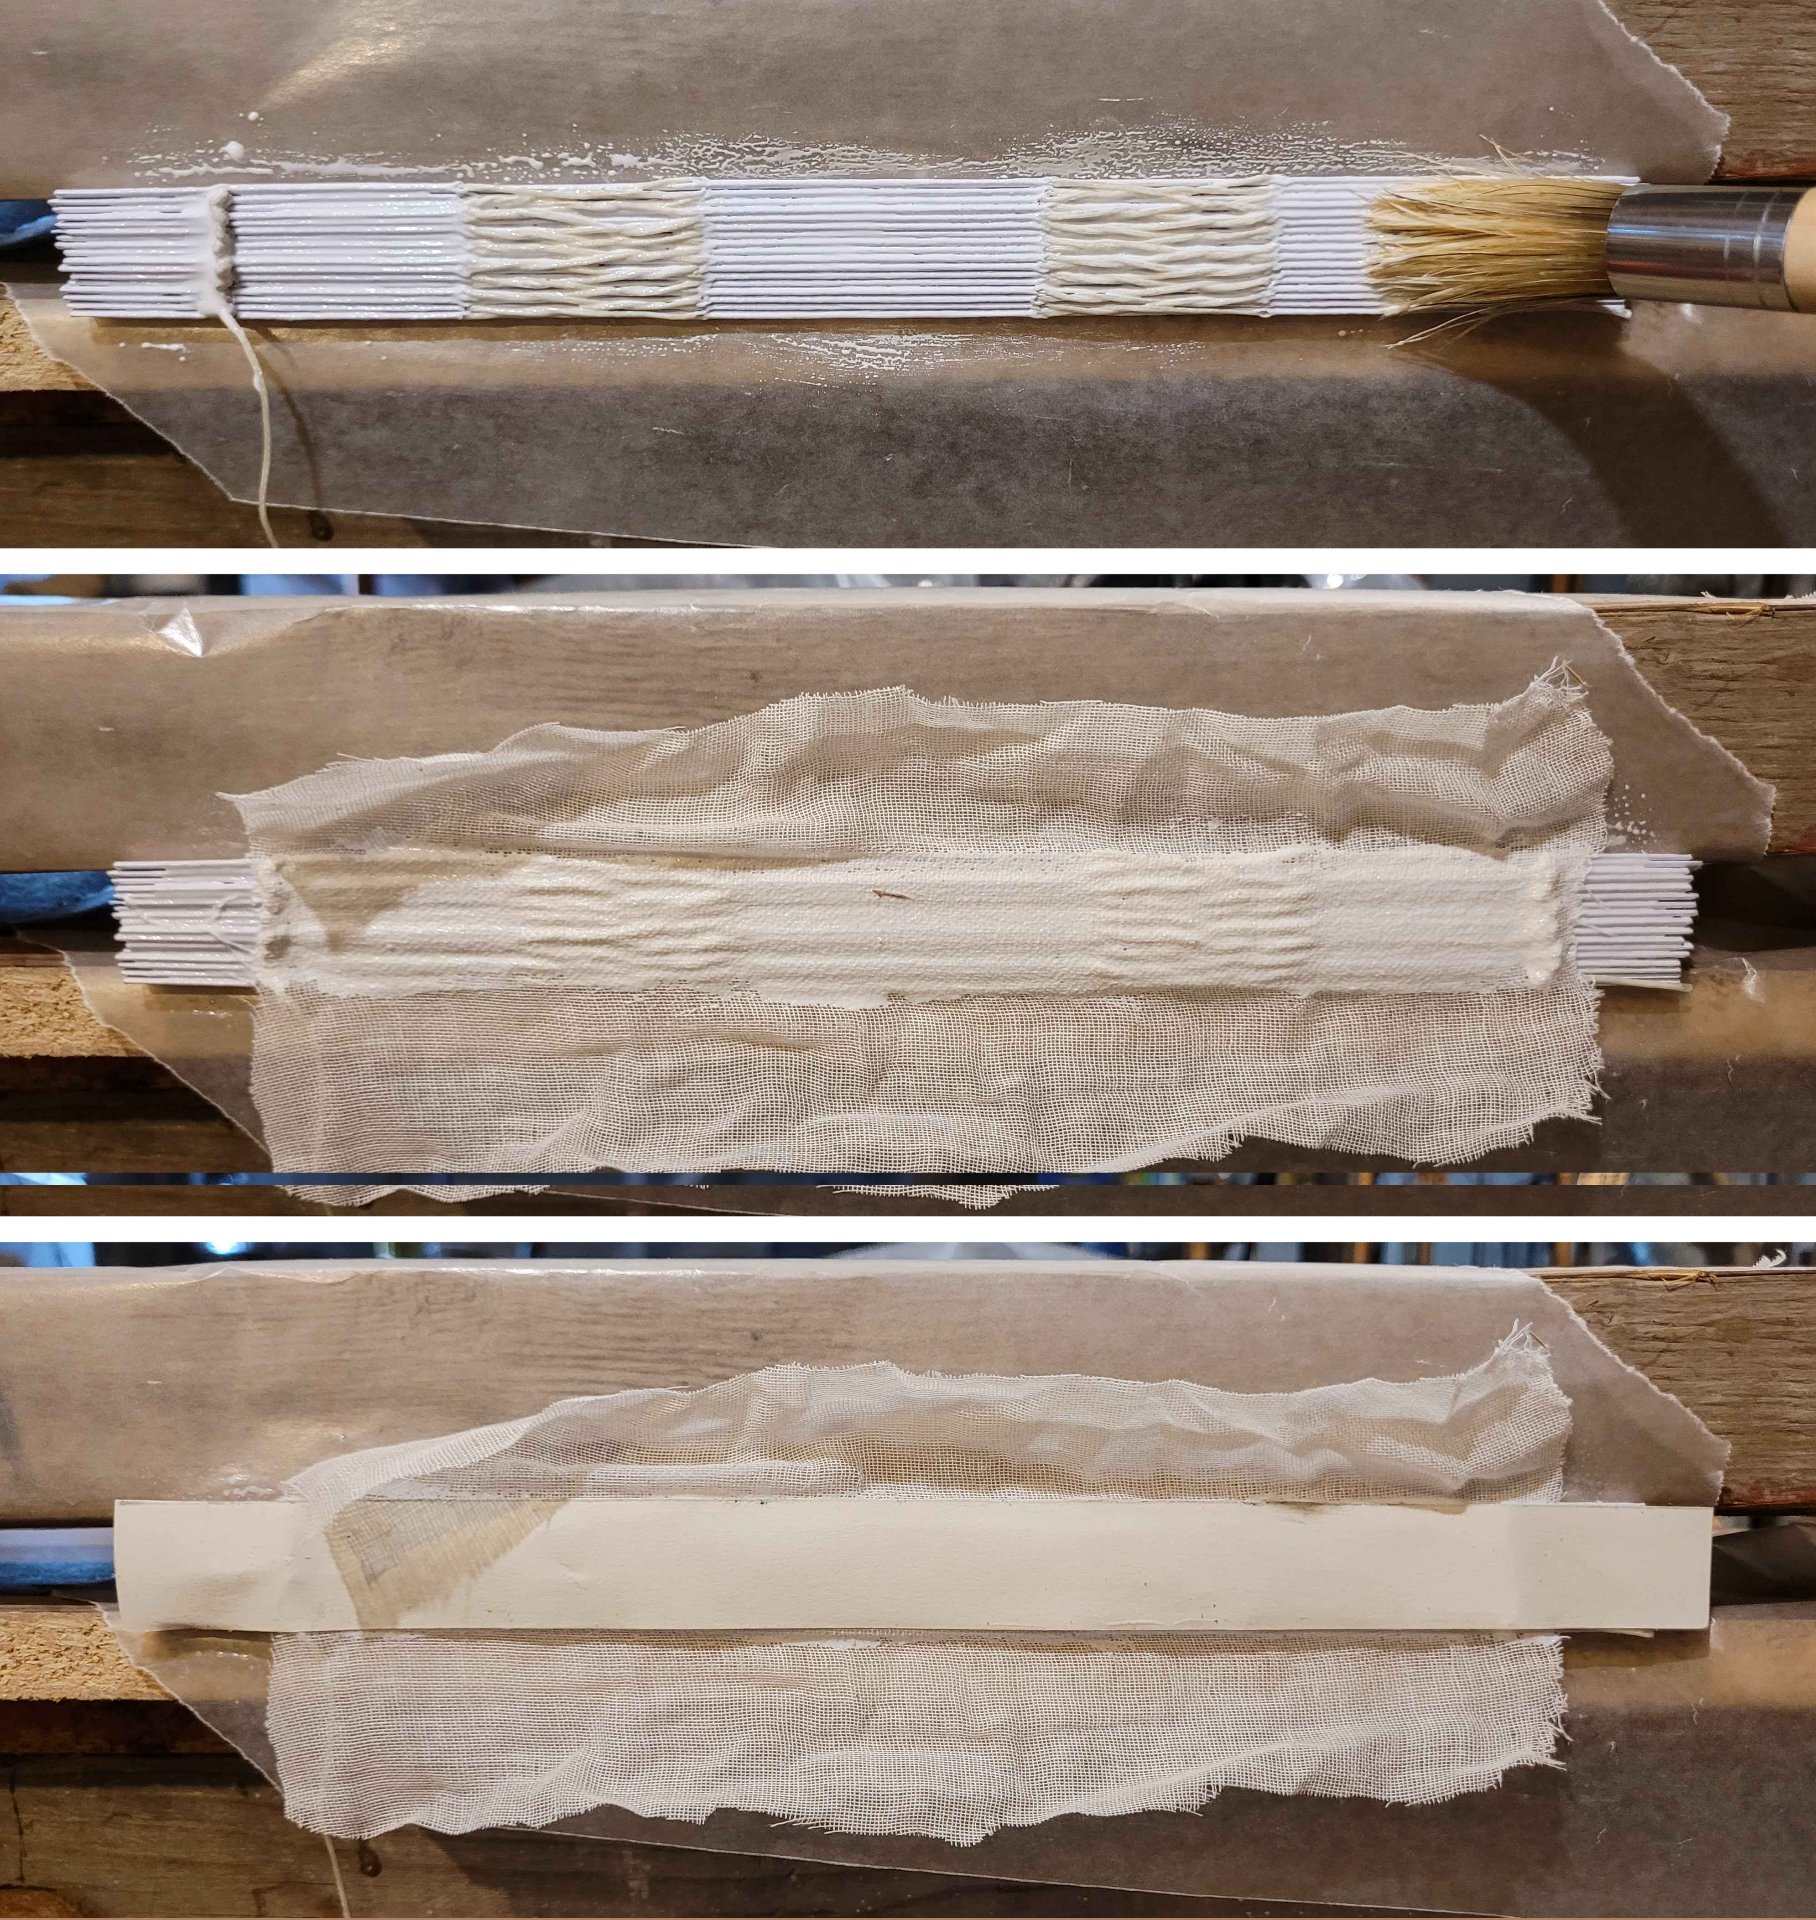
I followed my SO's bookbinding book, and this guide for the spine, and added a section of cheesecloth (in place of mull, which I didn't have) and manila paper in roughly the dimensions they specified. These help hold the spine together and attach it to the cover (called the case).

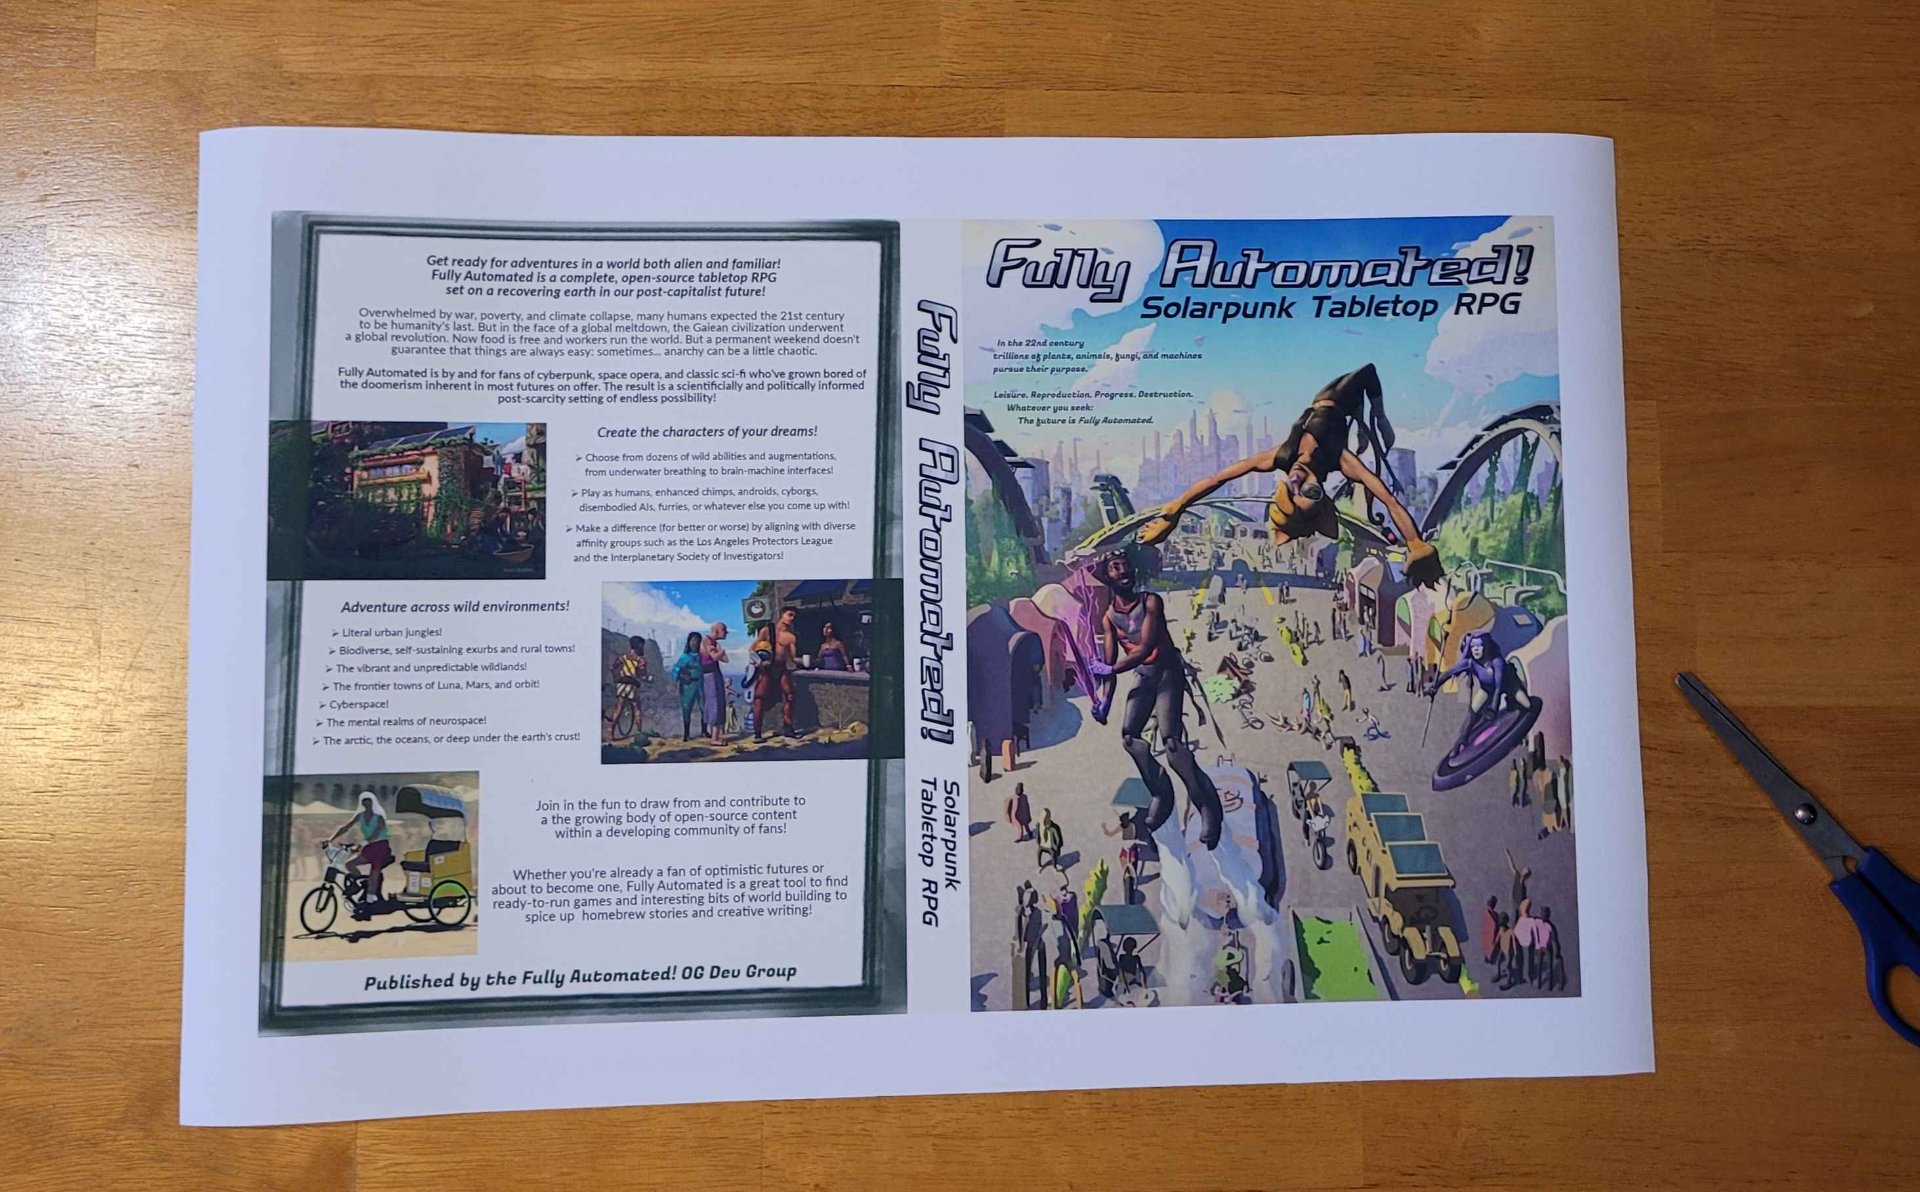
Next, I roped the Fully Automated folks into making a back cover for me, and I put together a printable version with a spine and everything. I took a lot of measurements, made my best guess, then went to our local makerspace to print it on their plotter printer:
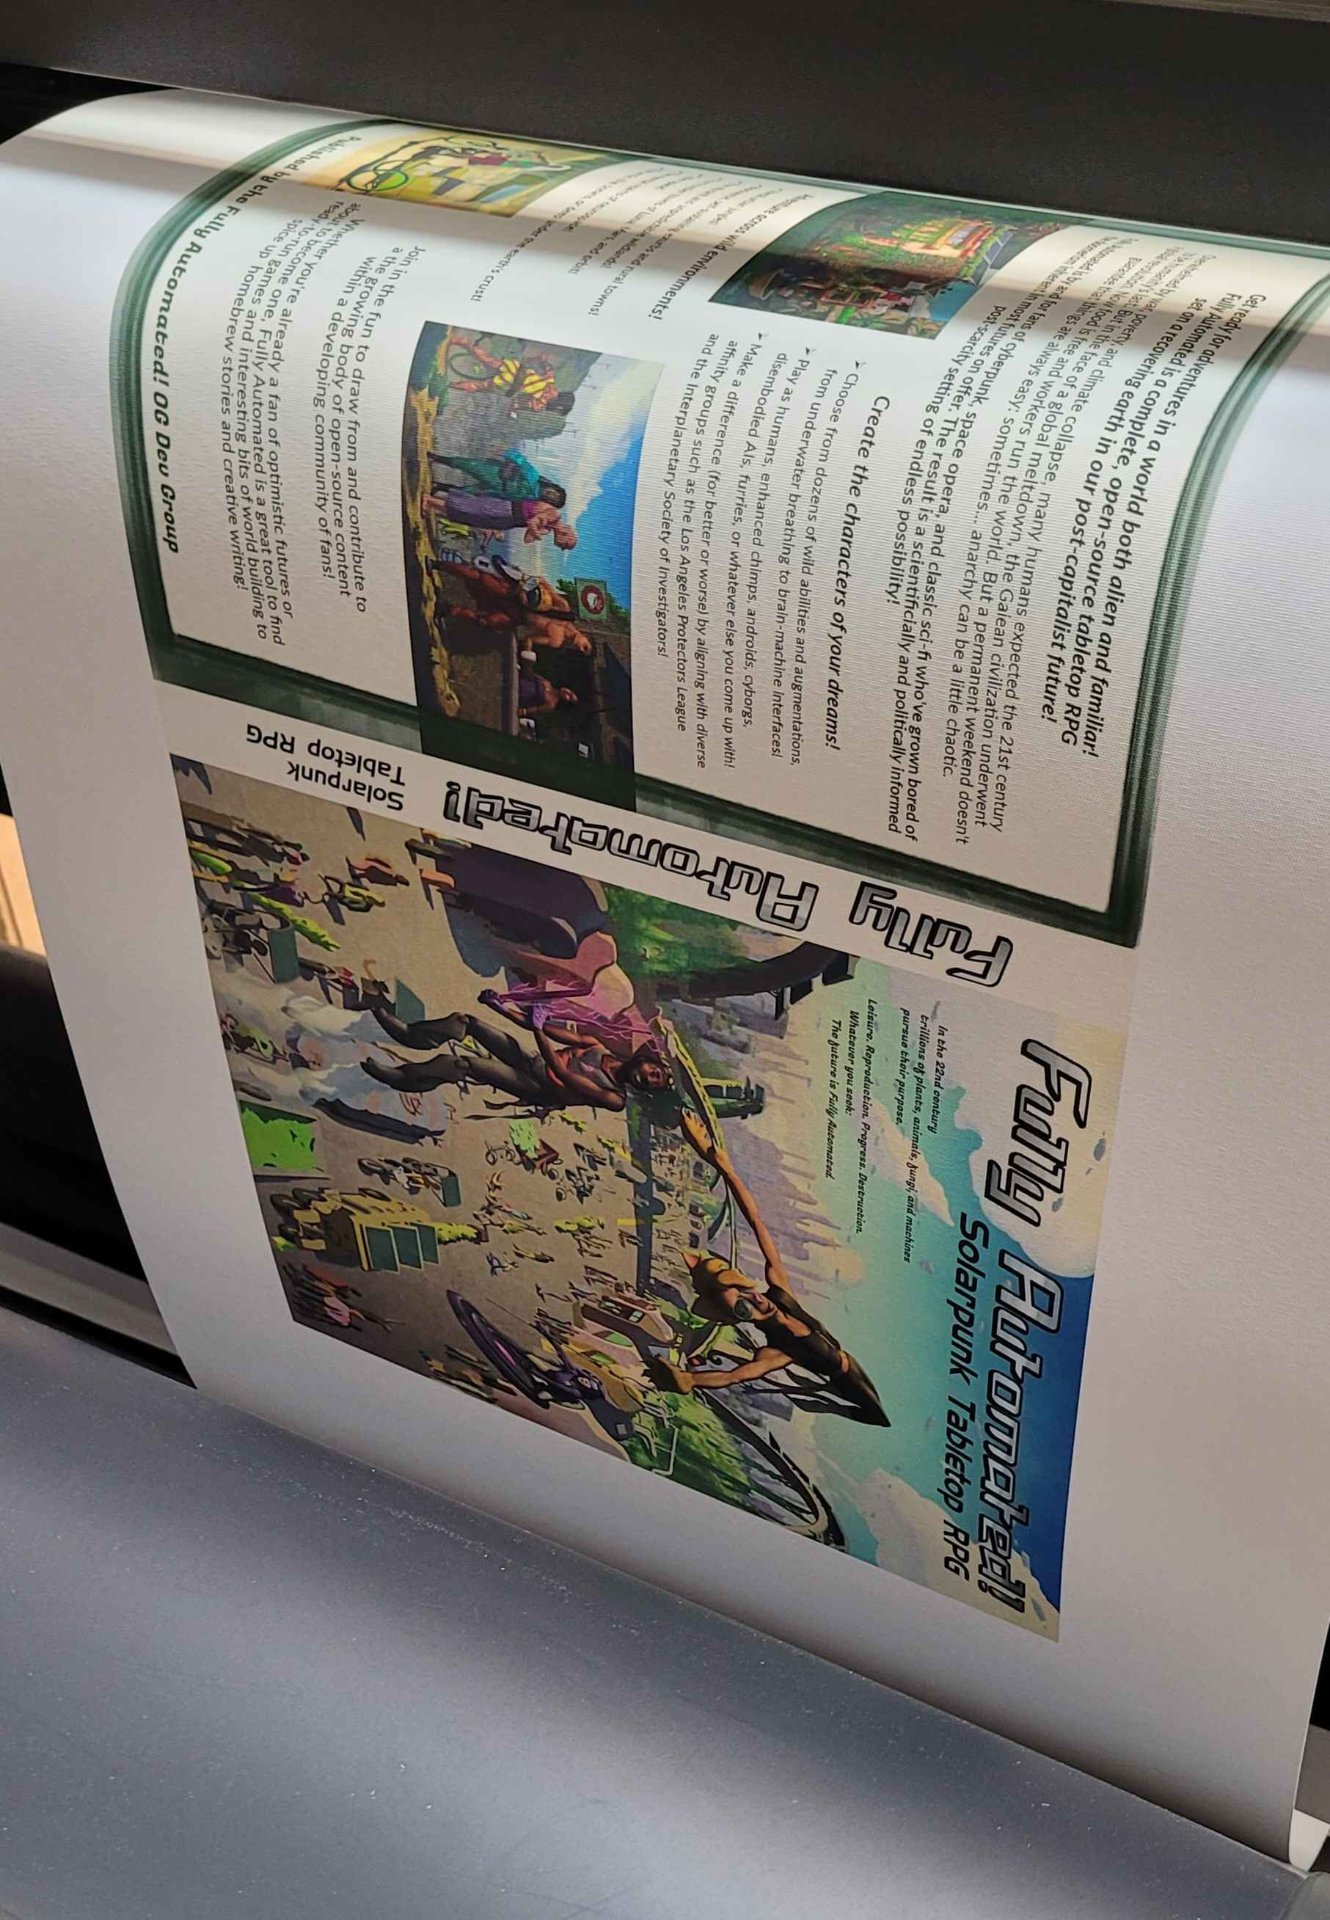
It's slightly large but I'm happy with it!

The next steps came pretty much entirely from this guide.

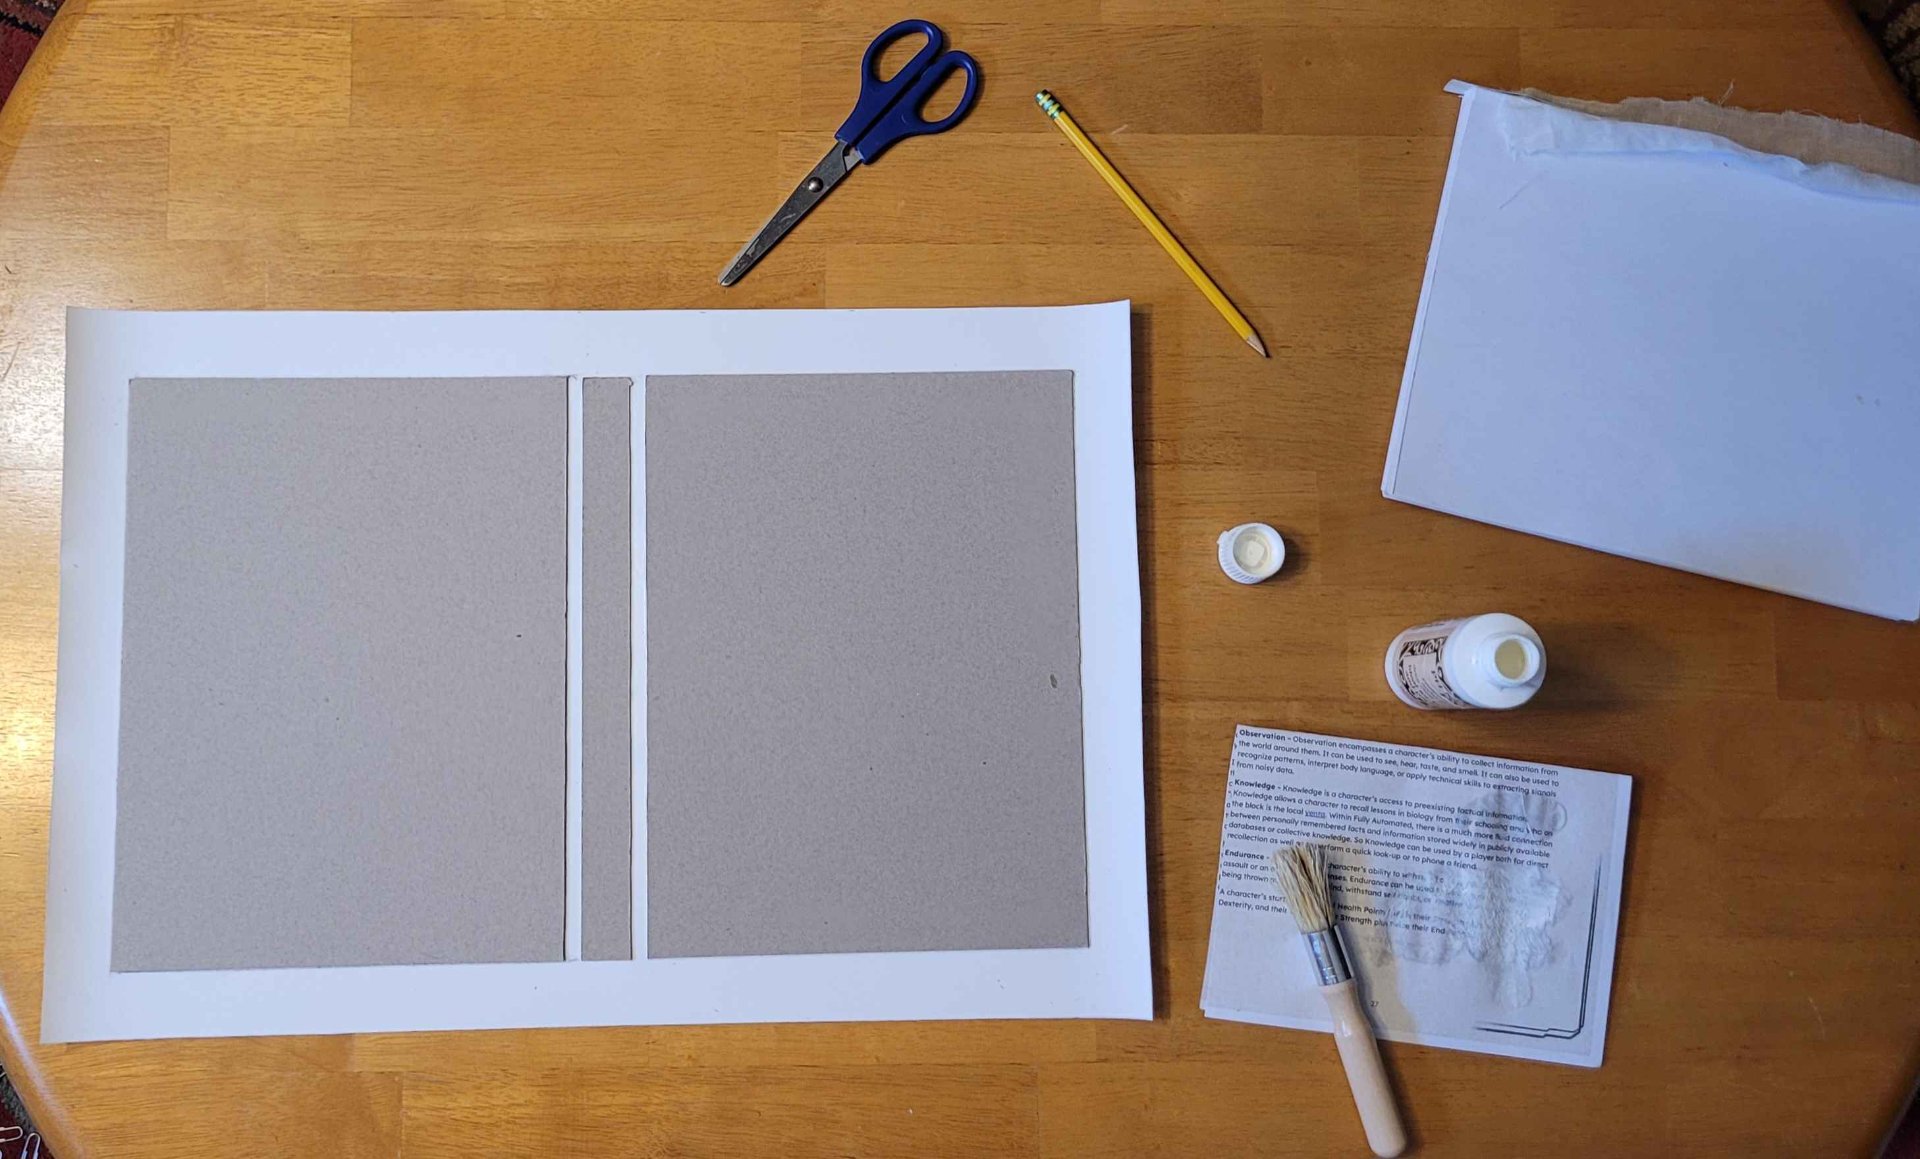
I cut some bookboard (stiff cardboard) to size, and did my best to line it up with the image showing through the canvas. Once I had them in place, I traced them lightly onto the back of the canvas in pencil, held it up to the light to see if it was good, and made corrections until I had good lines. Then I measured out to the edges of the sheet and trimmed it down:
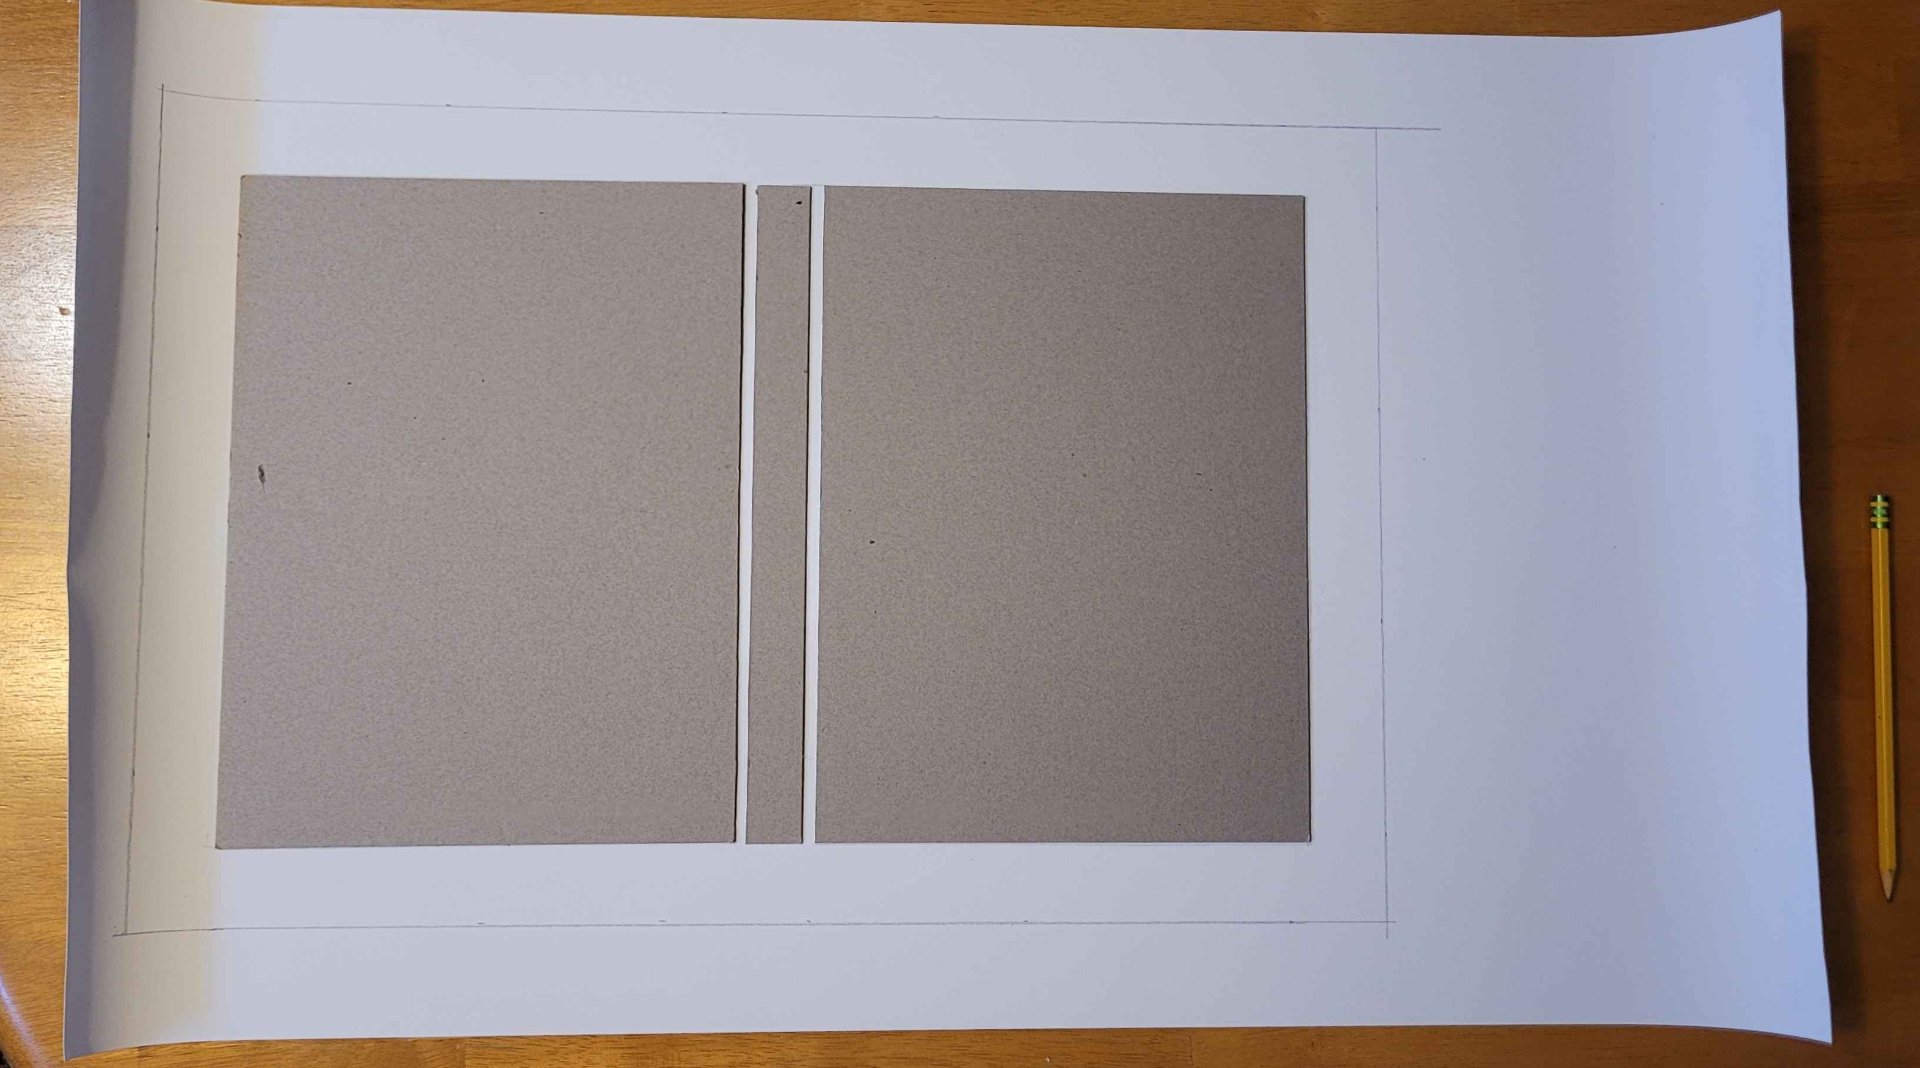
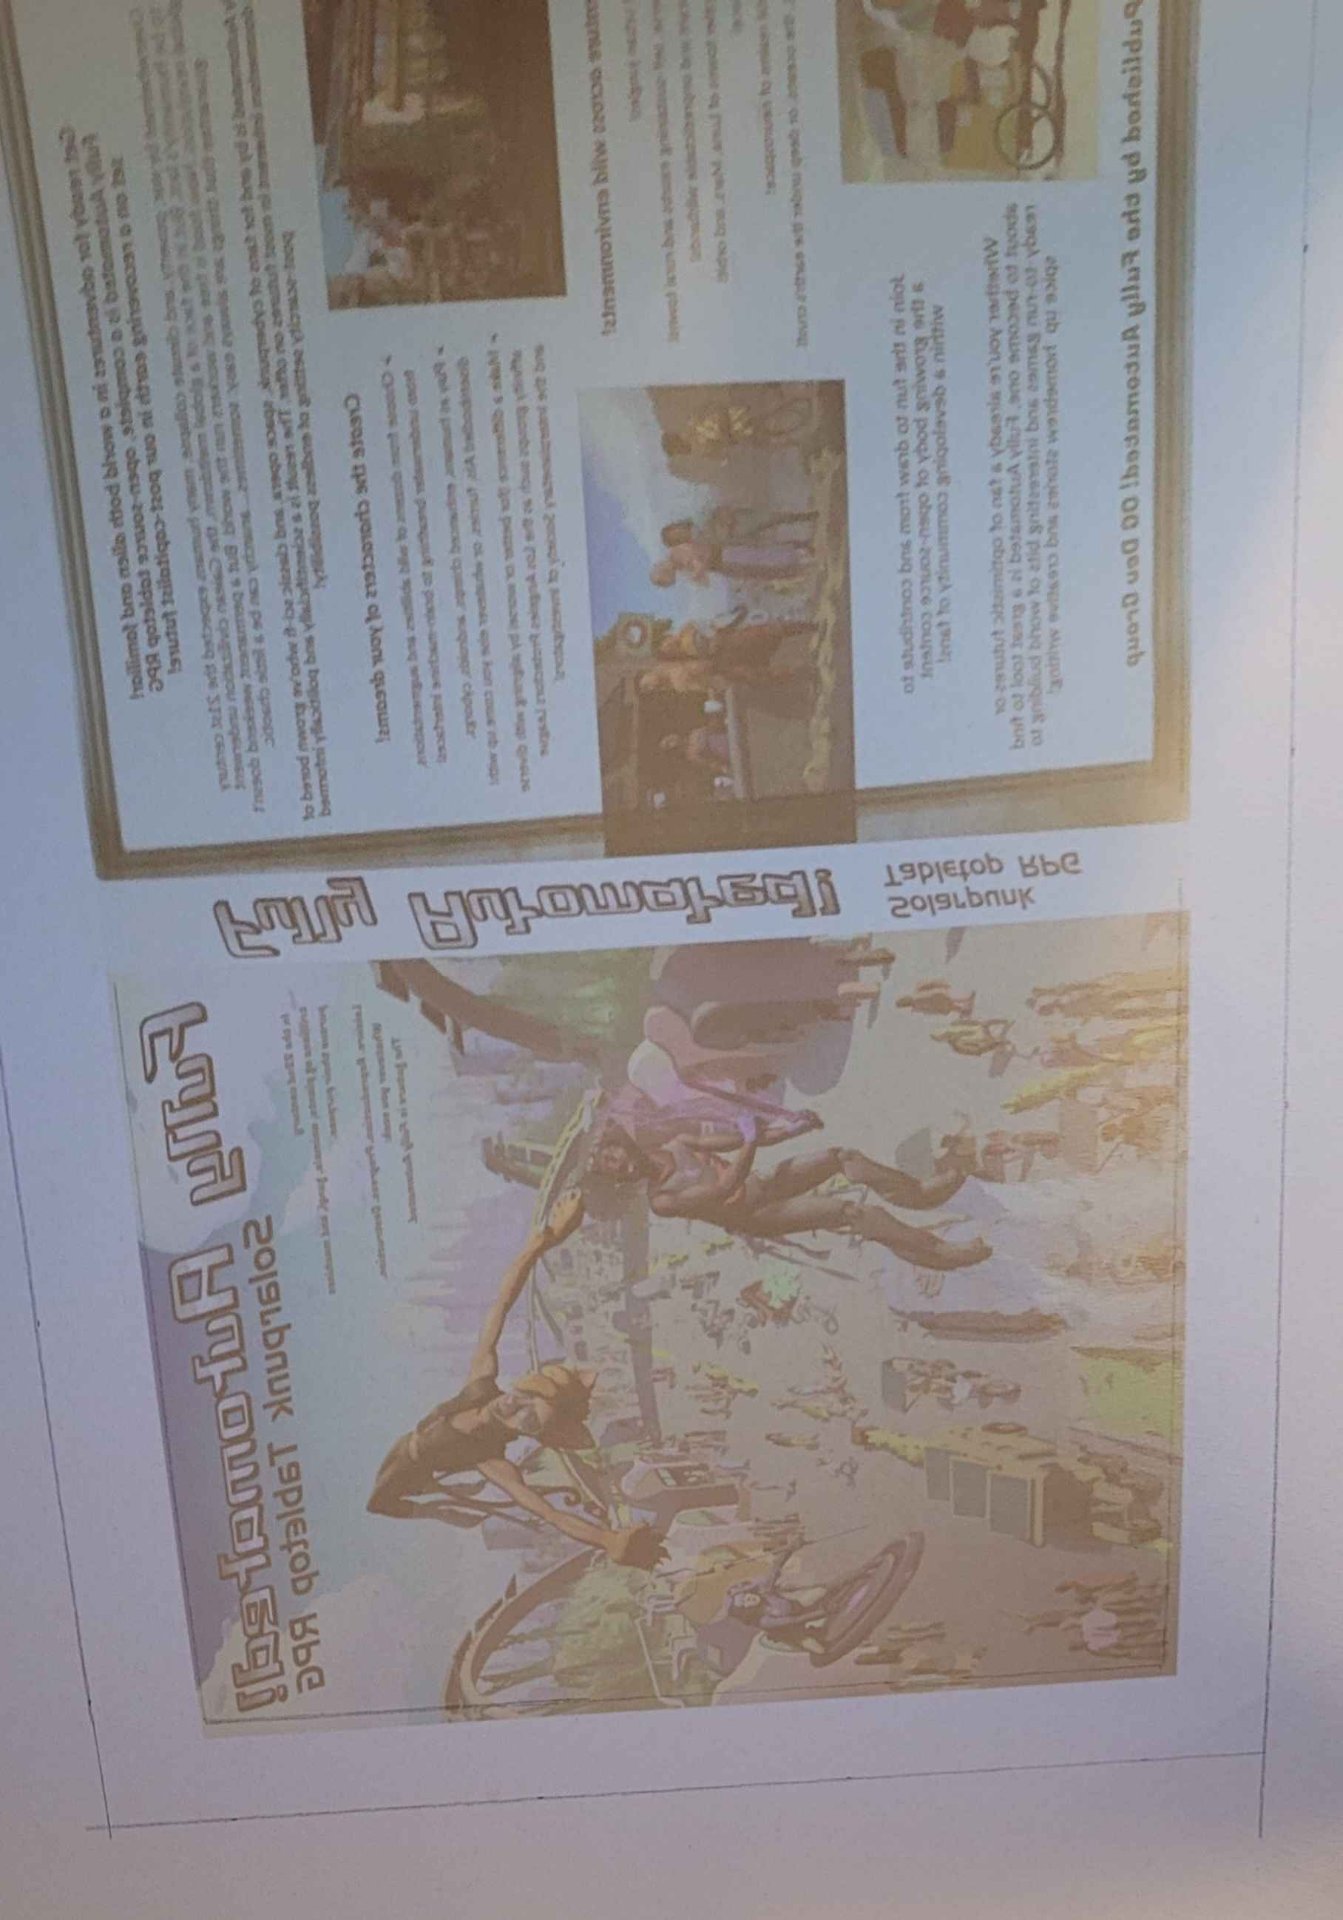
Then I glued the bookboard to the canvas:
I forgot to take some pictures for the next step (sorry) so you'll have to rely on my descriptions. First I cut the corners off the cover at a 45 degree angle 1/8" out from the corner of the bookboard. I used a carpenter's square to mark the angle. Then I folded the sheets over the bookboard and glued them.

Then it was time to glue the book block into the case. This happened fast enough that I didn't dare stop to take pictures. I slipped some wax paper between the endpaper (a blank sheet I included on front and back when I used the interposing software) and the rest of the book block. Then I painted it with glue as quickly as possible, being careful to first glue the cheesecloth to the paper, then painted it over with glue as well. Then I carefully closed the cover onto the sheet. The endpaper was just about a liquid at that point, despite how lightly I stippled on the glue, so I'm glad I didn't have to try to make changes. I flipped it, and let it dry for awhile.
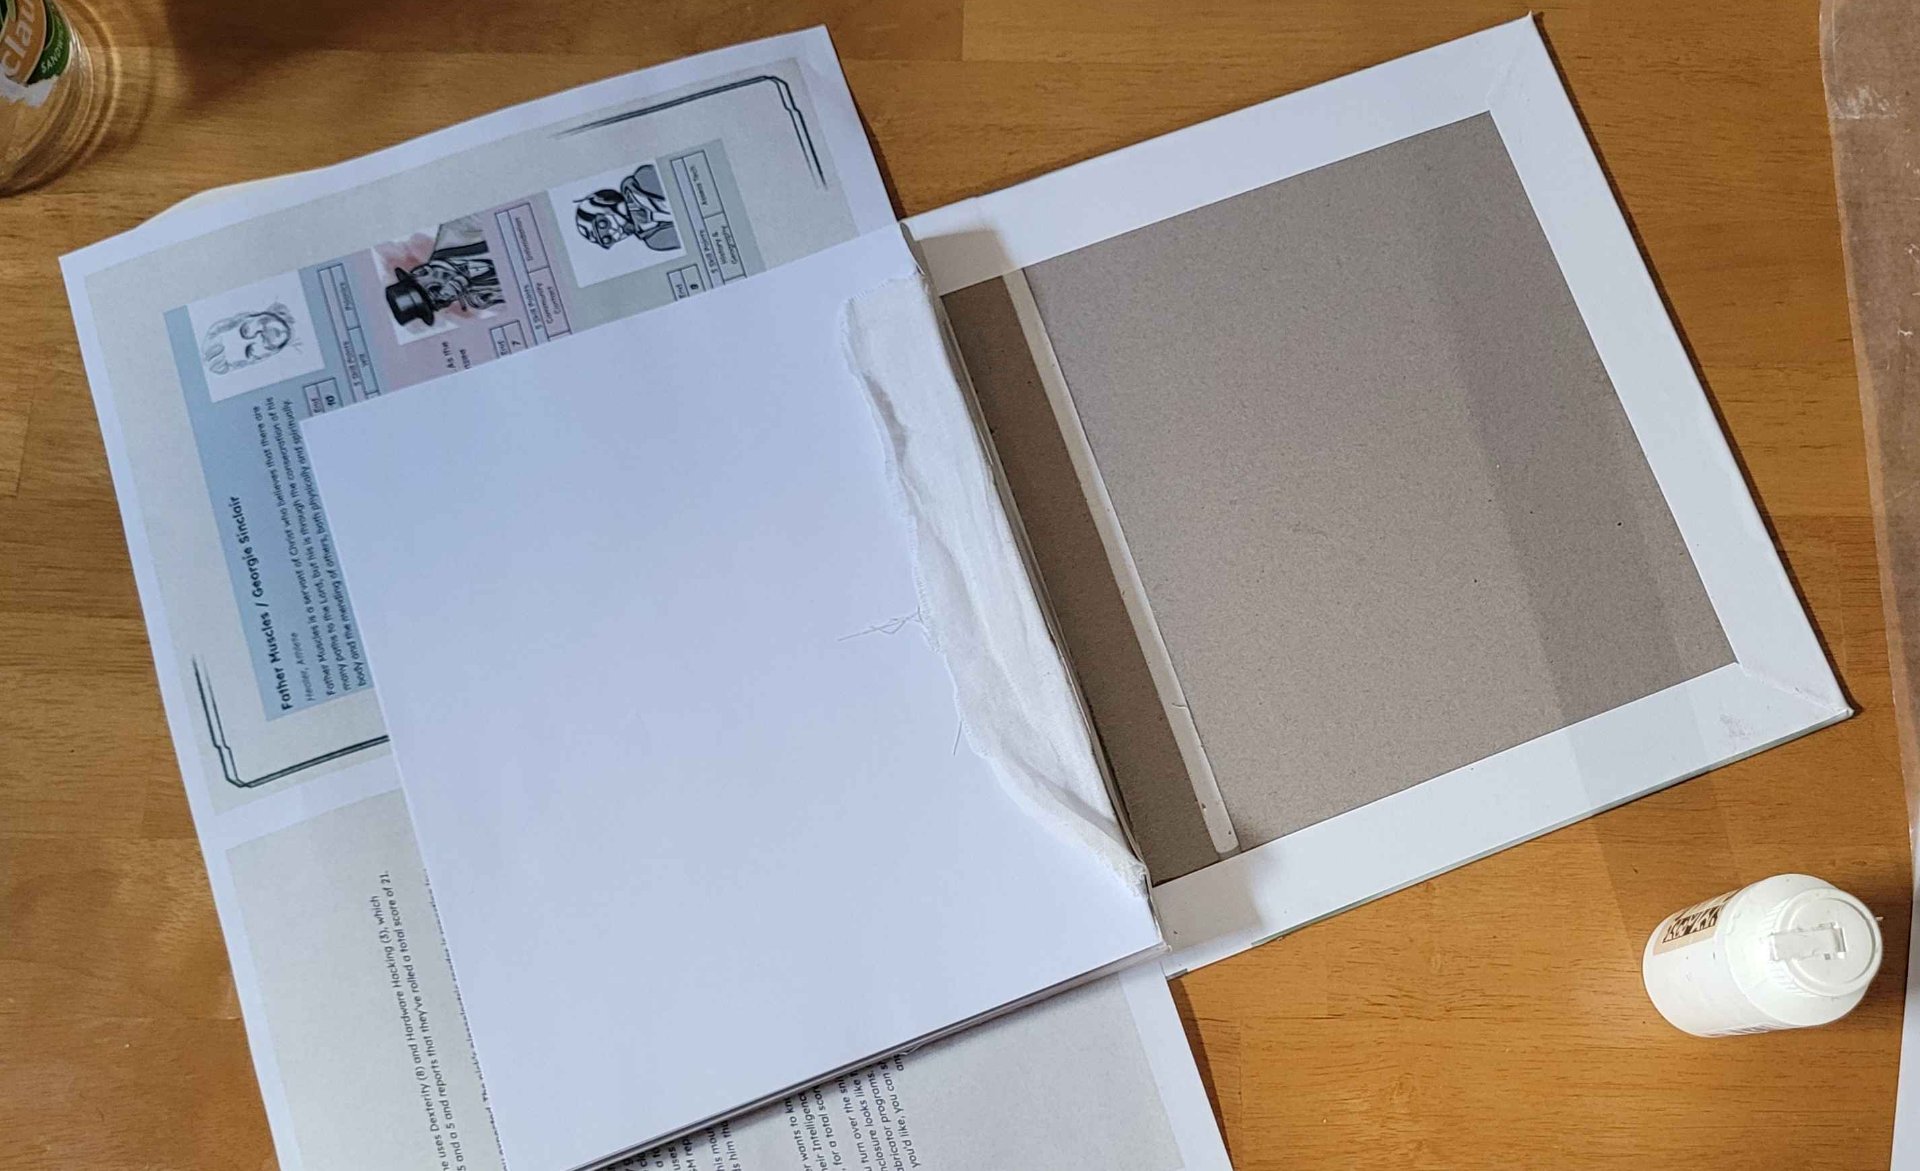
Then I repeated those steps on the other side and left a heavy laptop sitting on it.

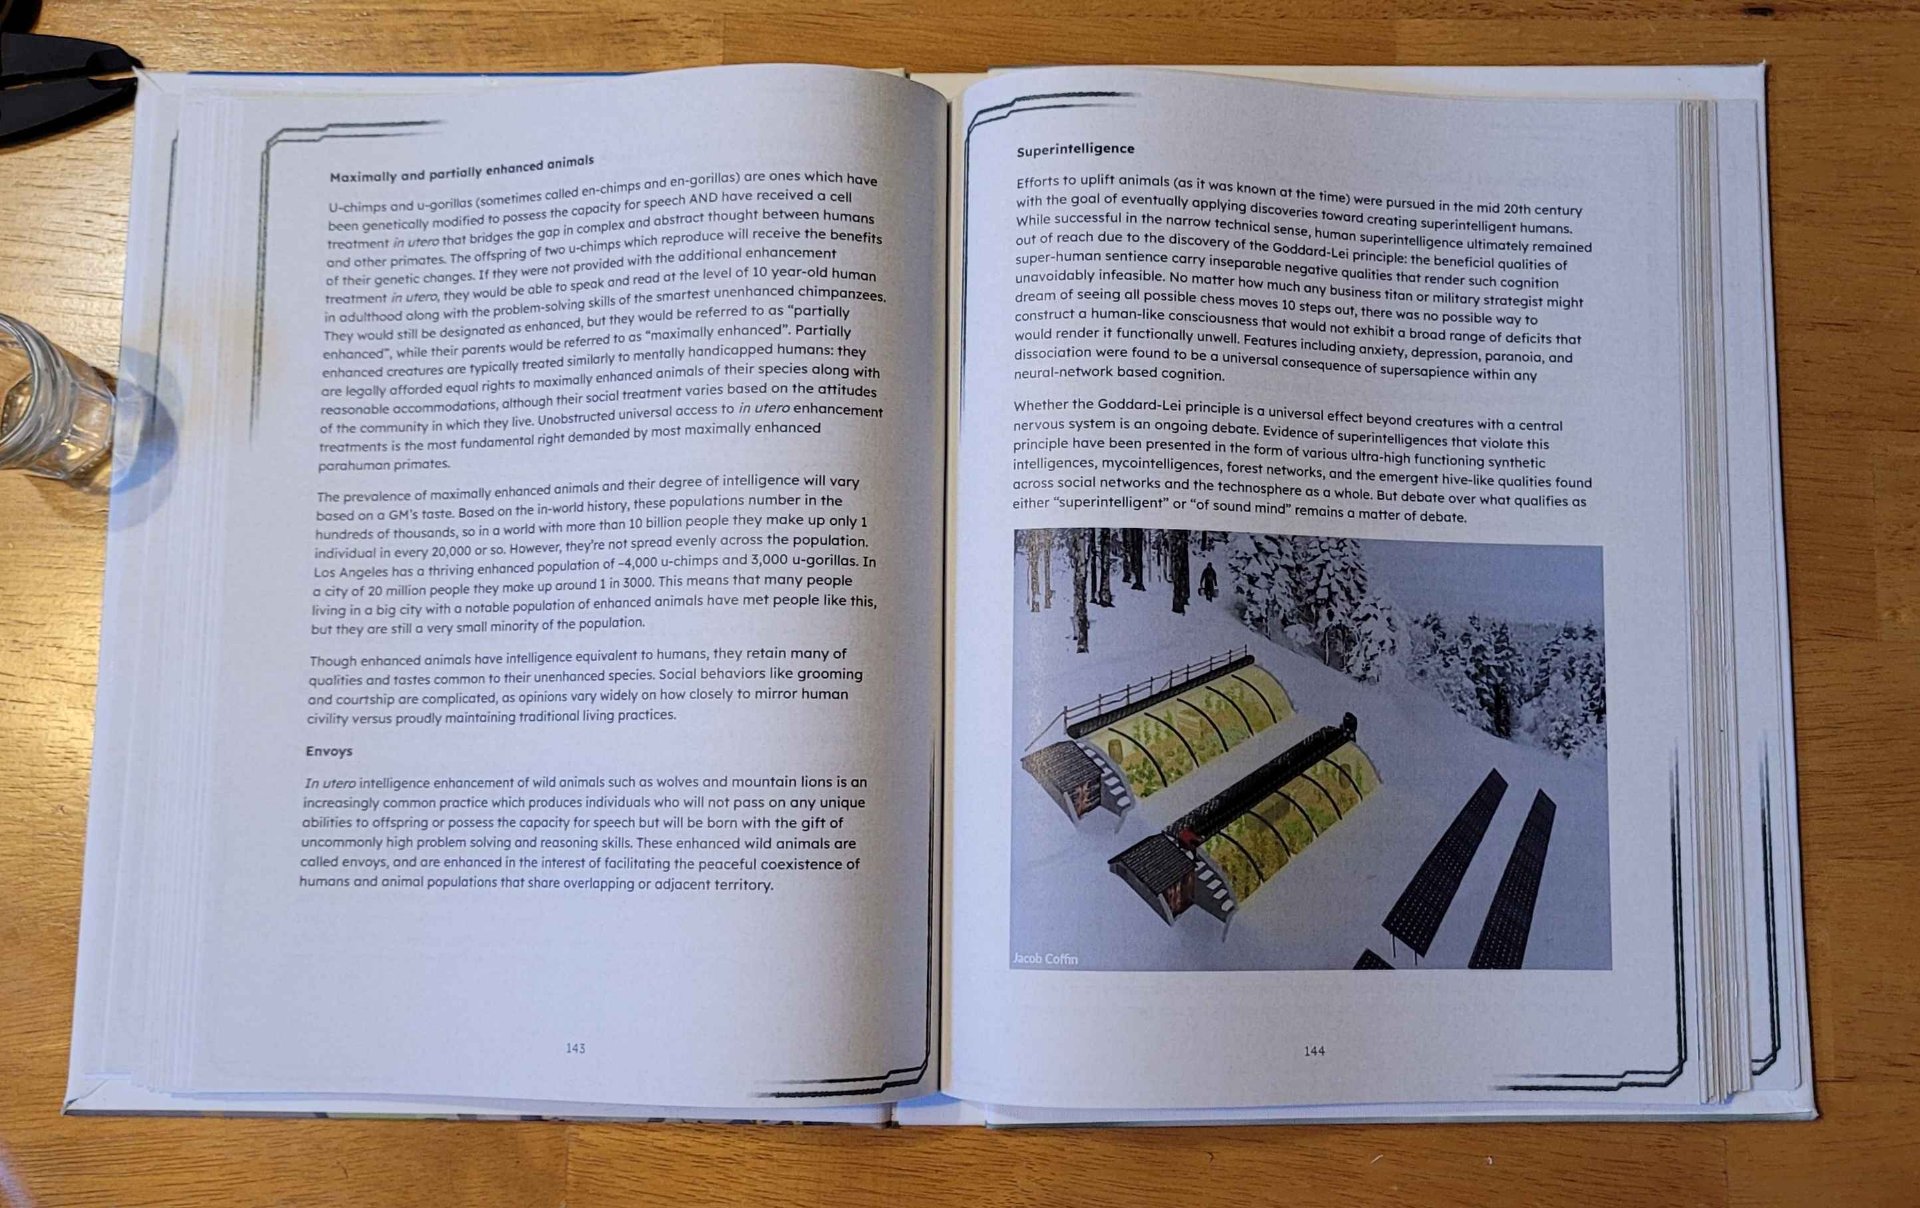
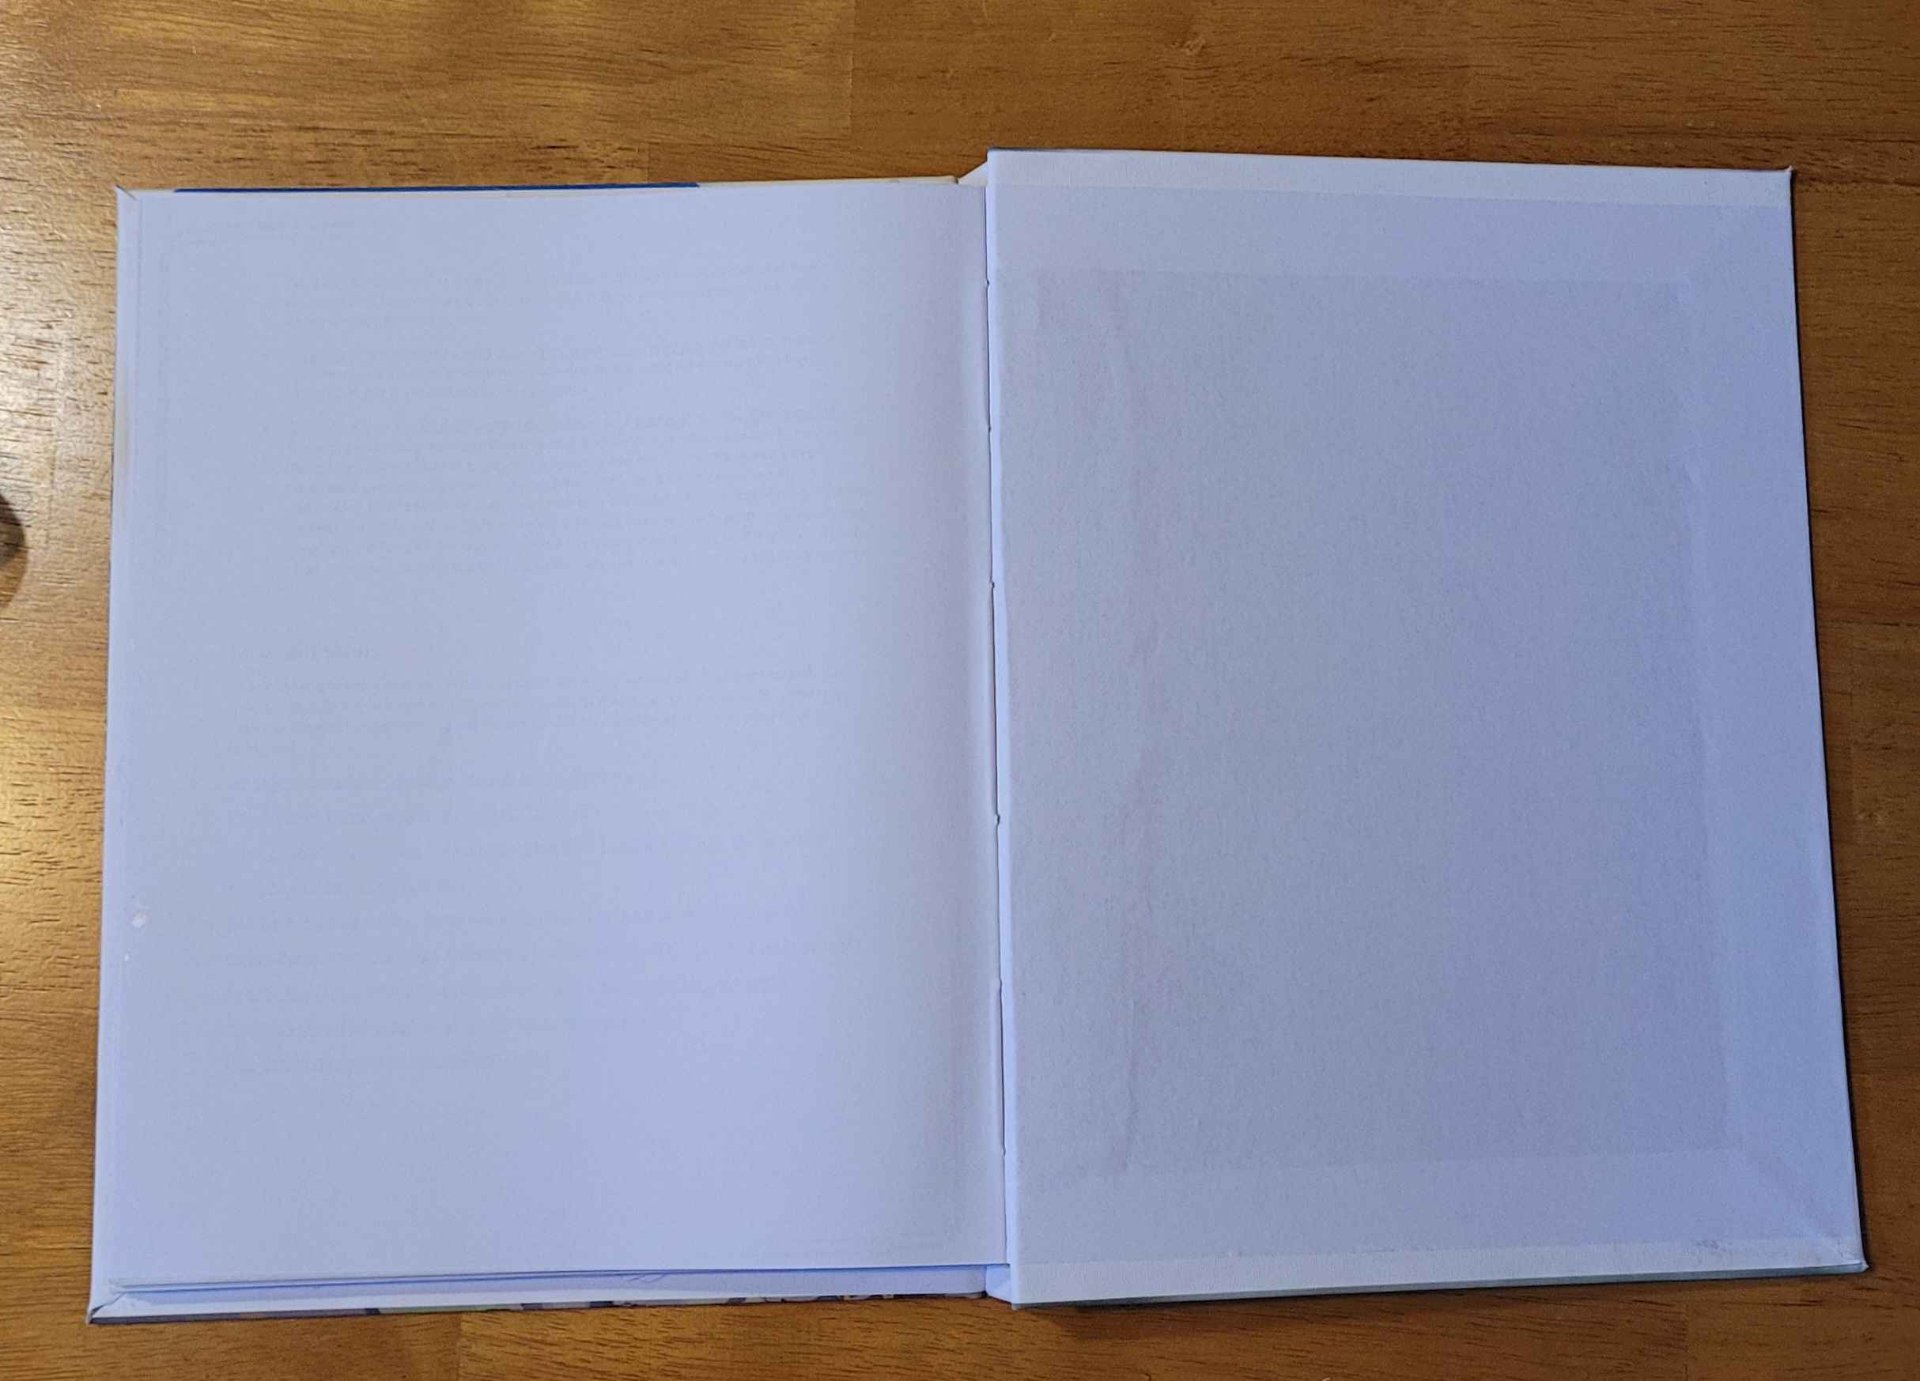
Its always tense waiting while the glue dries on a project, hoping its not clamped crooked, or the glue isn't running and sticking to something it shouldn't. Especially when you're combining the end result of two other projects. Luckily this one turned out mostly okay:
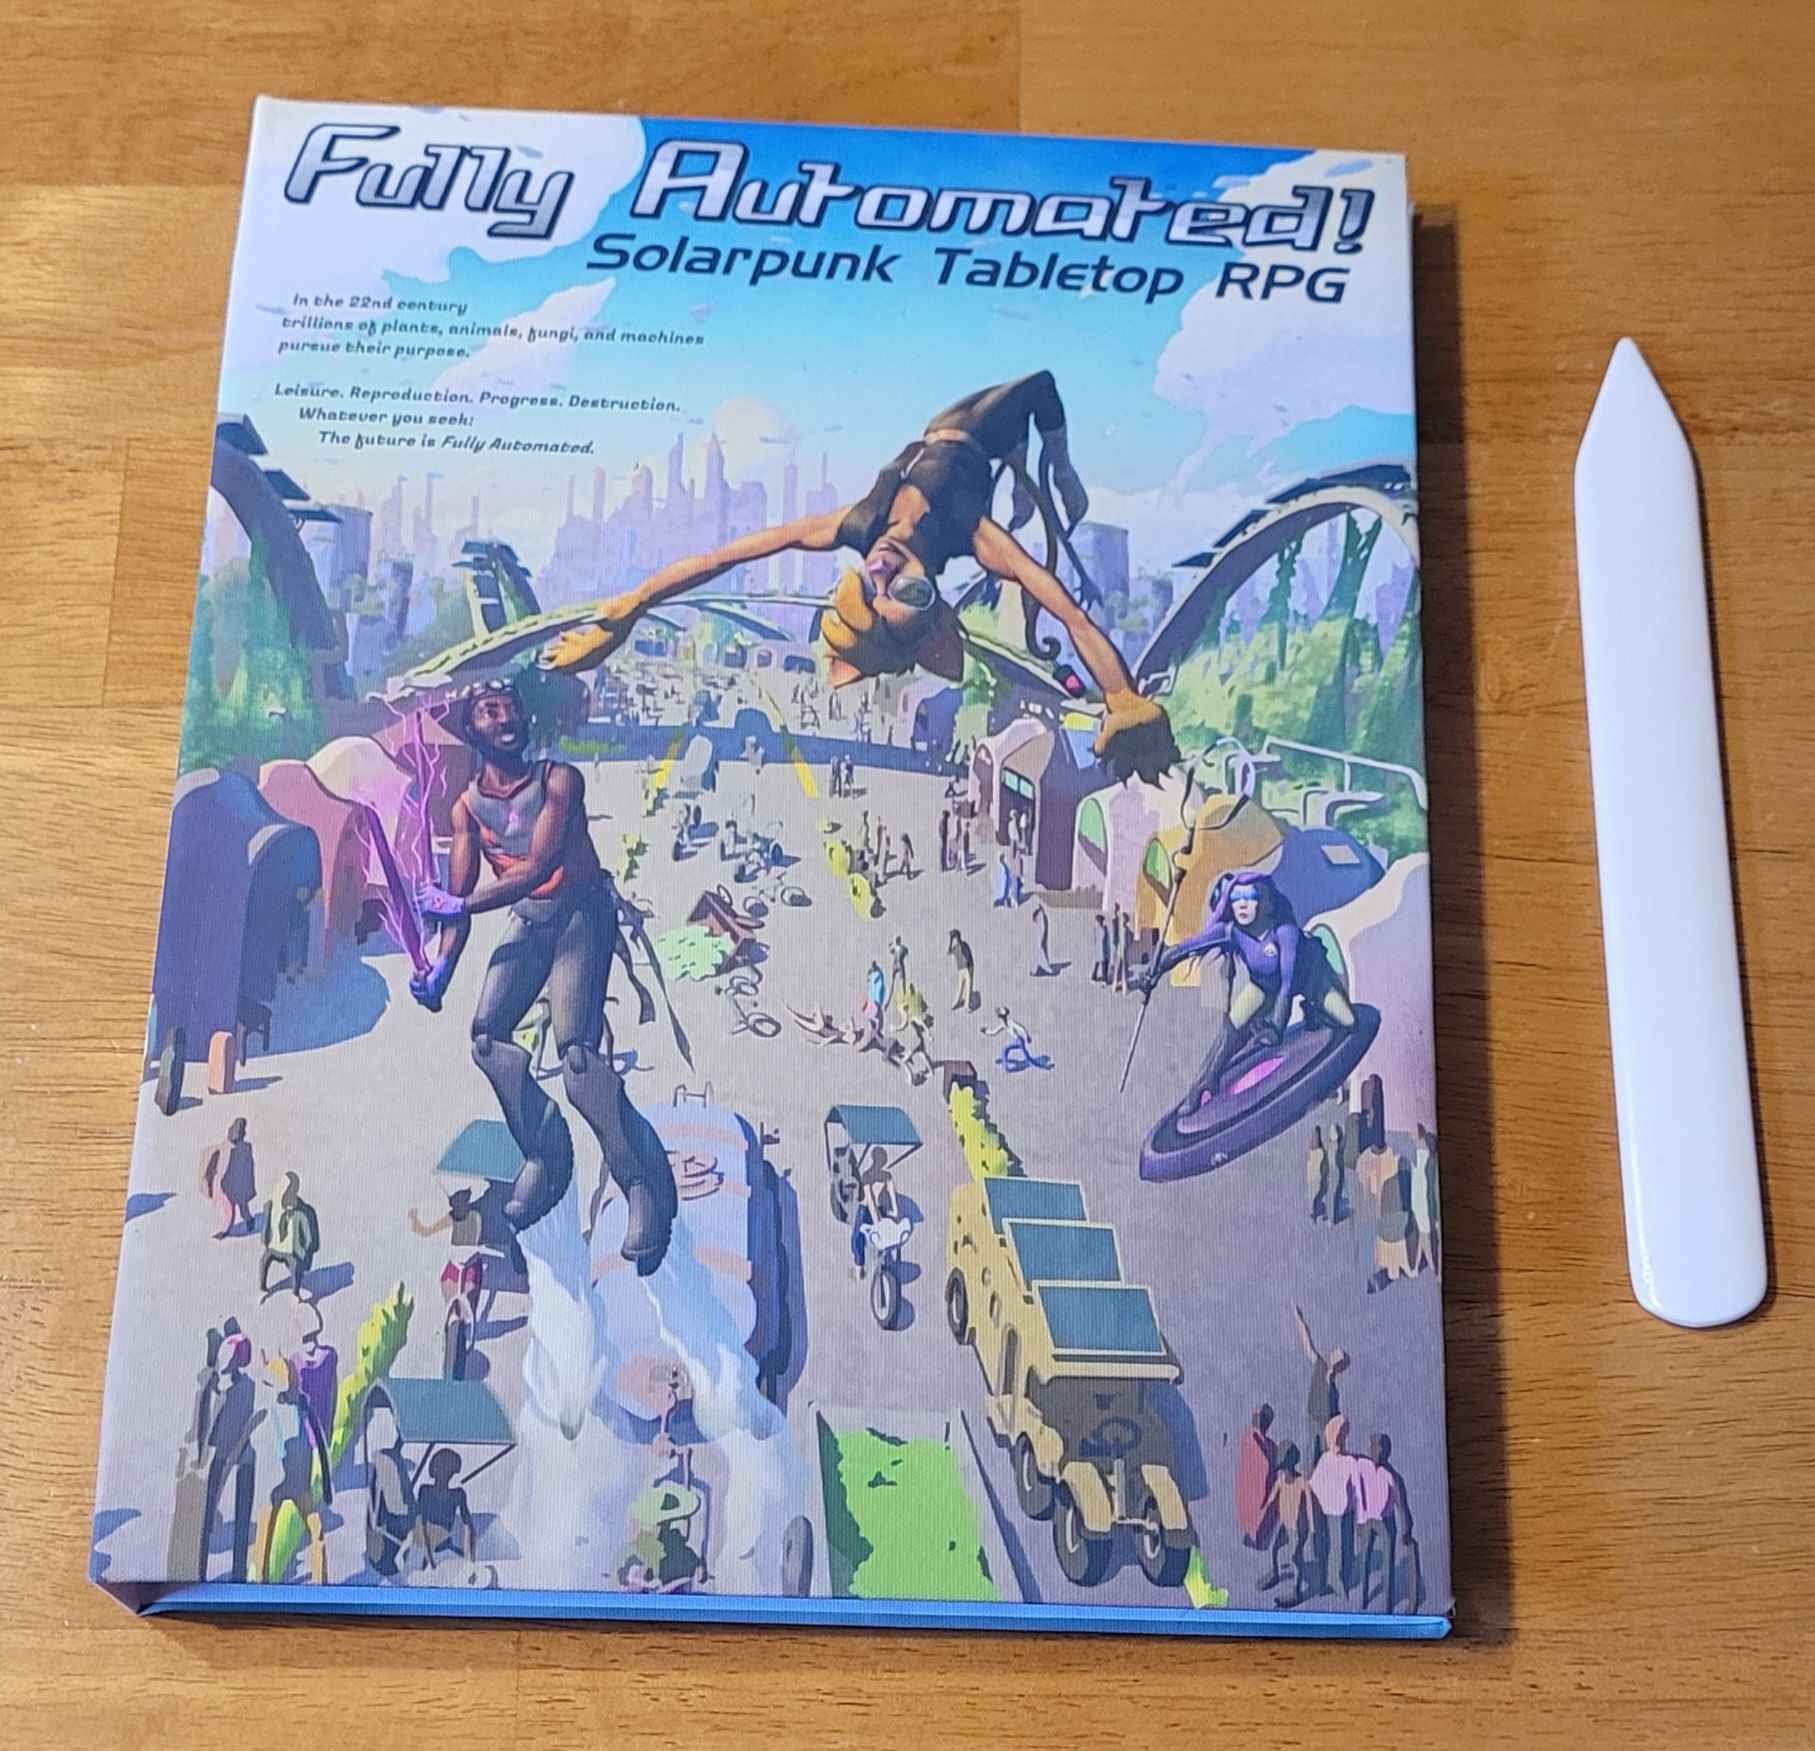
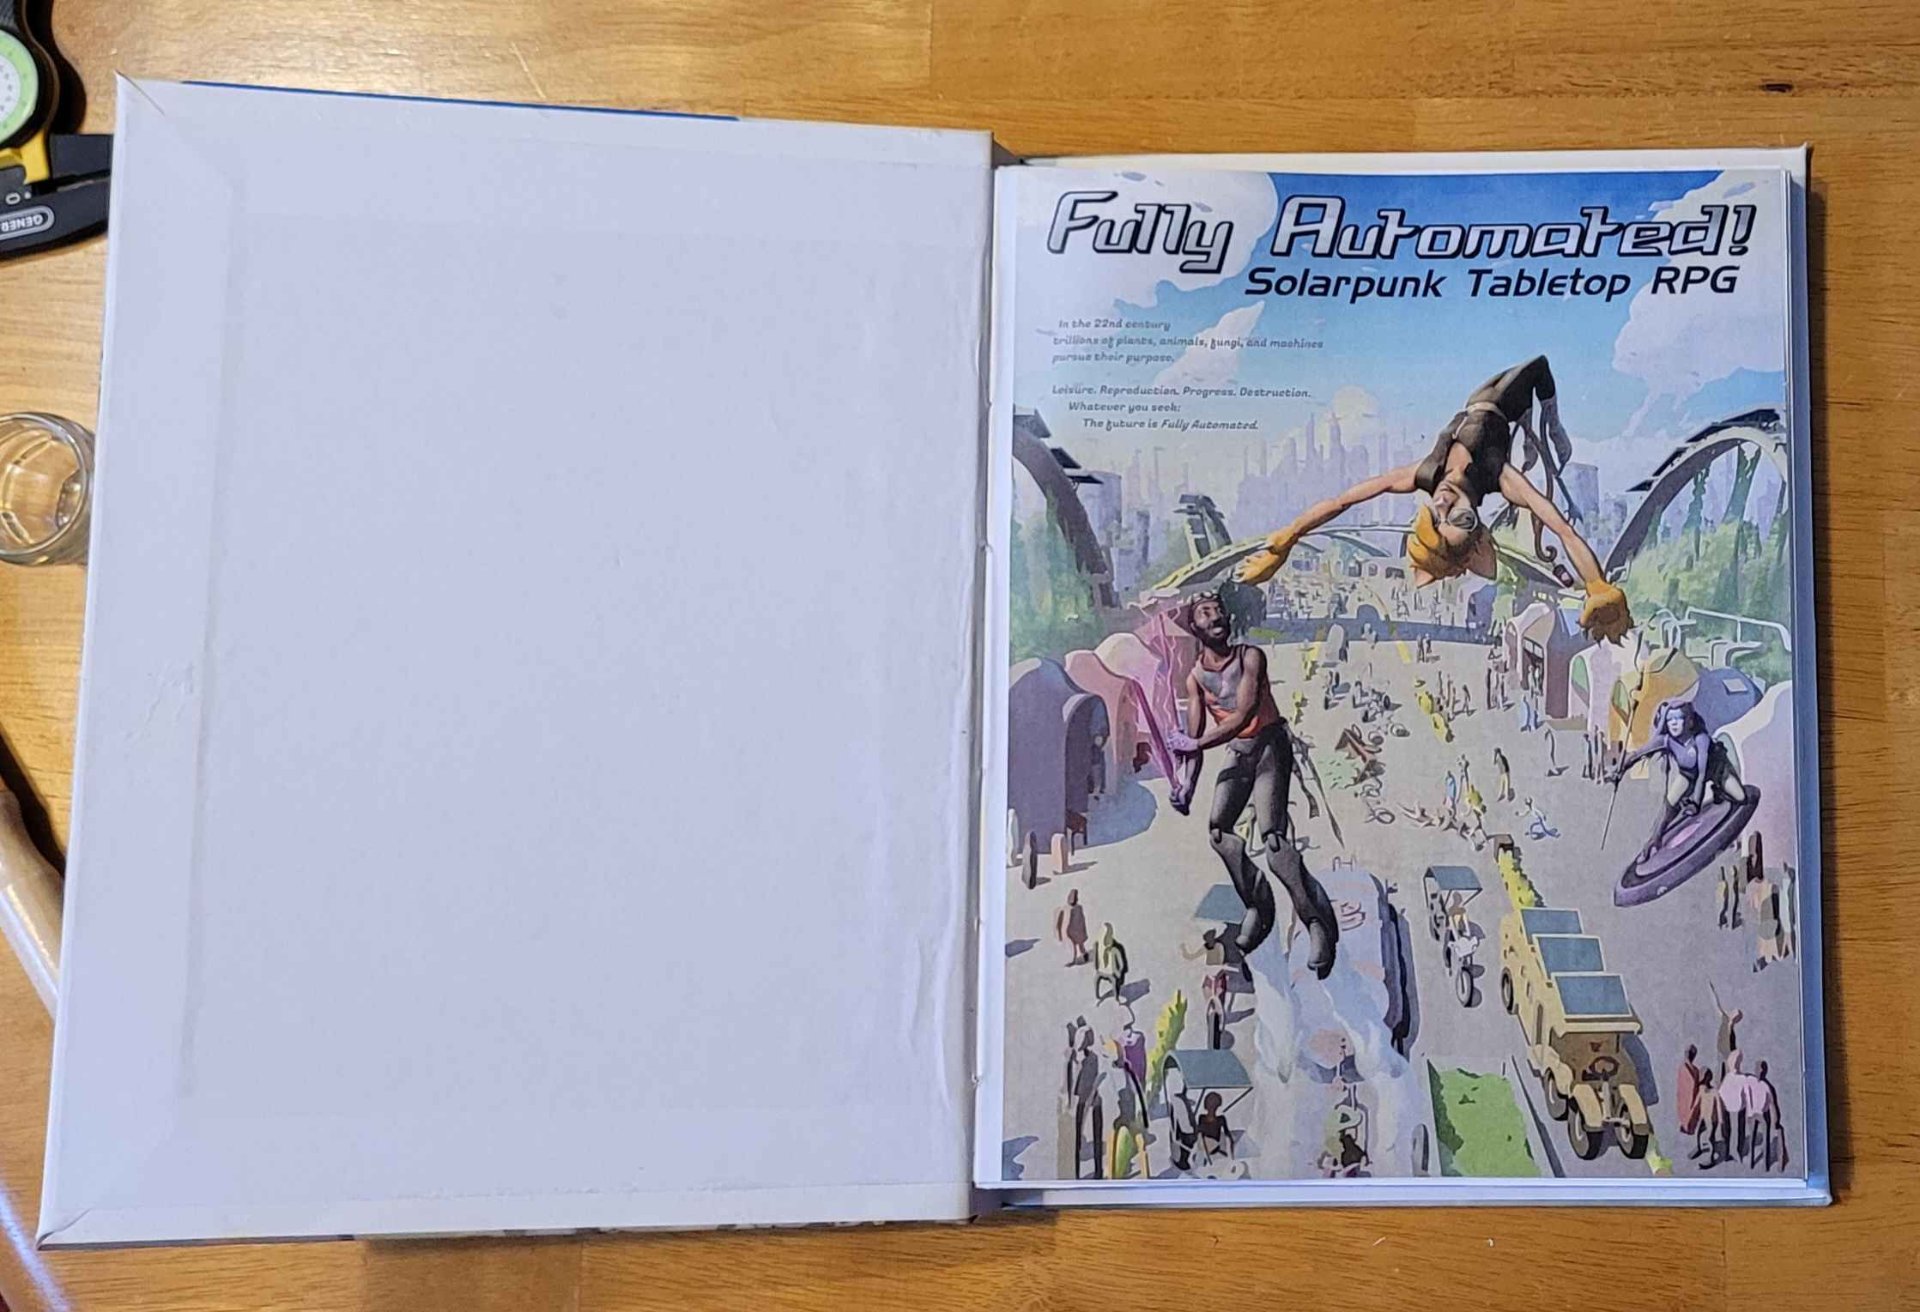
I can see where the endpapers stretched (just like one guide said they would) causing them to reach further towards the fore-edge than I'd have liked. But it generally looks pretty smooth and clean so I'm not very bothered by that.

All in all, I think not bad for my first bookbinding project!

11
47
submitted 1 month ago by poVoq@slrpnk.net to c/diy@slrpnk.net
12
99
submitted 1 month ago by poVoq@slrpnk.net to c/diy@slrpnk.net
13
26
submitted 1 month ago by cassiacow@beehaw.org to c/diy@slrpnk.net

Hi!

I'm planning to try to get into some solar-powered (or low-powered) DIY projects.

I have a mechanical engineering background so I'm not super worried about learning technical stuff but I live in an apartment and don't really have ready access to a workshop.

Does anyone have good projects they've found? Having some creativity issues more than anything else, I think...

14
24
submitted 2 months ago* (last edited 2 months ago) by Excrubulent@slrpnk.net to c/diy@slrpnk.net

EDIT: I think this video shows a better design, although I note some improvements below:

Making a DIY analog force sensor under quarantine, with the Kontrol Freak. | KontinuumLAB

The main video linked uses two strips of copper bridged by the velostat, but this creates deadzones where those copper strips are, and probably also gives different responses depending on the shape of the region being pressed. I've done more research and a much more consistent method should be to sandwich the velostat between the two conductors so that the entire surface gives a consistent response that goes directly through the material. This should also give a more pronounced response because the length of the circuit through the velostat is only the thickness of the sheet, not the width of the pad. This should also make it less sensitive to changes in the pad size.

Some videos use conductive fabric, but the best one I found uses adhesive copper tape. If you're getting this, make sure to use copper tape that is conductive on the adhesive side, as not all of them are.


And a follow up video with a more refined method of building the pads and ideas about how to improve the analog-to-digital conversion:

Eight pressure-sensitive Velostat/Linqstat pads for a velocity-sensitive MIDI controller


There is also this method using piezo sensors, but from experience I know that this is completely insensitive to sustained holds. It's used for electronic drumkits because it measures percussion, not pressure:

DIY midi controller with 8 Velocity-Sensitive Drum Pads (on one chip Atmega328) 'Very simple'

I suppose combining a piezo sensor with a simple touch-sensitive control might achieve a good effect, but velostat seems like a simpler solution to me. Also if you want a capacitive sensor on the surface you probably can't use the soft rubbery material that nice MIDI pads use.


Also this guy is quite good at his explanations and breaks down quickly how to make a full button pad, although he still uses regular buttons and pressure-sensitive ones would need a bit more logic to understand:

Launchpad || DIY or Buy || Keyboard Matrix & MIDI Tutorial


So I've been looking into how to do this, and I found someone on reddit asking this same question like 3 years ago, and they're still active. I was planning to log in just to link them the video since literally everyone just told them to use regular buttons, but they obviously want to make the real thing, and it's a night and day difference between using velocity sensitive pads and simple buttons. Also they said they live in India where a lot of musicians can't afford the more intuitive interfaces because they're massively marked up, and I thought they should have the information they need to make a DIY solution.

Anyway, I realised giving them that link would be contributing to making reddit the go-to place for information, but I didn't find this there, I don't spend time there, and in fact my alts keep getting banned, and I'm the one adding the information.

So since reddit doesn't want me, I figure the best way to solve this is to make a post here and link them to it. That way I'm helping them with their problem, adding content to the fediverse, and linking people here.

The only thing to add is that I plan to expand on this to make a proper MIDI controller using some of the second video's suggestions for improvements, and I'll be making a modular set of boxes that can magnetise together to arrange however we want. Also I'm going to look for translucent silicone rubber that I can illuminate with RGB LEDs so the sequencing can be animated.

Anyway, if that person or anyone else finds their way here, hello! Welcome, this is a much better place than reddit.

15
17
submitted 2 months ago* (last edited 2 months ago) by poVoq@slrpnk.net to c/diy@slrpnk.net

Also interesting is this video.

16
30
submitted 2 months ago by poVoq@slrpnk.net to c/diy@slrpnk.net
17
32
submitted 3 months ago by schmorpel@slrpnk.net to c/diy@slrpnk.net

So I have this silly idea/longterm project of wanting to run a server on renewables on my farm. And I would like to reuse the heat generated by the server, for example to heat a grow room, or simply my house. How much heat does a server produce, and where would you consider it best applied? Has anyone built such a thing?

18
23
submitted 3 months ago by technomad@slrpnk.net to c/diy@slrpnk.net

Any recommendations? Are any of them usb-c rechargeable? Seems like most of the ones I'm seeing take AAA batteries.

19
27
submitted 3 months ago* (last edited 3 months ago) by dullbananas@lemmy.ca to c/diy@slrpnk.net
20
17
submitted 3 months ago* (last edited 3 months ago) by Brutticus@lemm.ee to c/diy@slrpnk.net

Oh boy Fedi, do I have a weird one.

Ive posted here a few times regarding my basement build, and one of the handymen noted that if I am not going to cover up my ceiling, I have two exposed I beams. One runs through the kitchen, and one through a bedroom (mine). We were talking about mounting a spice rack, and he said I could mount a piece of wood on to an I beam trolly.

These things are cheap, and they are strong. What kind of fuckery can I get up to with them? Especially one in my bedroom? Is there anything ceiling mounted you just wish you could slide across the room, and back again? I'm envisioning something I can collapse against the wall.

Is this just insane?

21
102
submitted 3 months ago by anzo@programming.dev to c/diy@slrpnk.net

This is clever. But in a way, it's also shifting the environmental impact from these bottle caps. I can't imagine under which conditions the birds' may be a problem (e.g. getting too much food). Maybe someone with better knowledge on these species can tell if there could be a downside (no matter how improbable, just the risk of X). Such risk may include the interaction through second or third organisms (e.g. lack of seed spread, abundance of parasitic prokaryotr, etc.)

Biological question aside, anyway... This is so cool! I'd like to try building one myself ;)

22
57
submitted 4 months ago by schmorpel@slrpnk.net to c/diy@slrpnk.net

A couple of years ago I built two ram pumps and installed them in the stream near my house. They pumped water for the garden for a few months during spring and summer. I'm okay with the fact that the pumps are just useful during part of the year, but didn't really like damming up the entire stream for my installation, seemed rude towards wildlife.

So this year I returned with a longer tube and just took the water from further upstream. I have only about 70cm head. I haven't really measured the height I'm getting, but it's more than the first year and enough for what I want to do.

My installation in the stream is very simple: fence post hammered/wedged into the stream bed, pump tied to it with wire. Everything wobbles a tiny bit. Might return and solidify that later, but I love it when stuff is so simple that I can just throw it into the stream and it works. After a while of pumping by hand it just runs. Variations in water height might stop it as it sits low in the water. Will report back tomorrow.

This is for a reservoir IBC and washing tank outside the kitchen. I'm thinking about adding a solar heating panel in there as well.

The image is of a smaller kid-sized pump that I want to turn into a demonstration model to take to markets and fairs.

23
123
submitted 4 months ago by Thorny_Insight@lemm.ee to c/diy@slrpnk.net

It was even the same brand. I love when hoarding materials pays back.

24
183
submitted 5 months ago by poVoq@slrpnk.net to c/diy@slrpnk.net
25
51
submitted 5 months ago by poVoq@slrpnk.net to c/diy@slrpnk.net
view more: next ›

DIY

2380 readers
10 users here now

Share your self-made stuff and half-baked projects here.

Also check out !diy@beehaw.org

There is also a related XMPP chat.

founded 2 years ago
MODERATORS